Tutorial
We’ll present a test for the DuckDuckGo search engine. This engine has a nice disambiguation feature: the “Zero Click Info” box.
DuckDuckGo is just like Google, except that it doesn’t track you.
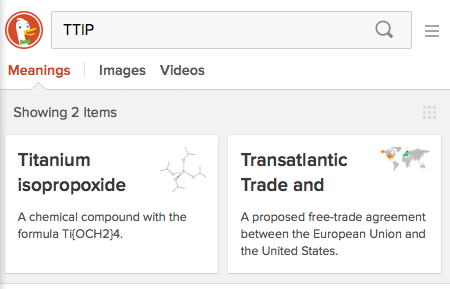
Let’s imagine we are engineers at DuckDuckGo, and we want to test if a Zero Click Info box is shown for an ambiguous request: “Toto”.
Are we looking for the band? The footballer? The African textile vendor? The result page should help our user narrow down his search!
Based on the above requirements, we can formalize the following testing scenario:
- Go to
duckduckgo.com(English version). - Type “Toto” in the search field.
- Submit the search.
- Ensure that a box with the “Meanings of Toto” header is presented to the user.
The test suite automating the above scenario is already available. Download it and open it in your file browser.

We see a config file, two Widget files, a Feature and a Data file.
These are all the parts of a Watai test, and we will now examine each in more details.
The config.js file exports a hash with two mandatory key-value pairs:
// example/DuckDuckGo/config.js
module.exports = {
	baseURL: 'https://duckduckgo.com/?kad=en_GB',
	browser: 'firefox'
}-
baseURL, that describes the URL at which the test should start. -
browser, that defines which browser should be used to run the test.
It also contains an optional
driverCapabilitieshash, which can be used to specify advanced constraints. For example, if your Firefox browser is stored in an unusual location, specify its path now in thefirefox_binarykey of thedriverCapabilitieshash.
Widgets are defined in files ending in Widget.js. They represent a graphical component of your webapp.
DOM mapping is mandatory for your tests to have knowledge of the structure of the tested web page.
That’s exactly what a widget provides: a mapping from DOM elements, identified through selectors, to testing-environment attributes.
Open the ZeroClickWidget.js file: it is a simple hash entry.
// example/DuckDuckGo/ZeroClickWidget.js
header: '#zero_click_heading'	// this is an element
And here is our header definition, as an element. It maps a meaningful, testable name to a CSS selector describing how this element is retrievable in the DOM. We will now be able to retrieve the content of the Zero Click Info box header.
Watai also offers other ways to select elements, such as XPath, for situations where a dynamic DOM is too complex for CSS selectors.
Interface components in modern webapps are not only sets of elements. They can also offer complex actions to the user, triggered by basic interaction events such as clicks or keystrokes on said elements.
This is why a widget is a bit more than a simple DOM map: it also abstracts action sequences and makes them callable directly through a meaningful name.
Open the SearchBarWidget.js file: there are once again elements, but there’s also an action defined.
// example/DuckDuckGo/SearchBarWidget.js
field:        'input[name=q]',            // this is an element
submitButton: '#search_button_homepage',  // this is an element too

searchFor: function searchFor(term) {     // this is an action
	return	this.setField(term)()
				.then(this.submit());
}
The searchFor key is a JavaScript function that takes a parameter and sequences two basic steps: typing the passed string in a field, and clicking a submit button.
With this action, we will be able to search for an ambiguous term, as our scenario needs.
The
thensyntax is here because all action steps are sequenced as promises, an abstraction over asynchronous operations. Don't worry, you don't need to understand this in details at this point. You may come back to this later if you need to write complex actions.
So, we have now defined all needed elements and actions for our scenario. However, we have not yet defined how these pieces fit together, nor what we are going to check.
This is what a feature is for. Let’s look at the 1 - ZeroClickFeature.js file.
// example/DuckDuckGo/1 - ZeroClickFeature.js
description: 'Looking up an ambiguous term should make a Zero Click Info box appear.',

scenario: [
    SearchBarWidget.searchFor(lookupTerm),
    {
        'ZeroClickWidget.header': 'Meanings of ' + lookupTerm
    }
]Just like a widget, a feature is series of hash entries, except that it has two mandatory keys.
To present what expected behavior you are testing exactly, you will have to associate a string to the description key.
It is good practice to write a sentence with “should” as the main verb, so that failures and successes may both be meaningful.
The second expected key in a feature is scenario. Its value must be an array.
In our example, the first line is simply a call to the action we defined in the SearchBarWidget: we are going to searchFor a term, lookupTerm (we’ll explain a bit later where it comes from, consider it defined).
You can define as many steps in a scenario as you want. A step can be, like here, an action, a custom function, or a state definition. All these steps will be executed in order, always waiting for the previous ones.
So, with scenario steps, we know how to define what our widgets are to execute. But we still don’t know how to actually check behavior!
Assertions in Watai are implicit. That is, you won’t have to assert anything (unless you want to): you’ll simply define an expected state, and the actual state of the current web page will be checked against it.
A state definition is simply a hash where keys reference some elements, and the corresponding values are matched against the values of the targeted DOM elements.
The only tricky thing is that you cannot have an actual reference as a key, only its name. So, remember to quote keys when defining states.
In the end, all files manipulated by Watai are JavaScript (possibly wrapped by automatically-added curly braces). The syntax is thus JavaScript, and that's why hash keys containing dots must be protected by quotes.
A feature file contains one feature, and has to end in Feature.js.
You may also have noticed the 1 - prefix of the feature filename. Such indices are needed for Watai to determine dependencies. Currently, there is no support for complex dependencies, so your test suite has to be linear. To make that explicit, feature filenames have to be prefixed with their index.
Indices don't have to be continuous, i.e. you may have features 1, 2, 3 and 5 without any harm. This also means you can quickly exclude a feature from being evaluated by renaming it to something like
x4 - MyFourthFeature.js.
You may have wondered where the lookupTerm variable came from. Open the ZeroClickData.js file: here it is!
// example/DuckDuckGo/ZeroClickData.js
lookupTerm = "Toto"
Using data files to store values is optional, but it is recommended as a way to decouple concerns even more.
In our example, if we wanted to test another ambiguous term, there’s no hesitation where to define it: simply open the data file, replace Toto with the new term, and restart the test.
A data file is pure JavaScript code, and has to end in Data.js.
All the variables defined inside will be made available to all widgets and features in the same suite.
You may have as many data files as you like, so don't hesitate to have many small and well-named files.
To run a test suite, simply use watai and pass it the path to the folder that contains your config, widgets, features and data files.
The following assumes you have Firefox installed. If not, do it now. If you don’t want to, learn how to test with Chrome, for example.
watai path/to/downloaded/example/DuckDuckGo
➥ If there’s any problem (did you start the Selenium server?), don’t despair and check the troubleshooting guide, there should be an easy fix :)
Ok, this was a small test suite, but it was enough to see all parts of Watai, congratulations!
- You could try to create your own test suite, using the DuckDuckGo example and keeping the other examples nearby to see more complex uses.
- You could also try to run the example with Chrome.
- If you need more in-depth information about some parts of Watai, read the references.
- If you’re still not sure about Watai or where it should fit in your development process, check out the rationale.
If something in this introduction could be improved, please do so, this is a wiki! All new users will thank you :)
If you think of bigger modifications, please create an issue so we can discuss it.