-
Notifications
You must be signed in to change notification settings - Fork 5
/
Copy pathchapter_3-3.qmd
310 lines (245 loc) · 18.4 KB
/
chapter_3-3.qmd
1
2
3
4
5
6
7
8
9
10
11
12
13
14
15
16
17
18
19
20
21
22
23
24
25
26
27
28
29
30
31
32
33
34
35
36
37
38
39
40
41
42
43
44
45
46
47
48
49
50
51
52
53
54
55
56
57
58
59
60
61
62
63
64
65
66
67
68
69
70
71
72
73
74
75
76
77
78
79
80
81
82
83
84
85
86
87
88
89
90
91
92
93
94
95
96
97
98
99
100
101
102
103
104
105
106
107
108
109
110
111
112
113
114
115
116
117
118
119
120
121
122
123
124
125
126
127
128
129
130
131
132
133
134
135
136
137
138
139
140
141
142
143
144
145
146
147
148
149
150
151
152
153
154
155
156
157
158
159
160
161
162
163
164
165
166
167
168
169
170
171
172
173
174
175
176
177
178
179
180
181
182
183
184
185
186
187
188
189
190
191
192
193
194
195
196
197
198
199
200
201
202
203
204
205
206
207
208
209
210
211
212
213
214
215
216
217
218
219
220
221
222
223
224
225
226
227
228
229
230
231
232
233
234
235
236
237
238
239
240
241
242
243
244
245
246
247
248
249
250
251
252
253
254
255
256
257
258
259
260
261
262
263
264
265
266
267
268
269
270
271
272
273
274
275
276
277
278
279
280
281
282
283
284
285
286
287
288
289
290
291
292
293
294
295
296
297
298
299
300
301
302
303
304
305
306
307
308
309
310
# 3.3 Air Piano {.unnumbered}
<br />
Normally, when we play a musical instrument, we have to pluck strings or press keys to produce musical notes. However, with electronic modules, playing music can become more exciting. For instance, you can simulate piano playing with push-button switches and even integrate light effects for interactive music. But if you use push-button switches as piano keys, you need to integrate many modules into the circuit. Is there a simpler and more unique idea? A combination of ultrasonic distance sensor and passive buzzer can do just that - detecting different distances with ultrasonics to trigger different notes, just like playing a piano in the air.
## 3.3.1 Background Knowledge
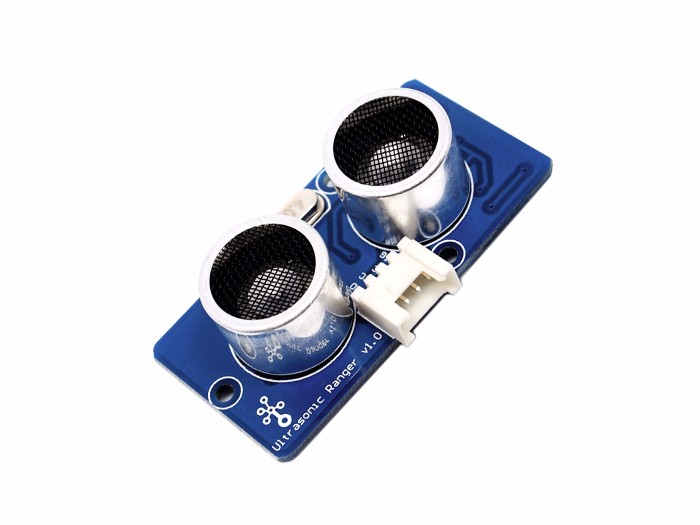
### **3.3.1.1 Grove Ultrasonic Distance Sensor**
<!--  -->
<div style="text-align:center;"><img src="https://files.seeedstudio.com/wiki/XIAO_Big_Power-Board-ebook-photo/chapter_3-3/chapter_3-3_1.png" width="400" height="auto" style="margin:0 auto" /></div>
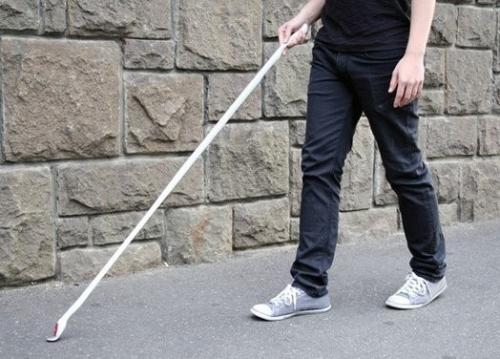
The [Grove Ultrasonic Distance Sensor](https://www.seeedstudio.com/Grove-Ultrasonic-Distance-Sensor.html) is a non-contact distance measurement module. Thanks to its strong directivity, the ultrasonic waves it emits can travel long distances in a medium. The calculations are simple and it is easy to control, so it's often used for distance measurements. When the ultrasonic distance sensor works, the transmitter emits ultrasonic waves in a certain direction. When the waves hit an obstacle, they reflect back. The ultrasonic receiver stops timing as soon as it receives the reflected waves. The actual distance from the emission point to the obstacle is calculated based on the time difference between emission and reception, much like bat echolocation. The application range of ultrasonic waves is becoming broader, commonly seen in reverse radar systems, intelligent guidance systems, robot obstacle avoidance systems, medical ultrasound examinations, and more.
> ⚠️ Note <br />
> The Grove Ultrasonic Distance Sensor module is not included in the Seeed Studio XIAO Starter Kit!
<!--  -->

<!--  -->

## 3.3.2 Task 1: Reading the Grove Ultrasonic Distance Sensor Value
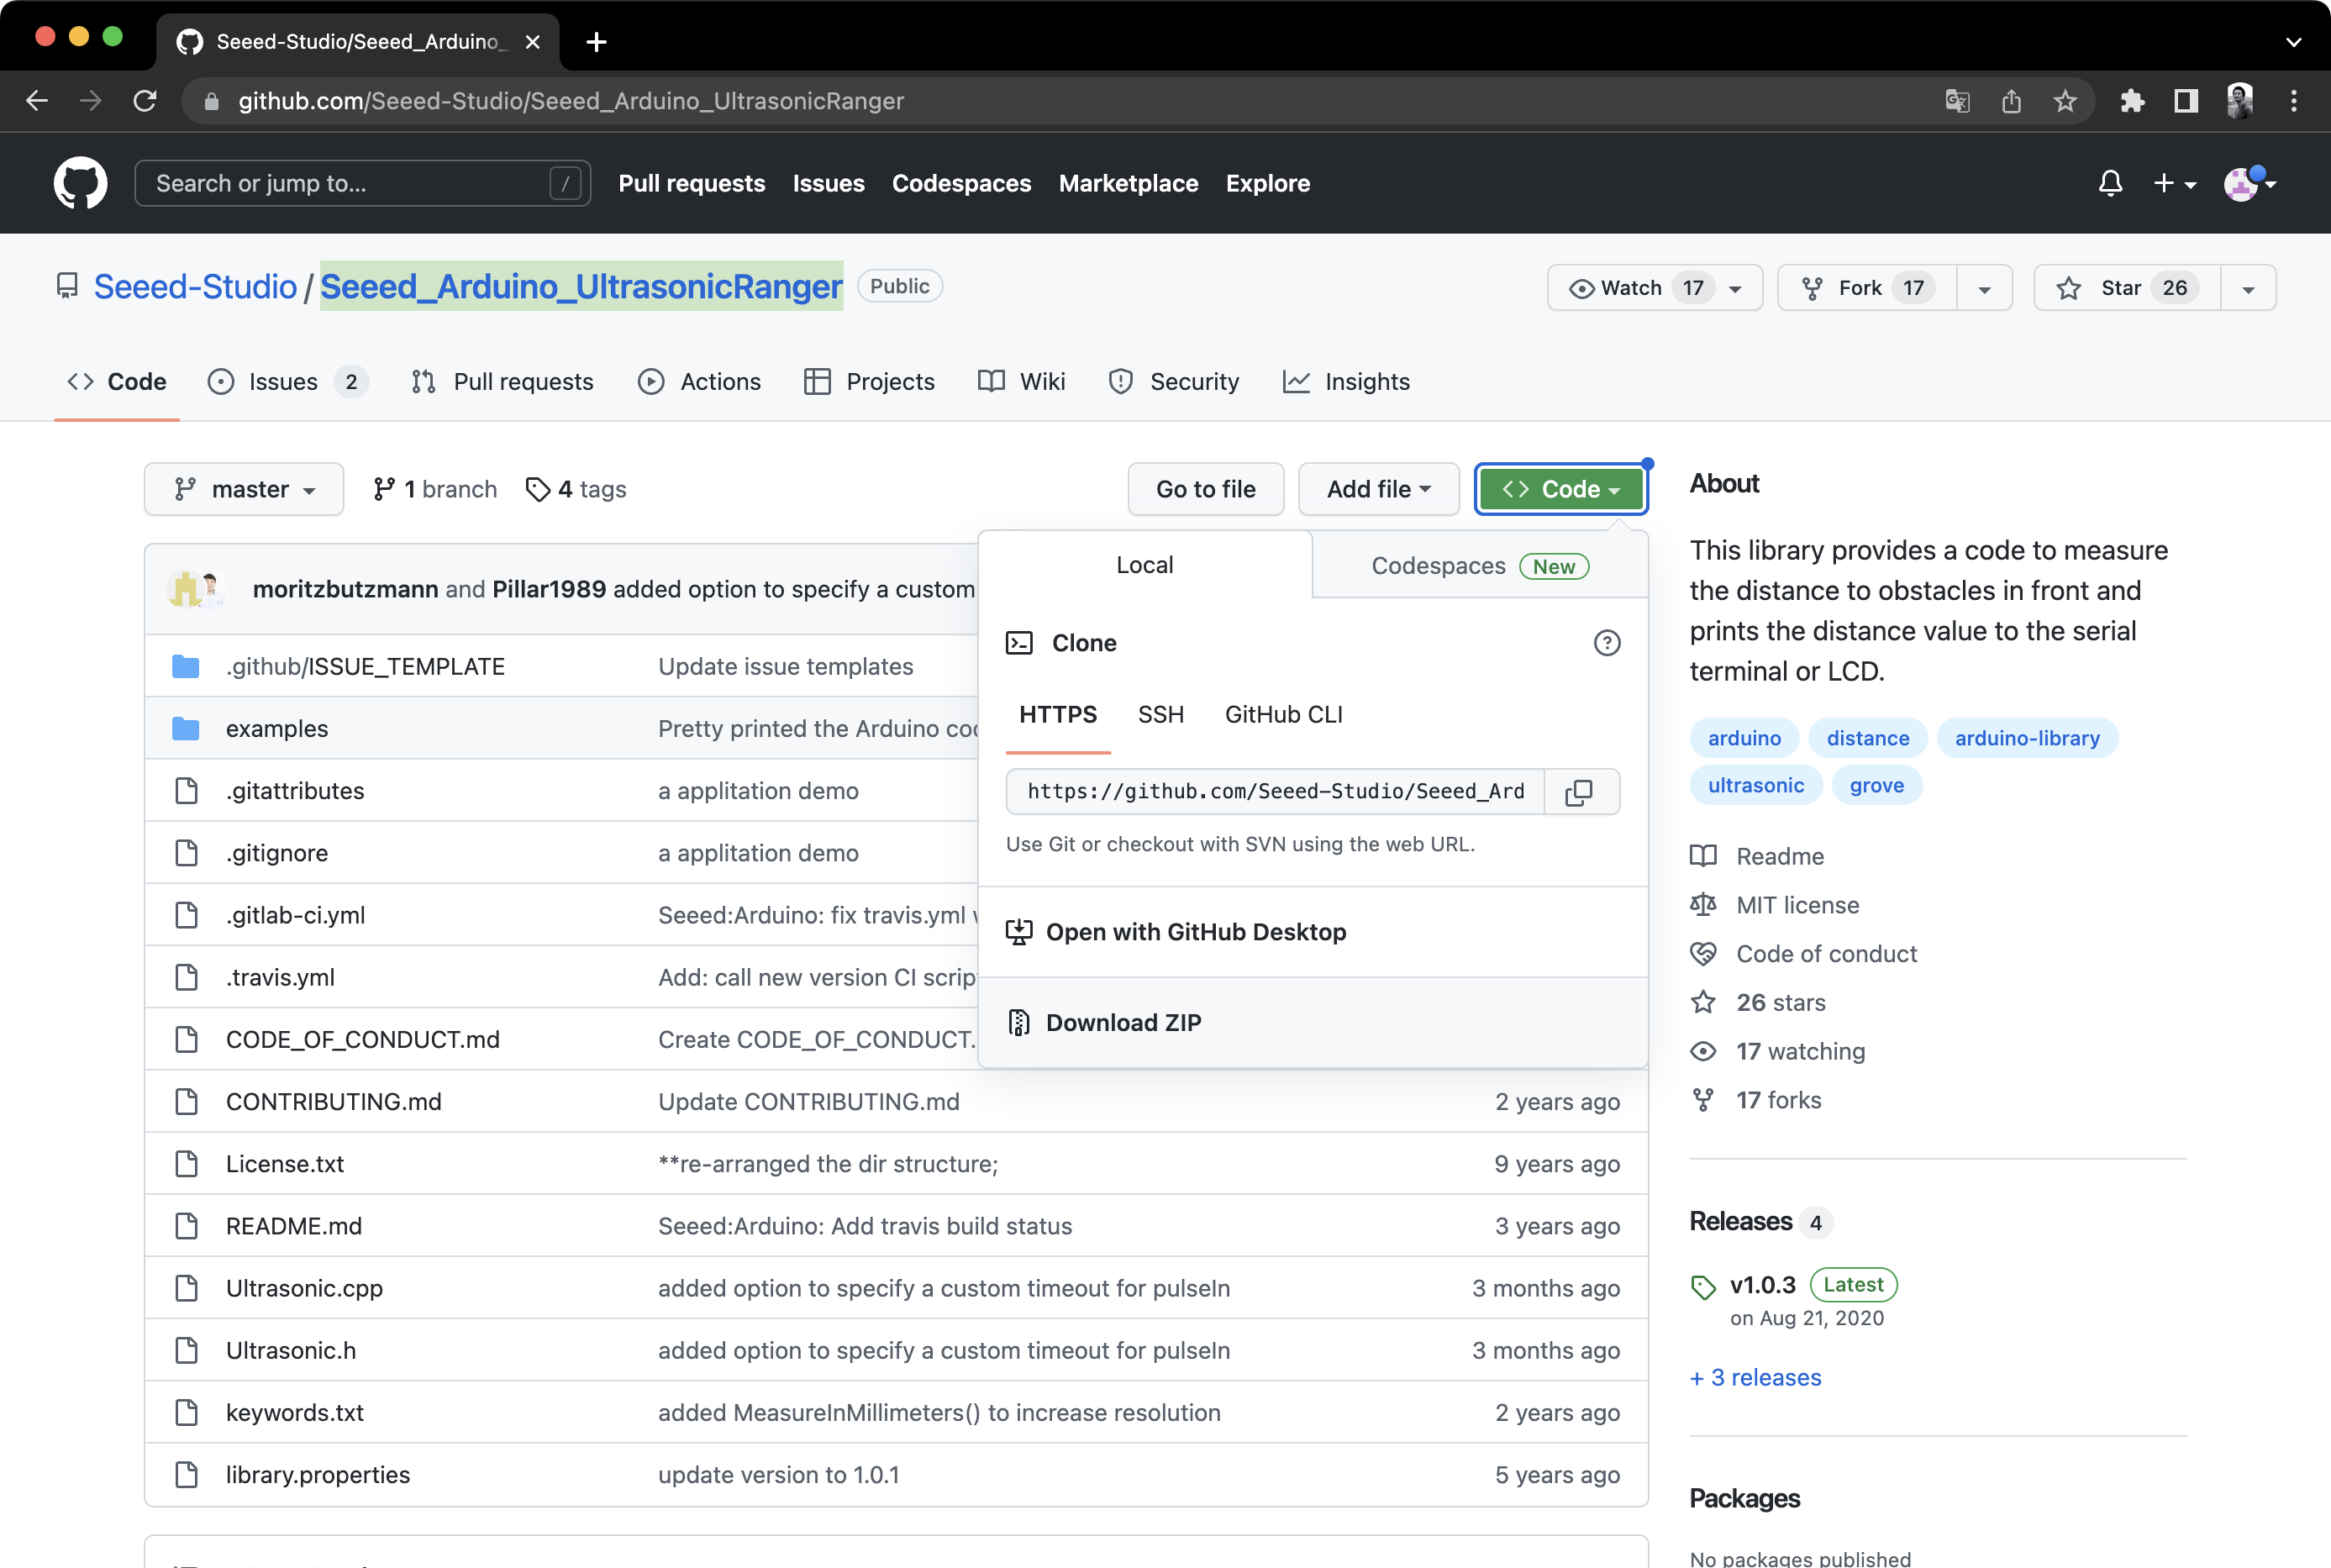
#### **Adding the [Seeed_Arduino_UltrasonicRanger](https://github.com/Seeed-Studio/Seeed_Arduino_UltrasonicRanger) Library**
Before starting to program the Grove Ultrasonic Distance Sensor with Arduino IDE, it's necessary to add the essential library for the sensor. Type the library address 🔗 <https://github.com/Seeed-Studio/Seeed_Arduino_UltrasonicRanger> into the browser address bar, enter the GitHub page, click `Code→Download ZIP` to download the resource package `Seeed_Arduino_UltrasonicRanger-master.zip` to your local drive, as shown below.
<!--  -->
Add the downloaded resource package `Seeed_Arduino_UltrasonicRanger-master.zip` to the `Sketch→Include Library→Add .ZIP Library` from the menu bar until you see a successful library loading prompt.
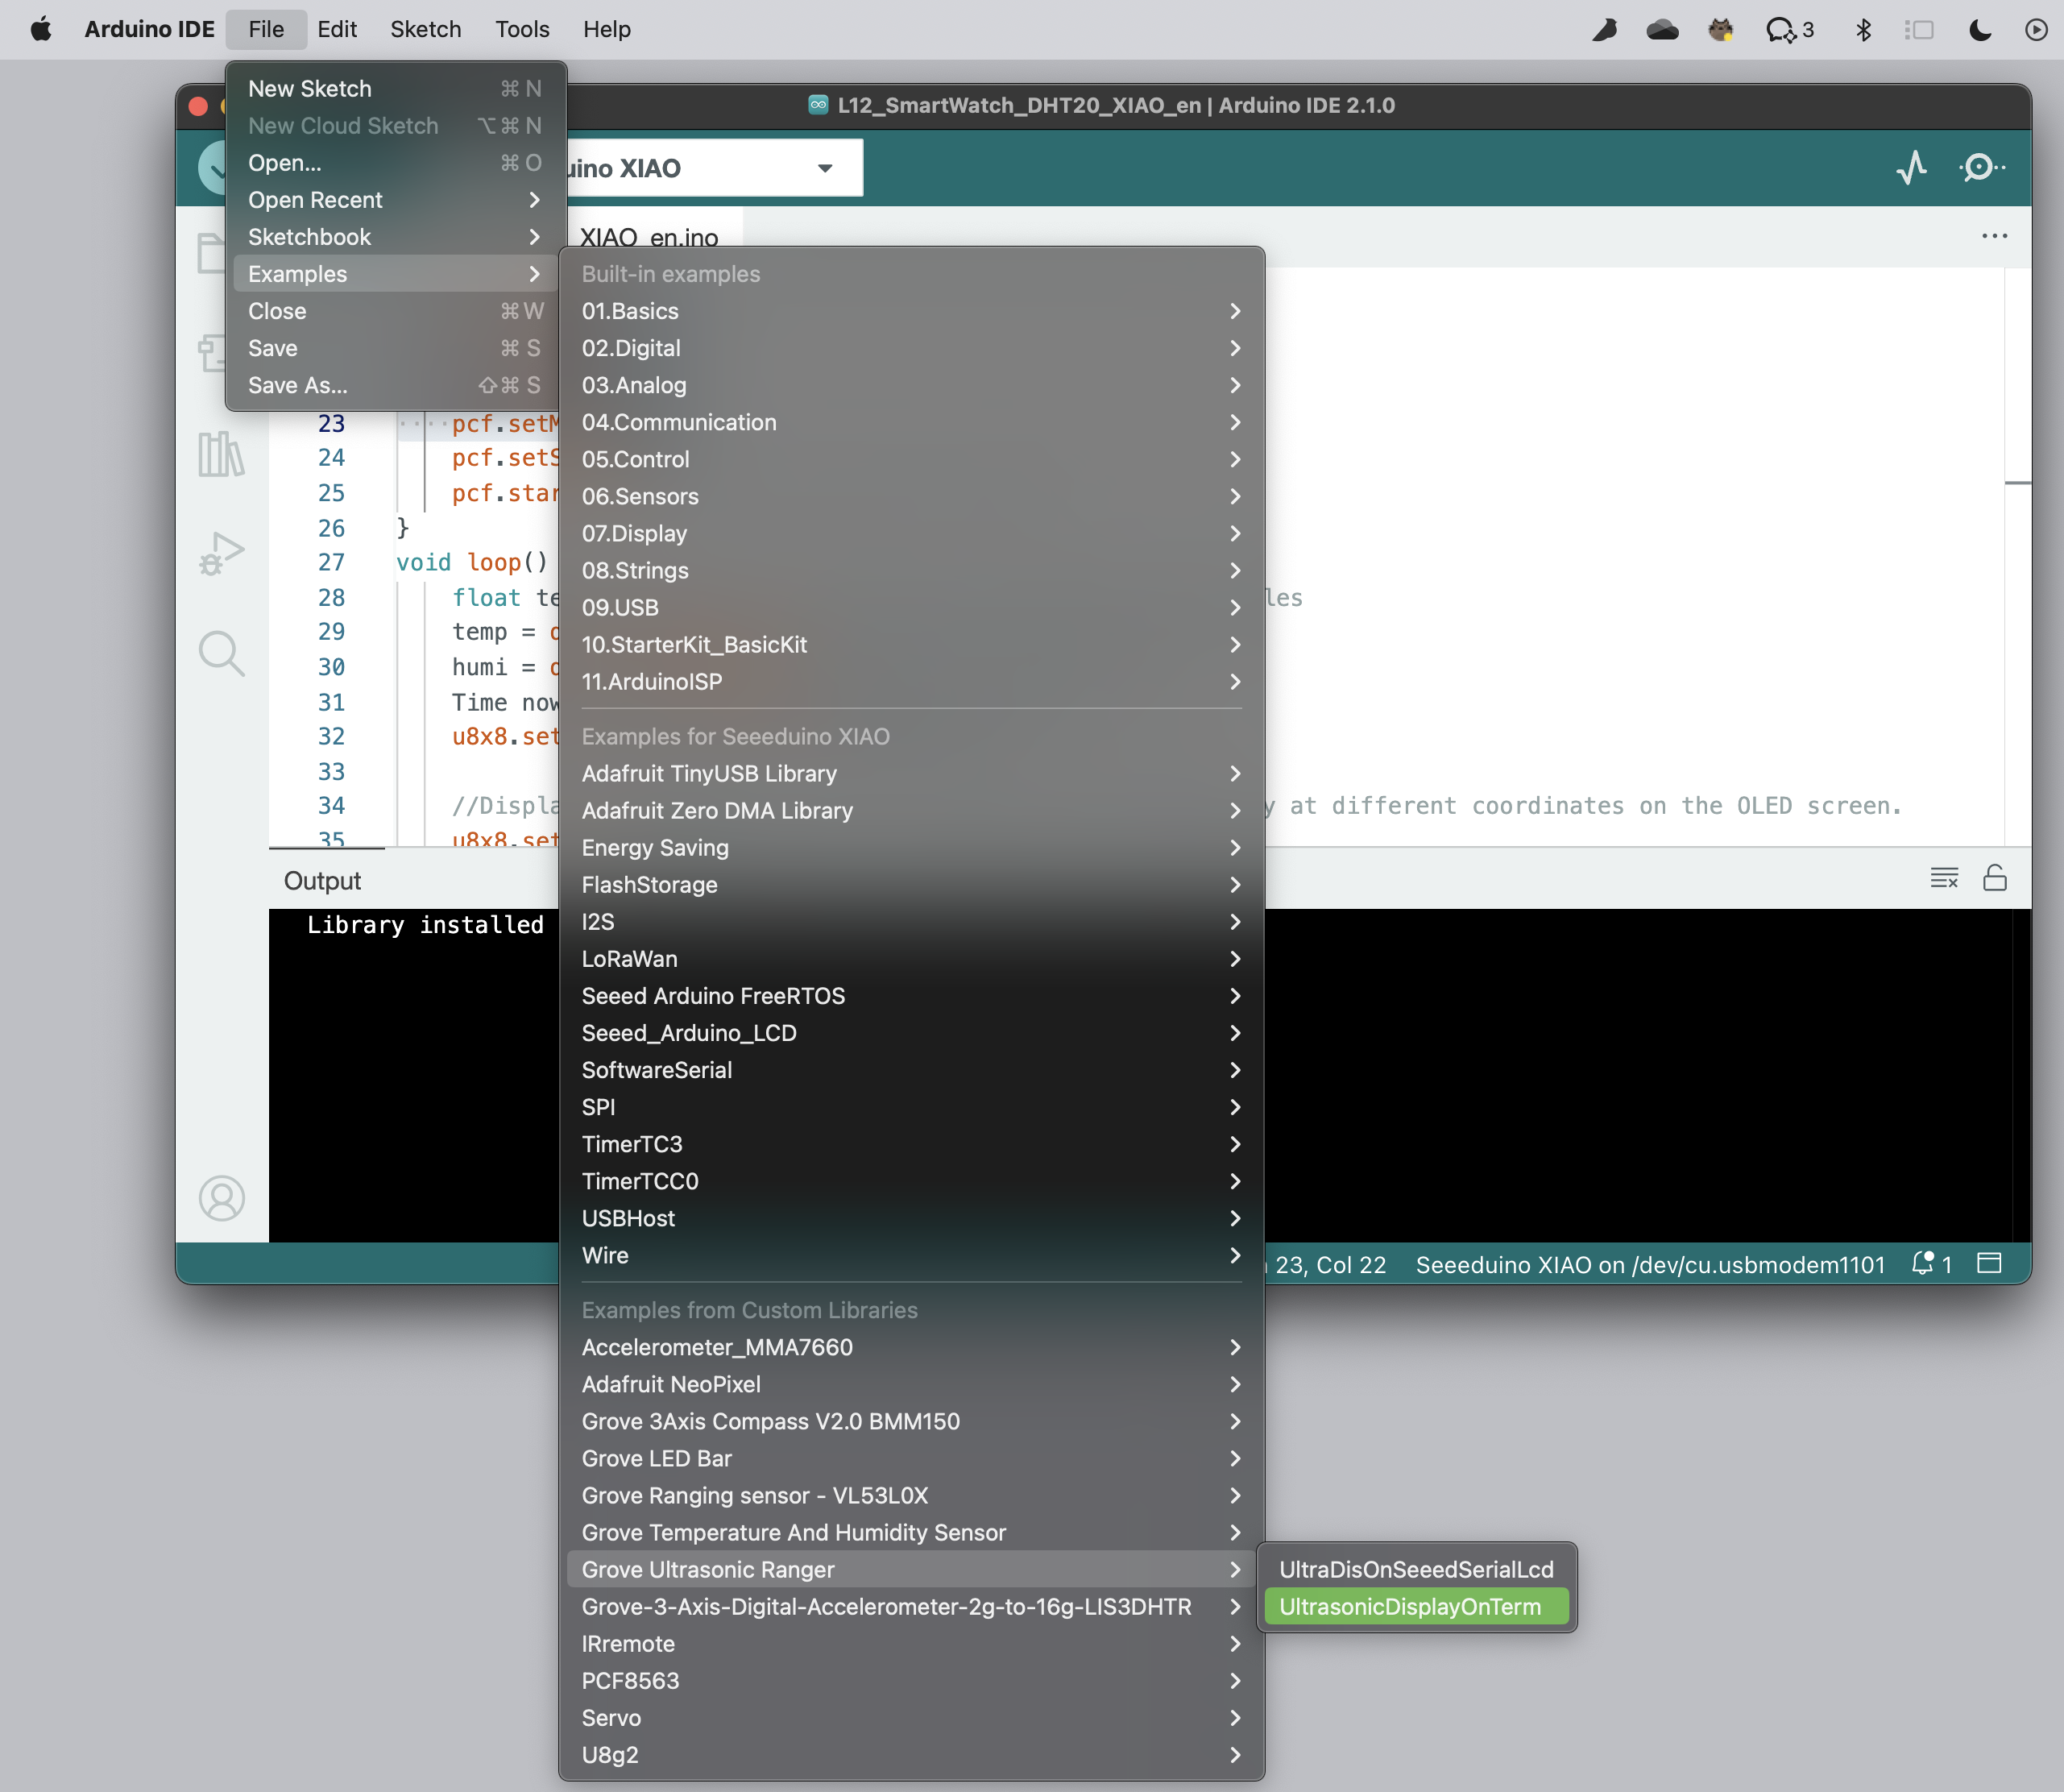
#### **Opening the Example File**
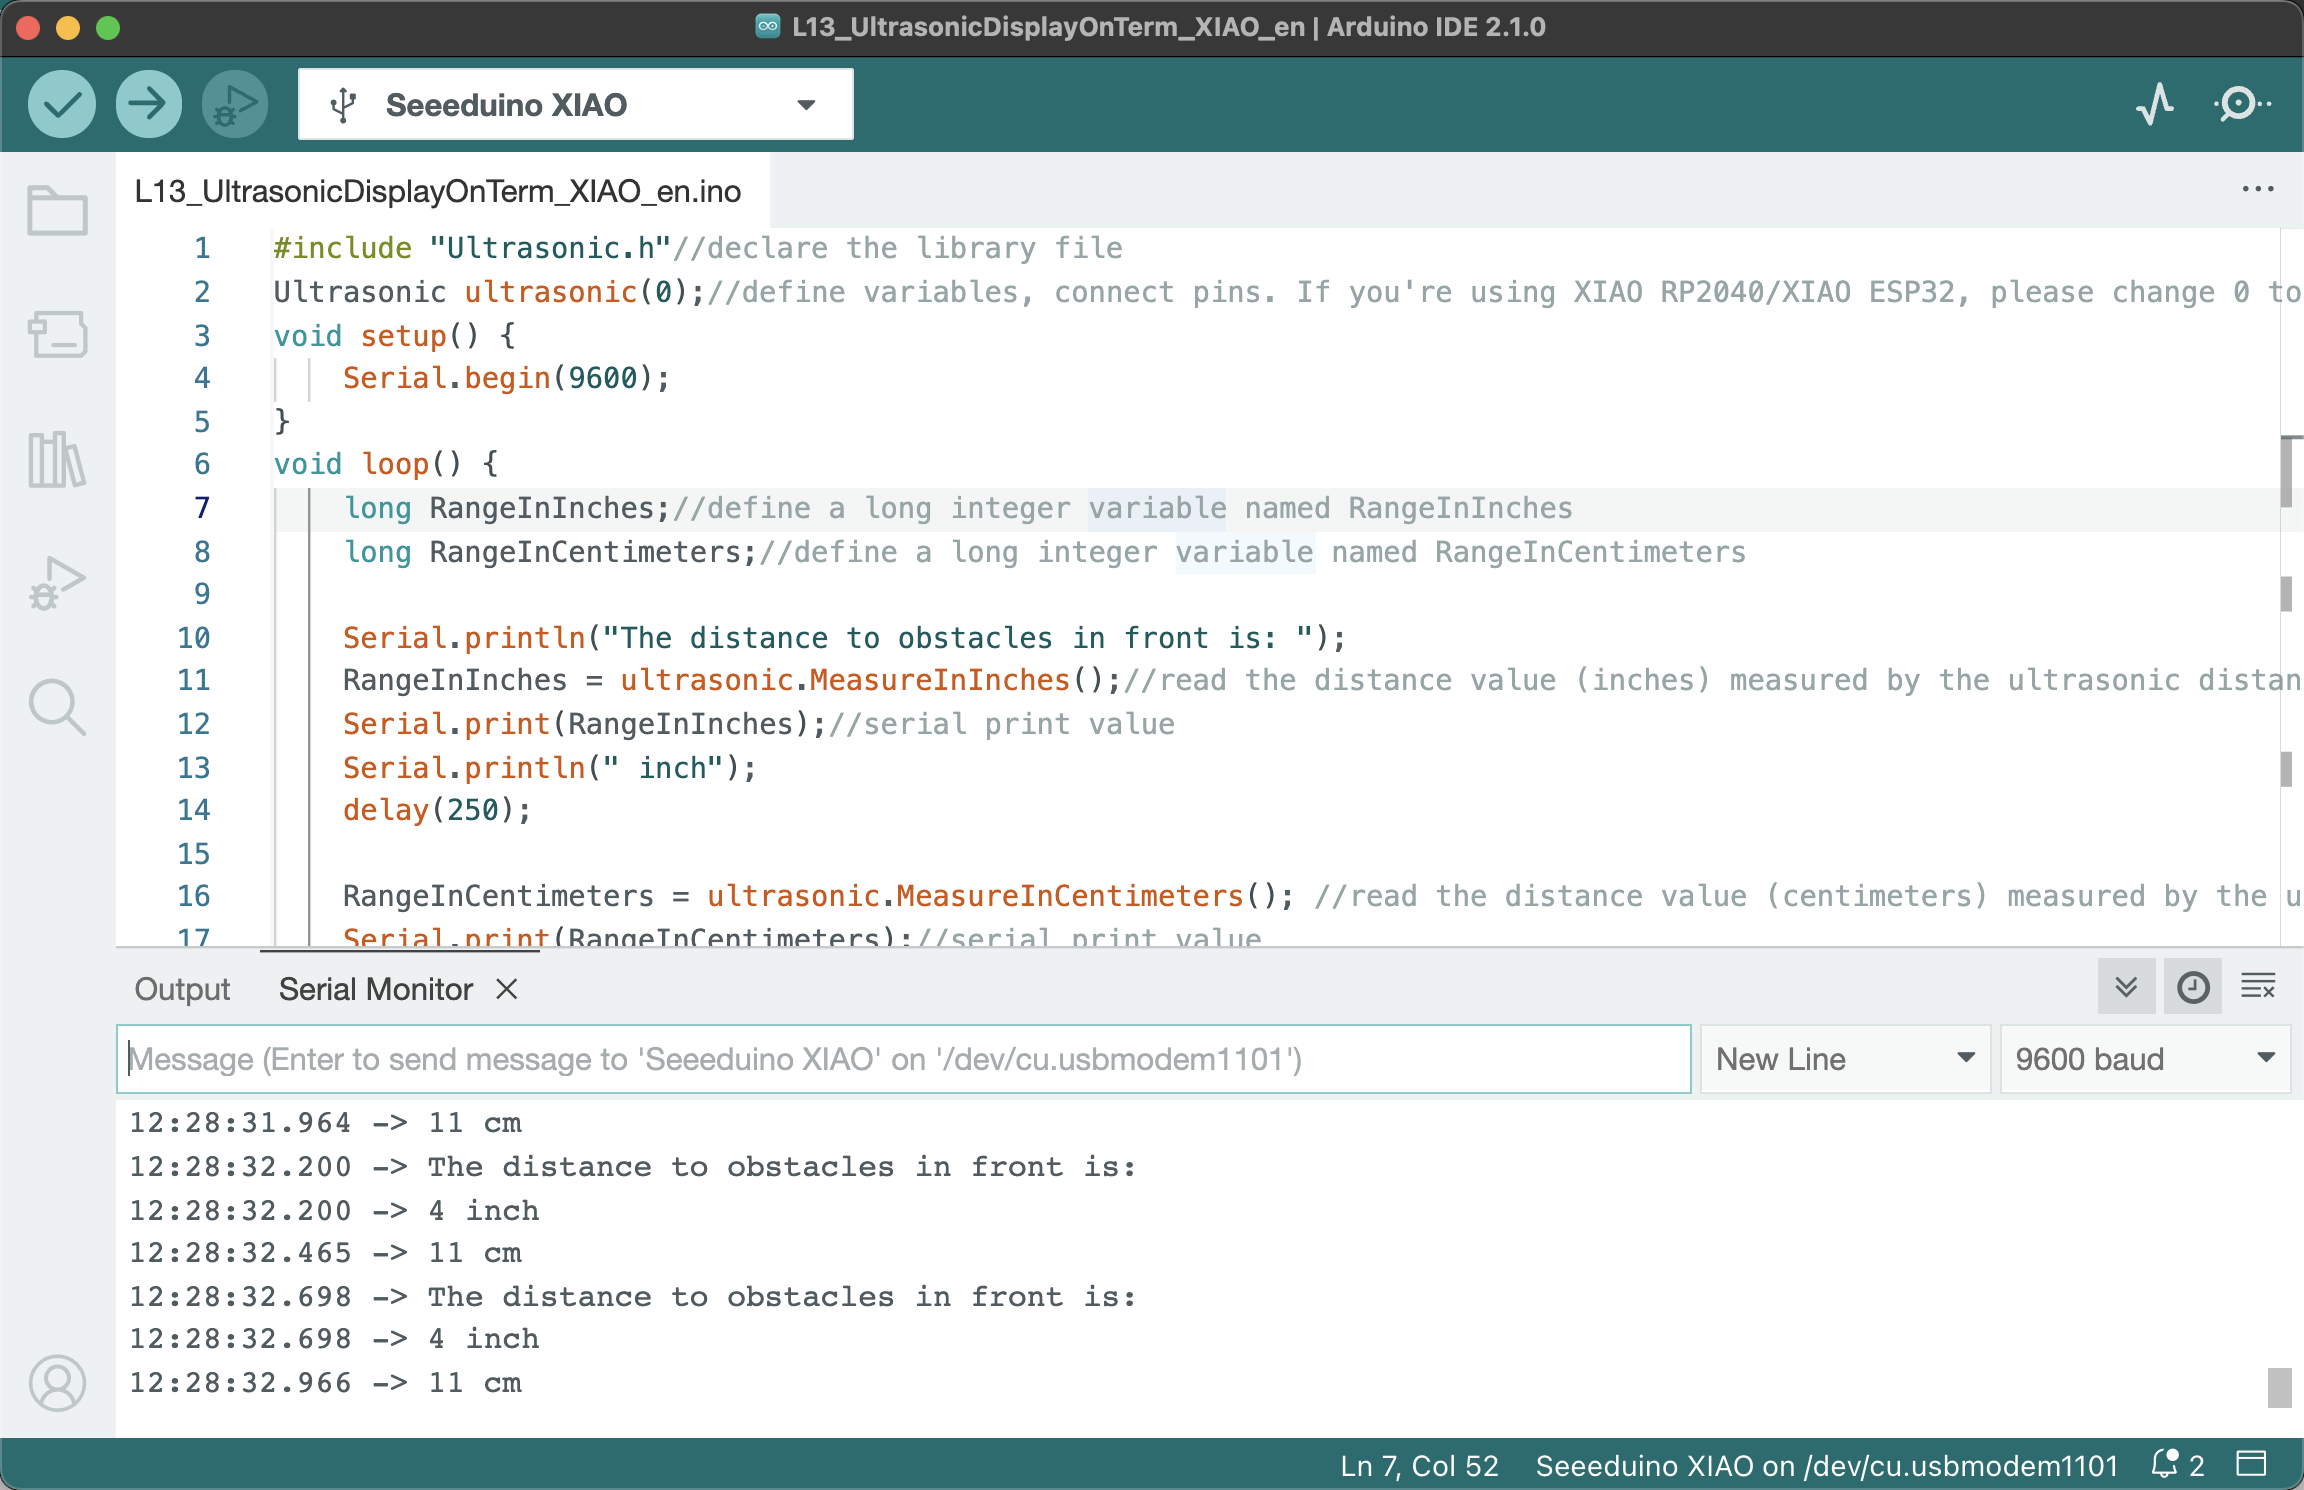
After successfully installing the library, a new item `Grove Ultrasonic Ranger` will be added to the Arduino's `File→Examples` list. Open the `UltrasonicDisplayOnTerm` sample program from it. This program can display the value of the ultrasonic distance sensor on the Serial Monitor. Modify `Ultrasonic ultrasonic(7);` in the sample program to `Ultrasonic ultrasonic(0);` (the ultrasonic distance sensor will be connected to the `A0` port of the XIAO expansion board).
<!--  -->
Open the modified sample file through the following path, 🔗 <br />
<https://github.com/mouseart/XIAO-Mastering-Arduino-and-TinyML/tree/main/code/L13_UltrasonicDisplayOnTerm_XIAO_en>.
``` cpp
#include "Ultrasonic.h"//declare the library file
Ultrasonic ultrasonic(0);//define variables, connect pins. If you're using XIAO RP2040/XIAO ESP32, please change 0 to D0
void setup() {
Serial.begin(9600);
}
void loop() {
long RangeInInches;//define a long integer variable named RangeInInches
long RangeInCentimeters;//define a long integer variable named RangeInCentimeters
Serial.println("The distance to obstacles in front is: ");
RangeInInches = ultrasonic.MeasureInInches();//read the distance value (inches) measured by the ultrasonic distance sensor and store it in the variable RangeInInches
Serial.print(RangeInInches);//serial print value
Serial.println(" inch");
delay(250);
RangeInCentimeters = ultrasonic.MeasureInCentimeters(); //read the distance value (centimeters) measured by the ultrasonic distance sensor and store it in the variable RangeInCentimeters
Serial.print(RangeInCentimeters);//serial print value
Serial.println(" cm");
delay(250);
}
```
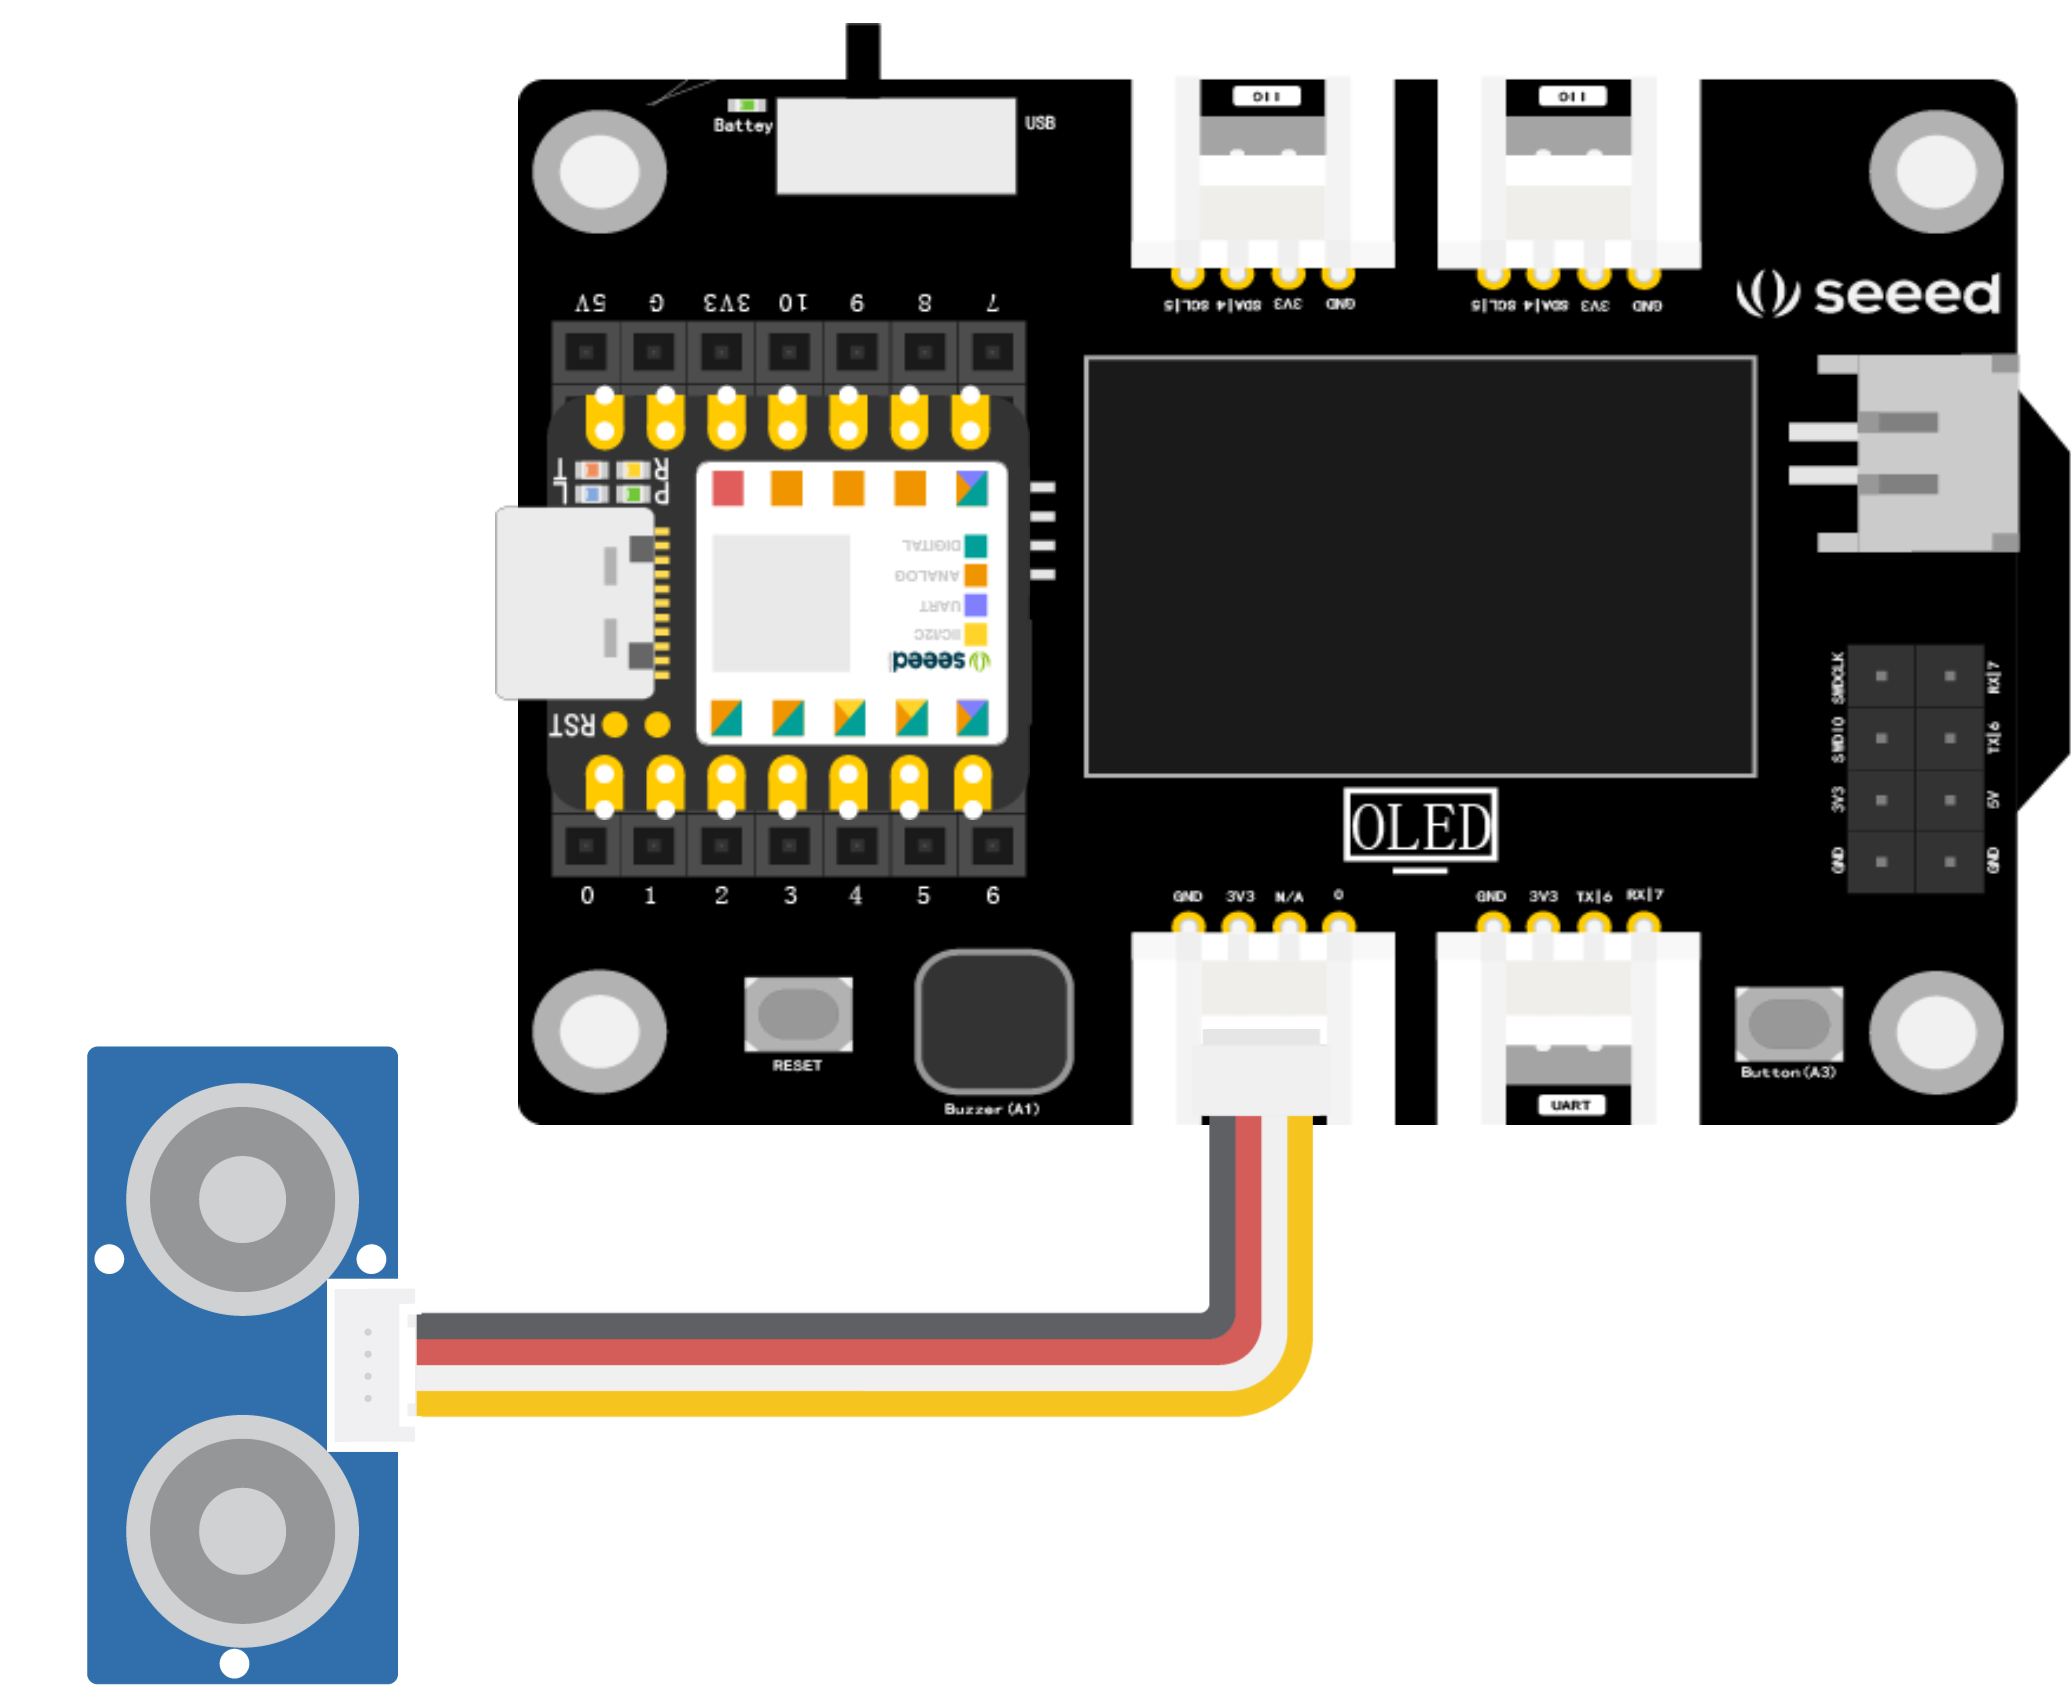
The ultrasonic distance sensor is connected to the `A0` interface, as shown in the figure below:
<!--  -->

After uploading the code, open the Serial Monitor. Place your hand or a card at any position in front of the ultrasonic distance sensor and observe the change in the values output by the Serial Monitor.
<!--  -->
## 3.3.3 Project Production: Ultrasonic Air Harp
### Project Description
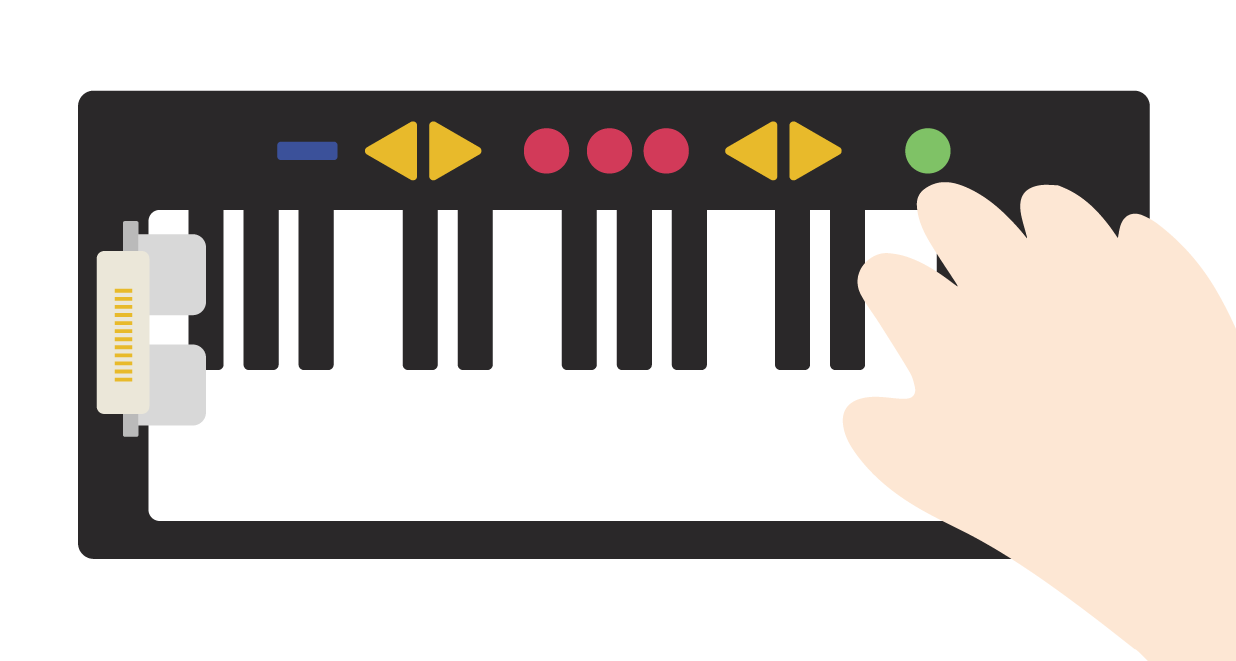
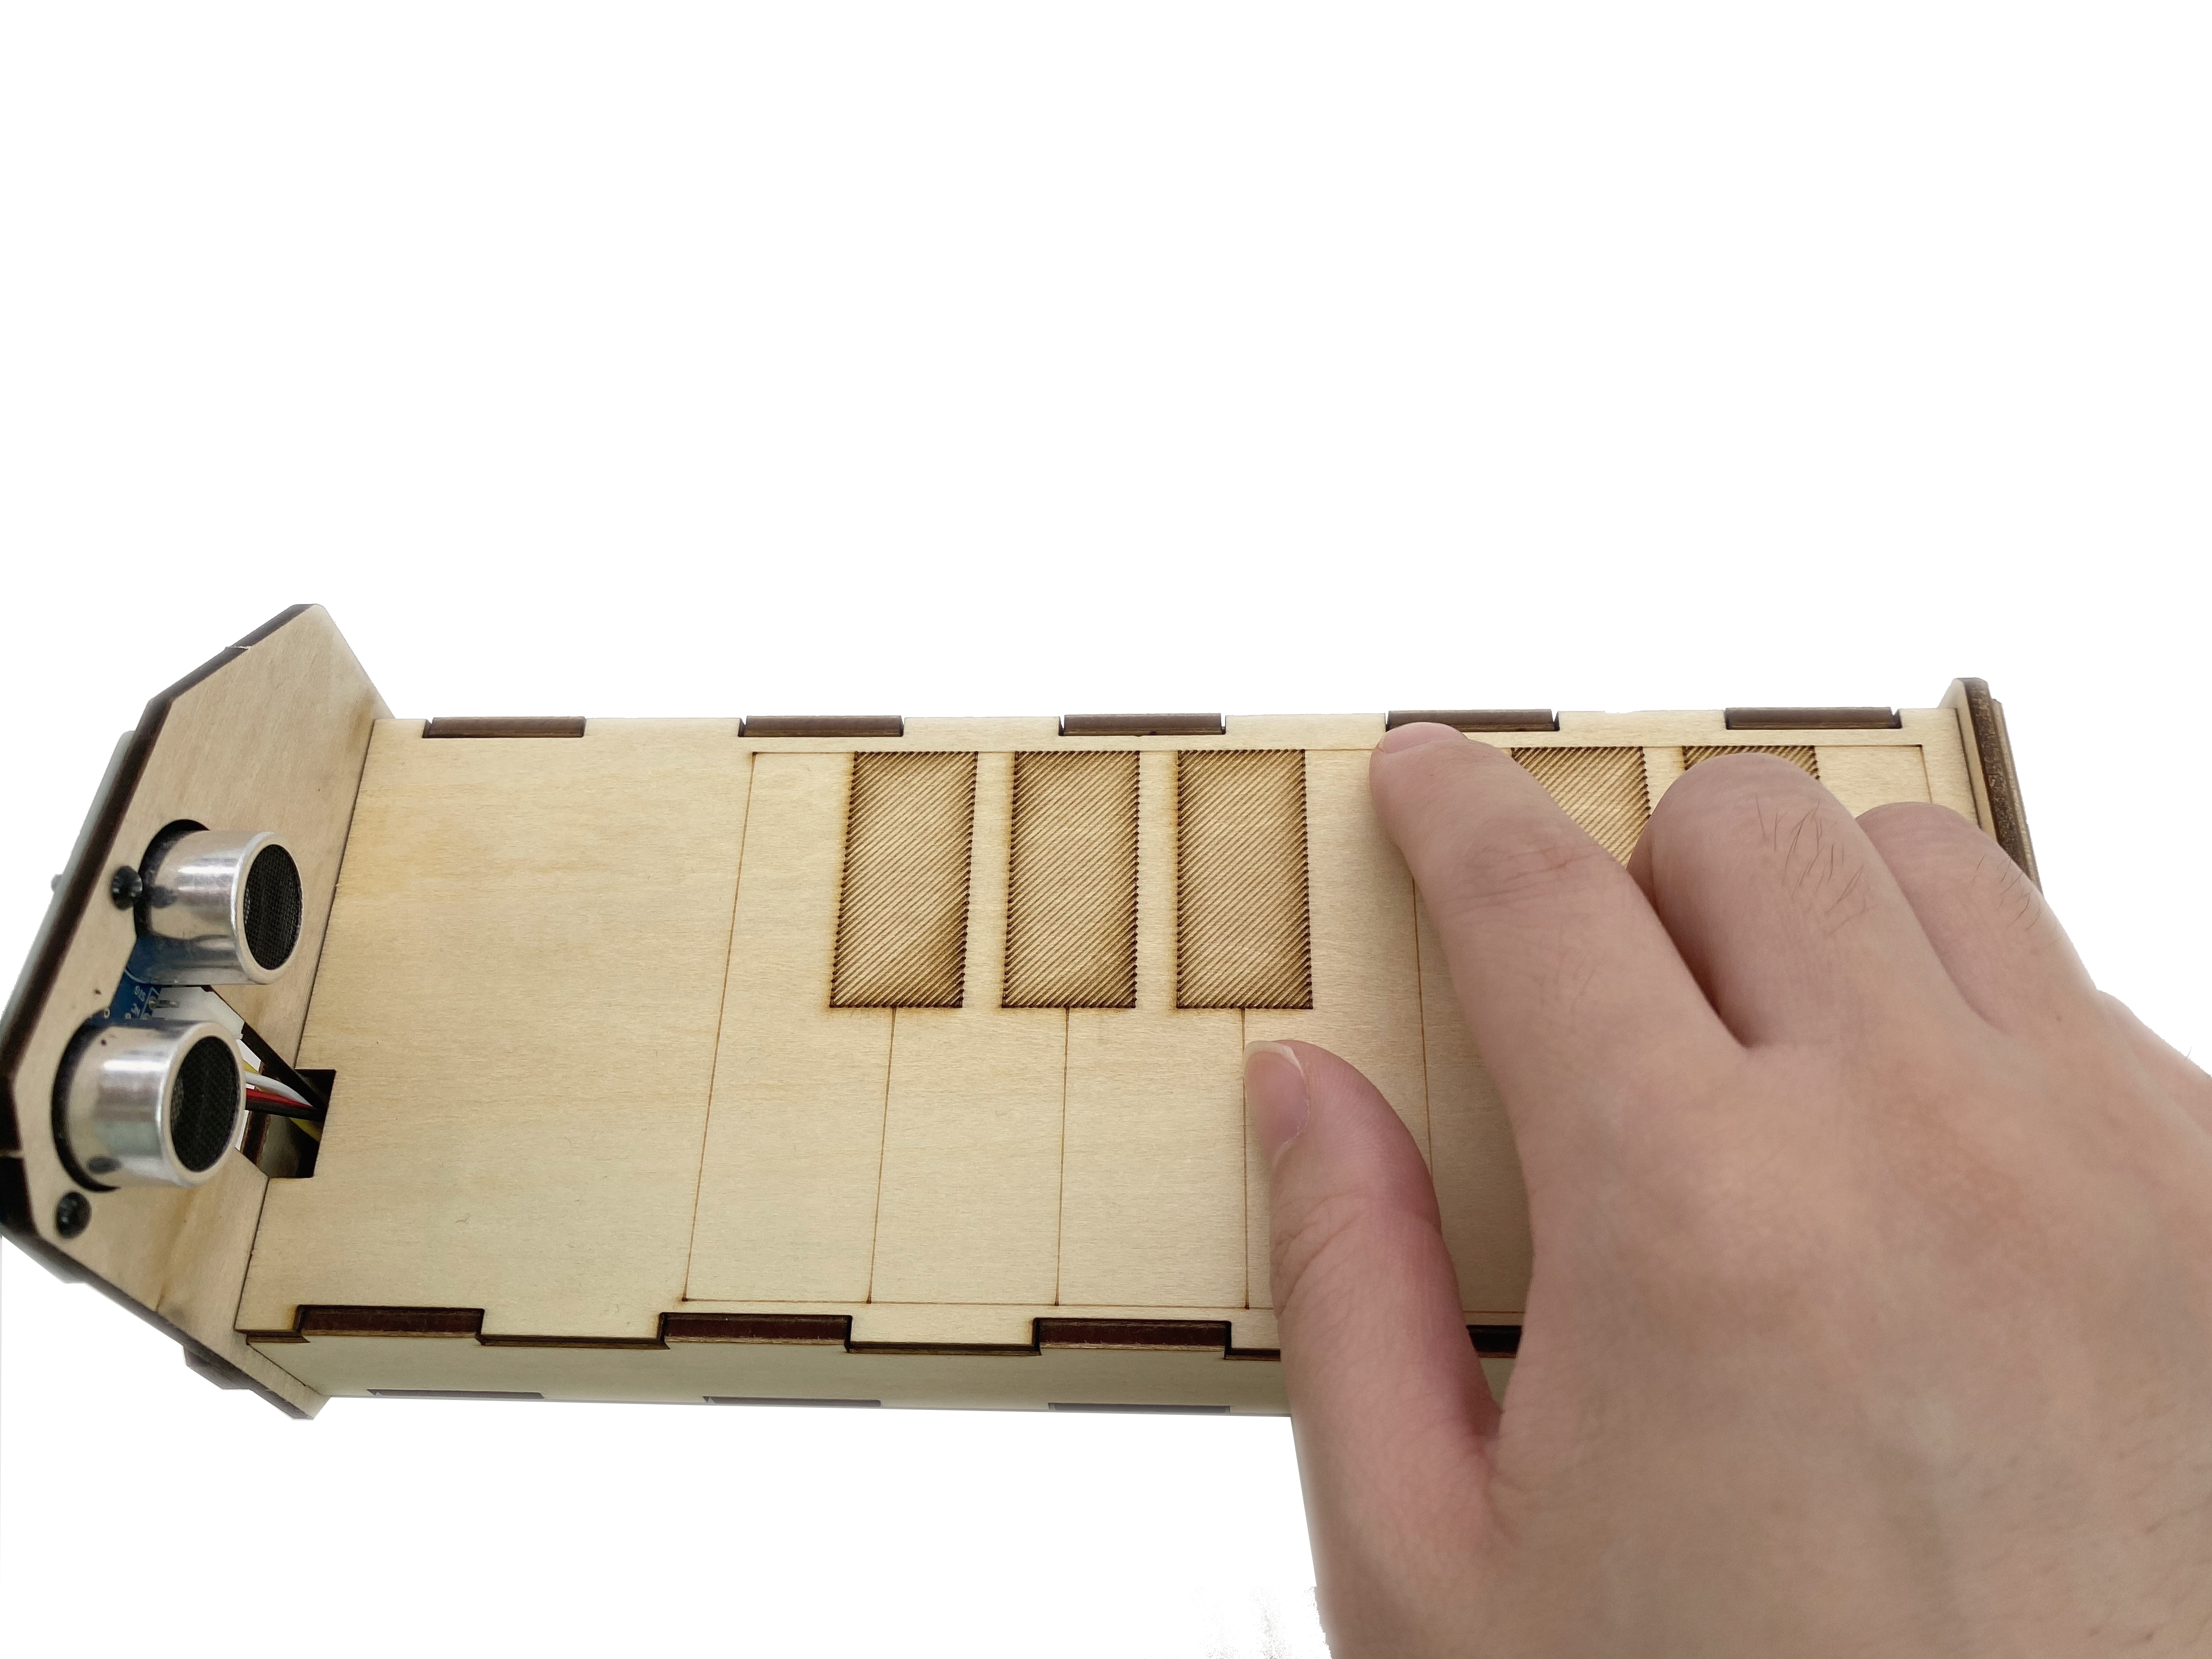
The working principle of the air harp is to measure the distance from the module to the palm of your hand through the ultrasonic distance sensor. Depending on the distance, the buzzer emits different musical notes. We have already learned how to measure distance and read values through the ultrasonic distance sensor with the sample program. Next, we just need to define different musical notes for the corresponding distances. As shown in the figure below: According to the width of the palm, one musical note corresponds to a unit of 2cm, and the performance starts from 4cm. "Do, Re, Mi, Fa, Sol, La, Xi, Do" respectively correspond to 4cm, 6cm, 8cm, 10cm, 12cm, 14cm, 16cm, 18cm... and so on.
<!--  -->
### Writing the Program
The implementation of the air harp program requires the following steps:
- Declare the library file, define different notes and buzzer pins.
- Initialization, setting the status of the buzzer pin.
- Read the distance (cm) measured by the ultrasonic distance sensor, and make a condition judgment to set different distances to emit different notes.
> ### Using the tone() Function to Play Melody
>
><br />
> When we want to control the buzzer to play notes or songs through the program, we need to set the frequency value of each note ourselves. If a song has many notes, it's too troublesome to adjust one by one, and it tests our music theory knowledge and pitch. Is there a simpler method? Of course! When defining notes, we can refer to the `tone()` function written on the Arduino website 🔗 <https://www.arduino.cc/en/Tutorial/BuiltInExamples/toneMelody>, this function defines the corresponding frequency of different notes through `pitches.h`, which is convenient for us to use the `tone()` function to set the notes emitted by the buzzer. The code of `pitches.h` is shown below:
``` cpp
/*
* pitches.h
*/
#define NOTE_B0 31
#define NOTE_C1 33
#define NOTE_CS1 35
#define NOTE_D1 37
#define NOTE_DS1 39
#define NOTE_E1 41
#define NOTE_F1 44
#define NOTE_FS1 46
#define NOTE_G1 49
#define NOTE_GS1 52
#define NOTE_A1 55
#define NOTE_AS1 58
#define NOTE_B1 62
#define NOTE_C2 65
#define NOTE_CS2 69
#define NOTE_D2 73
#define NOTE_DS2 78
#define NOTE_E2 82
#define NOTE_F2 87
#define NOTE_FS2 93
#define NOTE_G2 98
#define NOTE_GS2 104
#define NOTE_A2 110
#define NOTE_AS2 117
#define NOTE_B2 123
#define NOTE_C3 131
#define NOTE_CS3 139
#define NOTE_D3 147
#define NOTE_DS3 156
#define NOTE_E3 165
#define NOTE_F3 175
#define NOTE_FS3 185
#define NOTE_G3 196
#define NOTE_GS3 208
#define NOTE_A3 220
#define NOTE_AS3 233
#define NOTE_B3 247
#define NOTE_C4 262
#define NOTE_CS4 277
#define NOTE_D4 294
#define NOTE_DS4 311
#define NOTE_E4 330
#define NOTE_F4 349
#define NOTE_FS4 370
#define NOTE_G4 392
#define NOTE_GS4 415
#define NOTE_A4 440
#define NOTE_AS4 466
#define NOTE_B4 494
#define NOTE_C5 523
#define NOTE_CS5 554
#define NOTE_D5 587
#define NOTE_DS5 622
#define NOTE_E5 659
#define NOTE_F5 698
#define NOTE_FS5 740
#define NOTE_G5 784
#define NOTE_GS5 831
#define NOTE_A5 880
#define NOTE_AS5 932
#define NOTE_B5 988
#define NOTE_C6 1047
#define NOTE_CS6 1109
#define NOTE_D6 1175
#define NOTE_DS6 1245
#define NOTE_E6 1319
#define NOTE_F6 1397
#define NOTE_FS6 1480
#define NOTE_G6 1568
#define NOTE_GS6 1661
#define NOTE_A6 1760
#define NOTE_AS6 1865
#define NOTE_B6 1976
#define NOTE_C7 2093
#define NOTE_CS7 2217
#define NOTE_D7 2349
#define NOTE_DS7 2489
#define NOTE_E7 2637
#define NOTE_F7 2794
#define NOTE_FS7 2960
#define NOTE_G7 3136
#define NOTE_GS7 3322
#define NOTE_A7 3520
#define NOTE_AS7 3729
#define NOTE_B7 3951
#define NOTE_C8 4186
#define NOTE_CS8 4435
#define NOTE_D8 4699
#define NOTE_DS8 4978
```
### Task 2: Ultrasonic Air Harp
**Step 1:** Declare the library file, define different notes and buzzer pins. The main notes we use are "Do Re Mi Fa Sol La Xi Do", corresponding to "C5 D5 E5 F5 G5 A5 B5 C6". You can only define the notes you need to avoid the program looking too lengthy.
``` cpp
#include "Ultrasonic.h"//declare the library file
Ultrasonic ultrasonic(0);//define the ultrasonic object and connect the ultrasonic wave to the A0 interface. If you're using XIAO RP2040, please change 0 to D0
int buzzerPin = 3;//The buzzer is connected to the A3 interface, if you're using XIAO RP2040, please change 3 to A3
#define NOTE_C5 523
#define NOTE_CS5 554
#define NOTE_D5 587
#define NOTE_DS5 622
#define NOTE_E5 659
#define NOTE_F5 698
#define NOTE_FS5 740
#define NOTE_G5 784
#define NOTE_GS5 831
#define NOTE_A5 880
#define NOTE_AS5 932
#define NOTE_B5 988
#define NOTE_C6 1047
```
**Step 2:** Initialize the baud rate and set the buzzer pin status.
``` cpp
void setup()
{
Serial.begin(9600);
pinMode(buzzerPin,OUTPUT);
}
```
**Step 3:** Read the distance (cm) measured by the ultrasonic distance sensor and make a condition judgment to set different distances to emit different notes. Since the setting of the air harp is that different distances trigger different notes, and this distance is a long integer value, so we need to use the `long()` function to define the value returned by the ultrasonic wave. For example, `(long)RangeInCentimeters== 4`, that is, the distance value returned by the ultrasonic wave is 4. Corresponding to the buzzer emitting different notes, use the `tone()` function, for example, `tone(3,NOTE_C5,100)`, that is, the buzzer on pin `3`, emits `NOTE_C5 (Do)` note, lasts for 100 milliseconds.
``` cpp
void loop()
{
// Read the distance value detected by the ultrasonic distance sensor, in centimeters, and print it on the serial monitor
long RangeInCentimeters;
RangeInCentimeters = ultrasonic.MeasureInCentimeters();
Serial.print(RangeInCentimeters);
Serial.println(" cm");
delay(250);
// Using an if statement for conditional judgment, when the distance is 4, 6, 8, 10, 12, 14, 16, 18, it corresponds to C5, D5, E5, F5, G5, A5, B5, C6
if (((long)RangeInCentimeters== 4)) { //Do
tone(3,NOTE_C5,100);
}
if (((long) RangeInCentimeters== 6)) { //Re
tone(3,NOTE_D5,100);
}
if (((long) RangeInCentimeters== 8)) { //Mi
tone(3,NOTE_E5,100);
}
if (((long) RangeInCentimeters== 10)) { //Fa
tone(3,NOTE_F5,100);
}
if (((long) RangeInCentimeters== 12)) { //Sol
tone(3,NOTE_G5,100);
}
if (((long) RangeInCentimeters== 14)) { //La
tone(3,NOTE_A5,100);
}
if (((long) RangeInCentimeters== 16)) { //Xi
tone(3,NOTE_B5,100);
}
if (((long) RangeInCentimeters== 18)) { //Do
tone(3,NOTE_C6,100);
}
}
```
> Get this program from Github <br />
> <https://github.com/mouseart/XIAO-Mastering-Arduino-and-TinyML/tree/main/code/L13_UltrasonicPiano_XIAO_en>
**Step 4:** Connect the hardware and upload the program. Connect the ultrasonic distance sensor to the `A0` interface of the XIAO expansion board as shown below:
<!--  -->
Use the data cable to connect XIAO to the computer, click the "Upload" button, upload the program to the hardware, when the debugging area shows "Upload Successful", open the serial monitor, and start playing with your palm.
## 3.3.4 Exterior Design
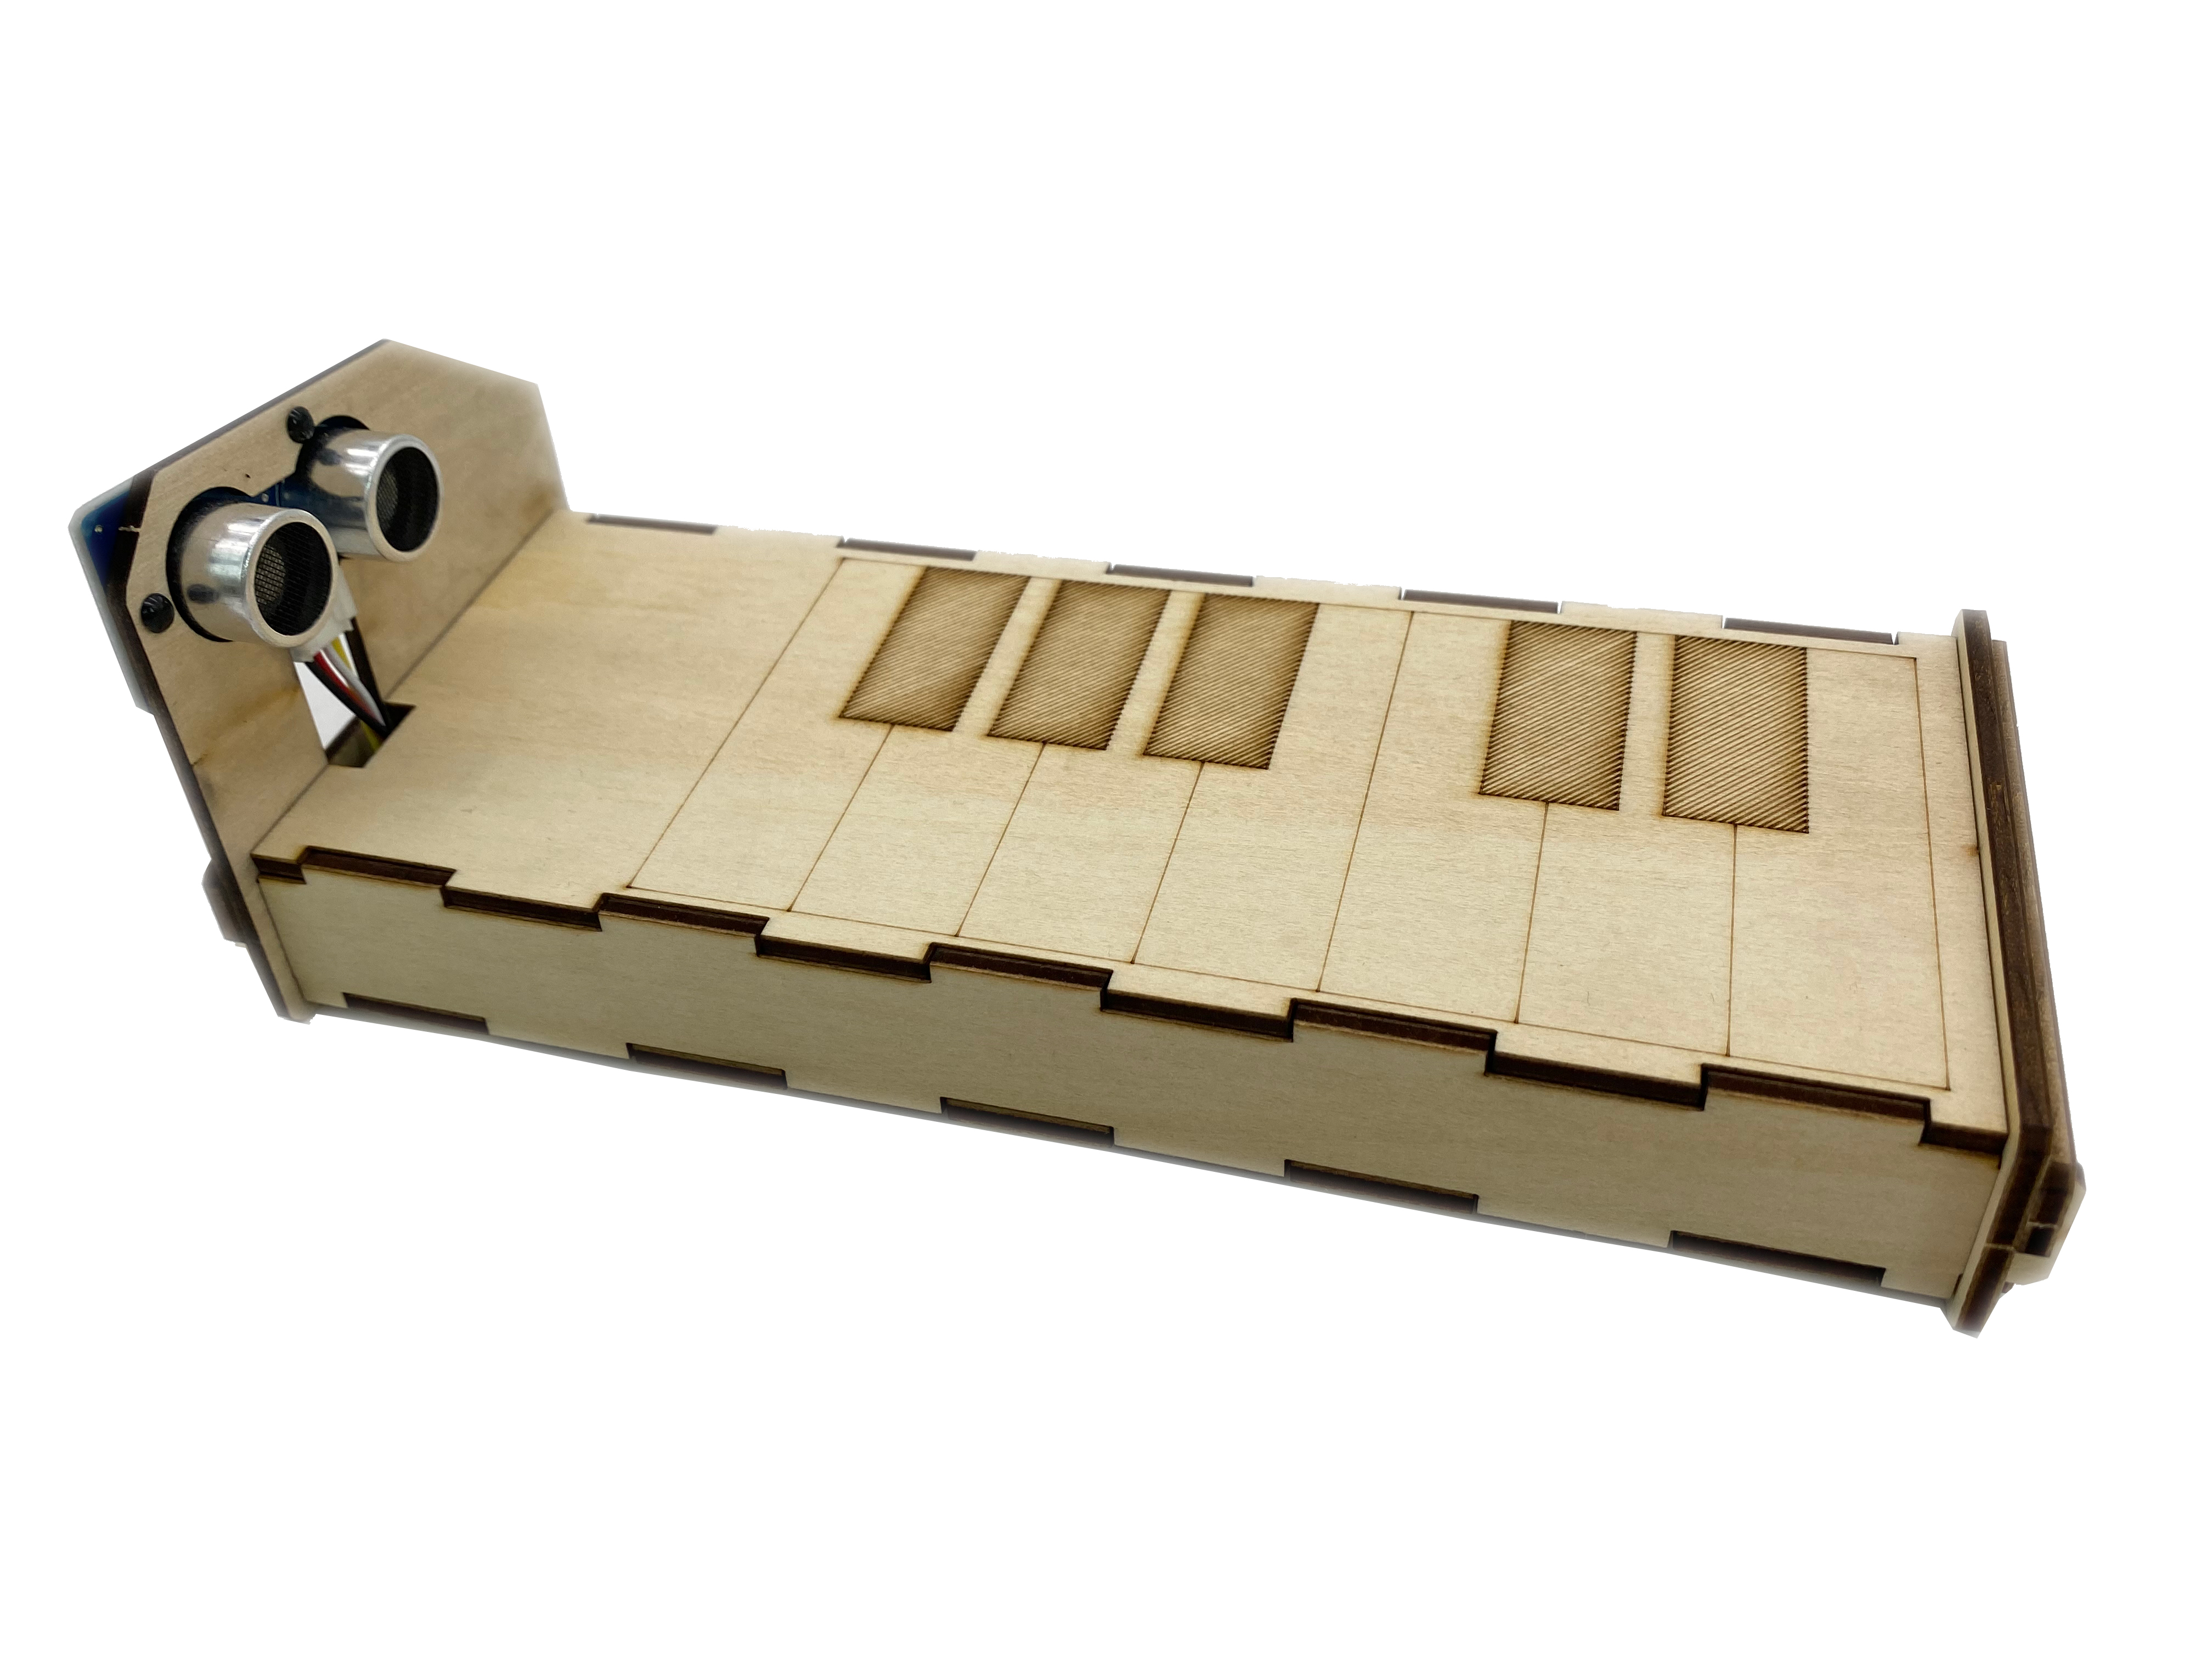
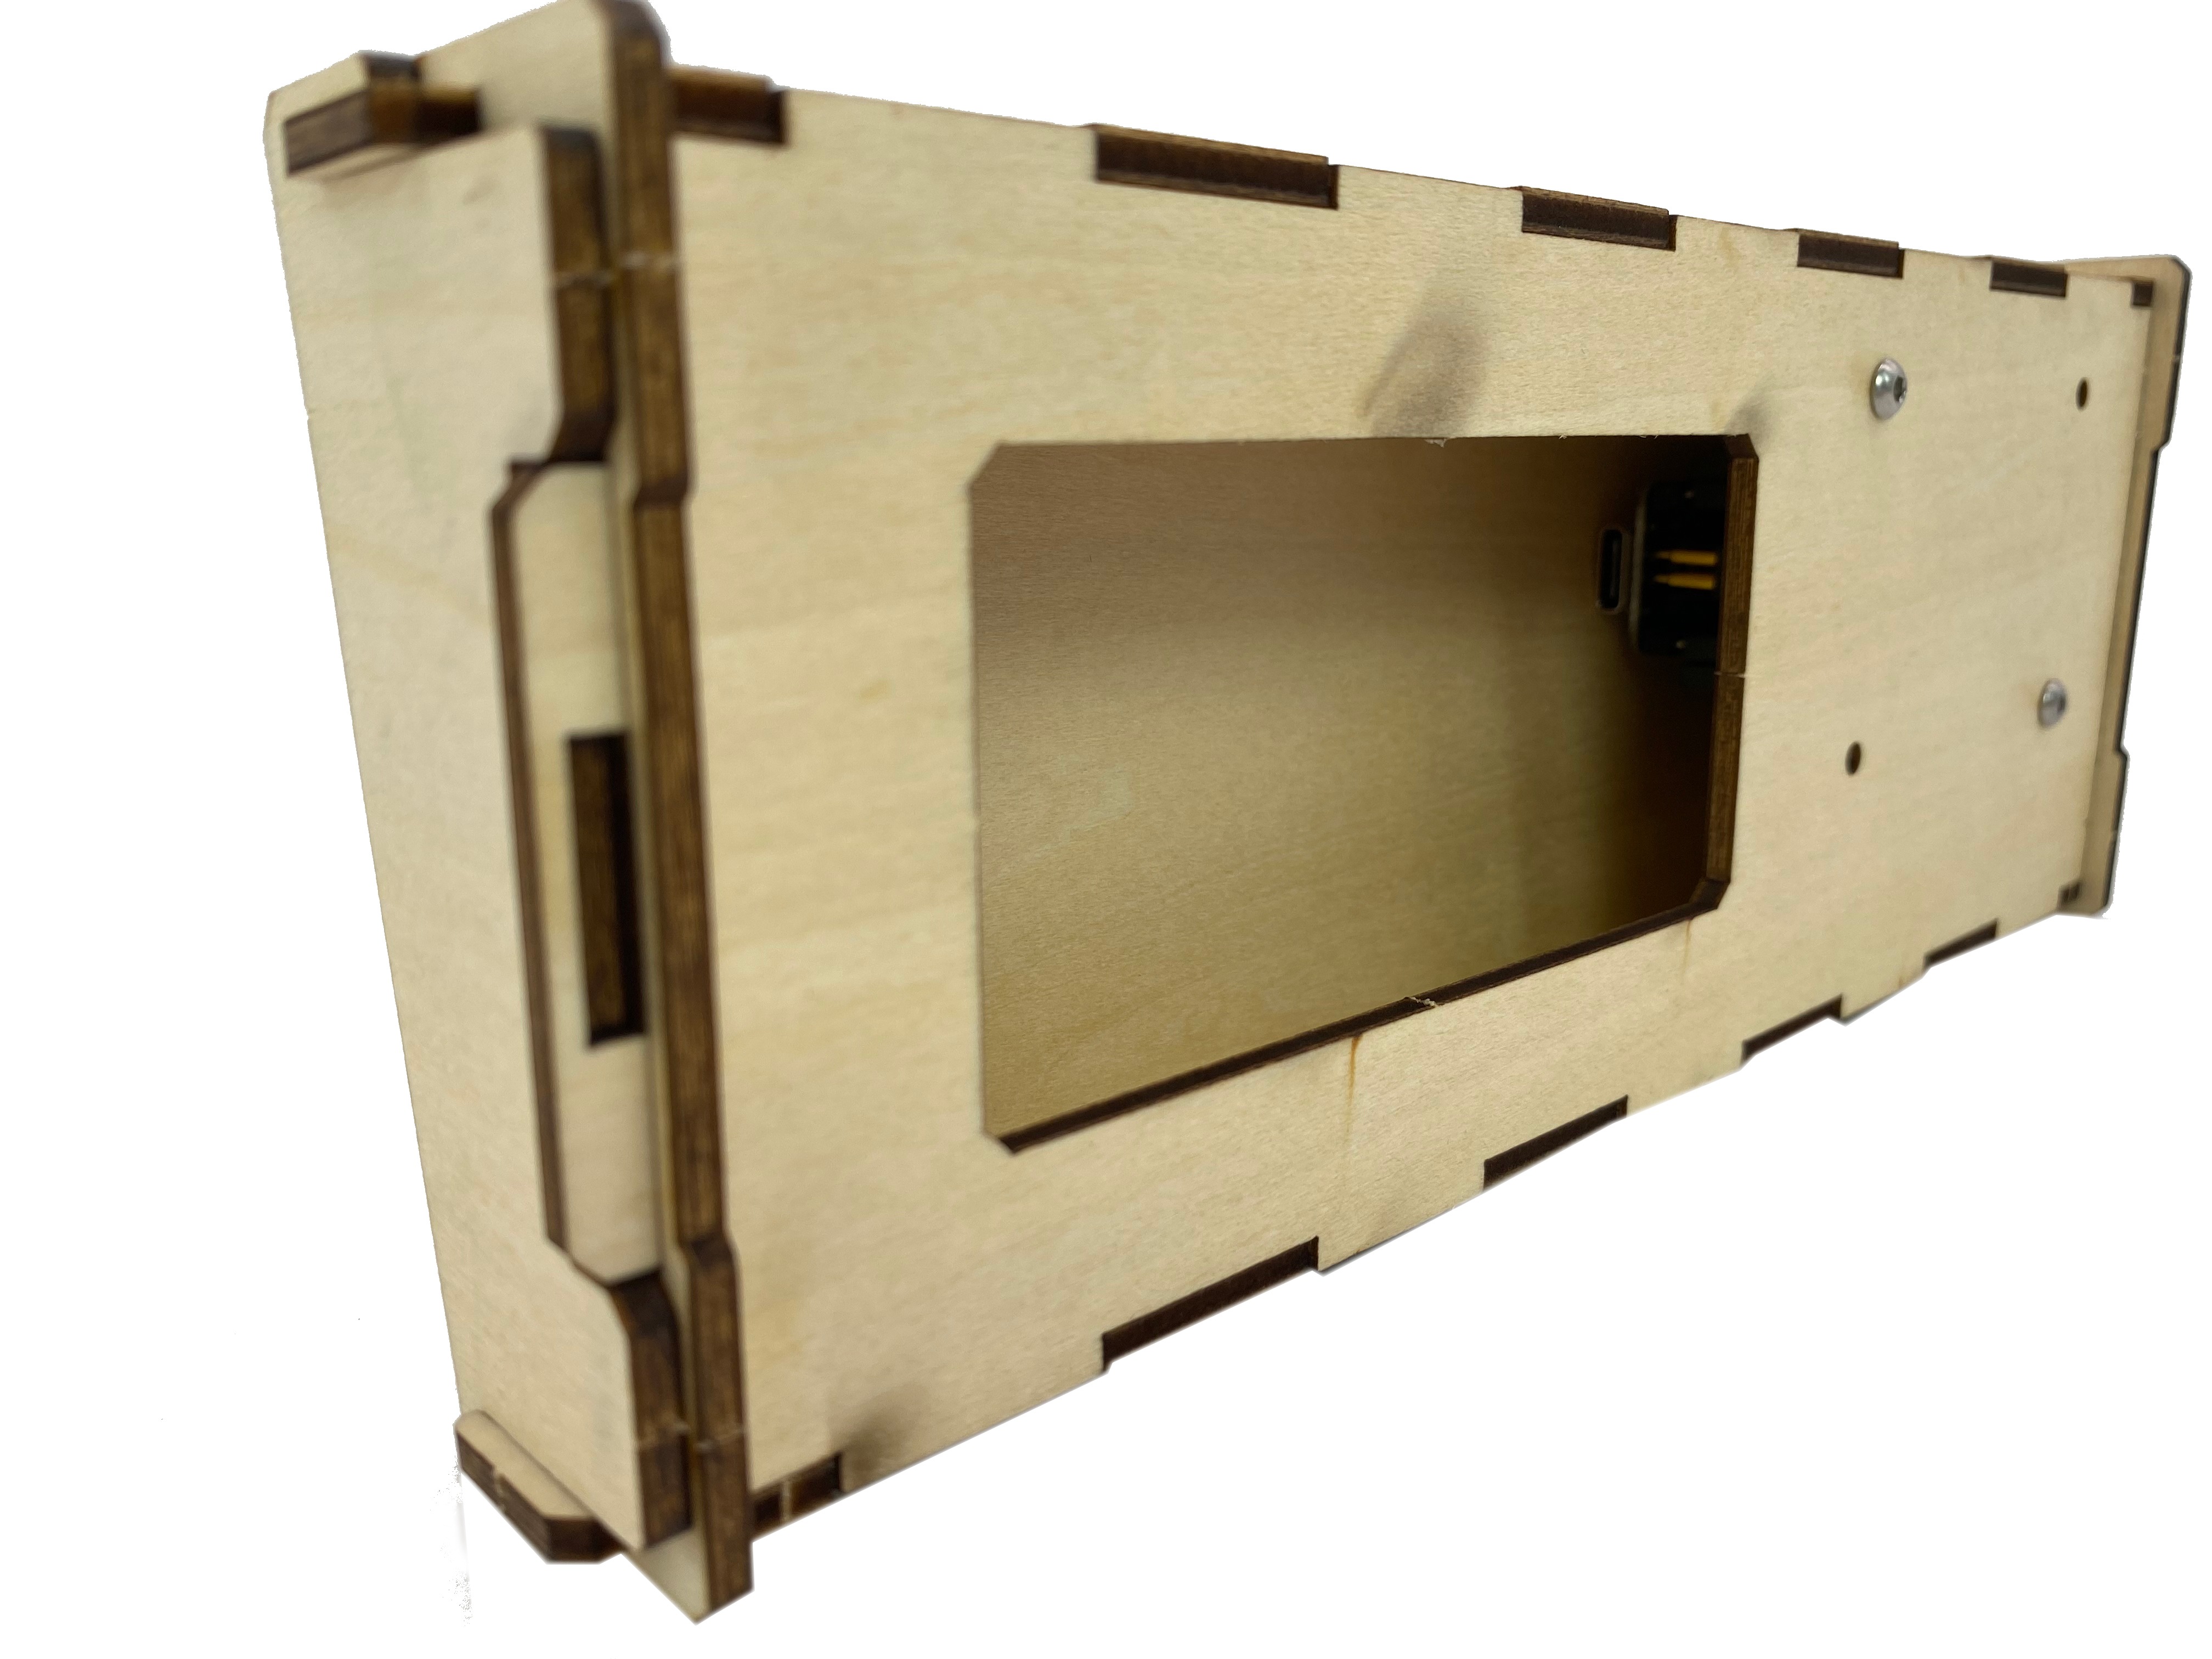
The inspiration for the air harp comes from the piano, with a note every 2 cm also designed according to the style of the piano keys. In the process of creating the appearance, we can cut a harp surface from a basswood board, and fix the ultrasonic range sensor at the left end of the harp. We also provide laser cutting files for reference, which can be easily assembled, as shown in the picture:
<!-- 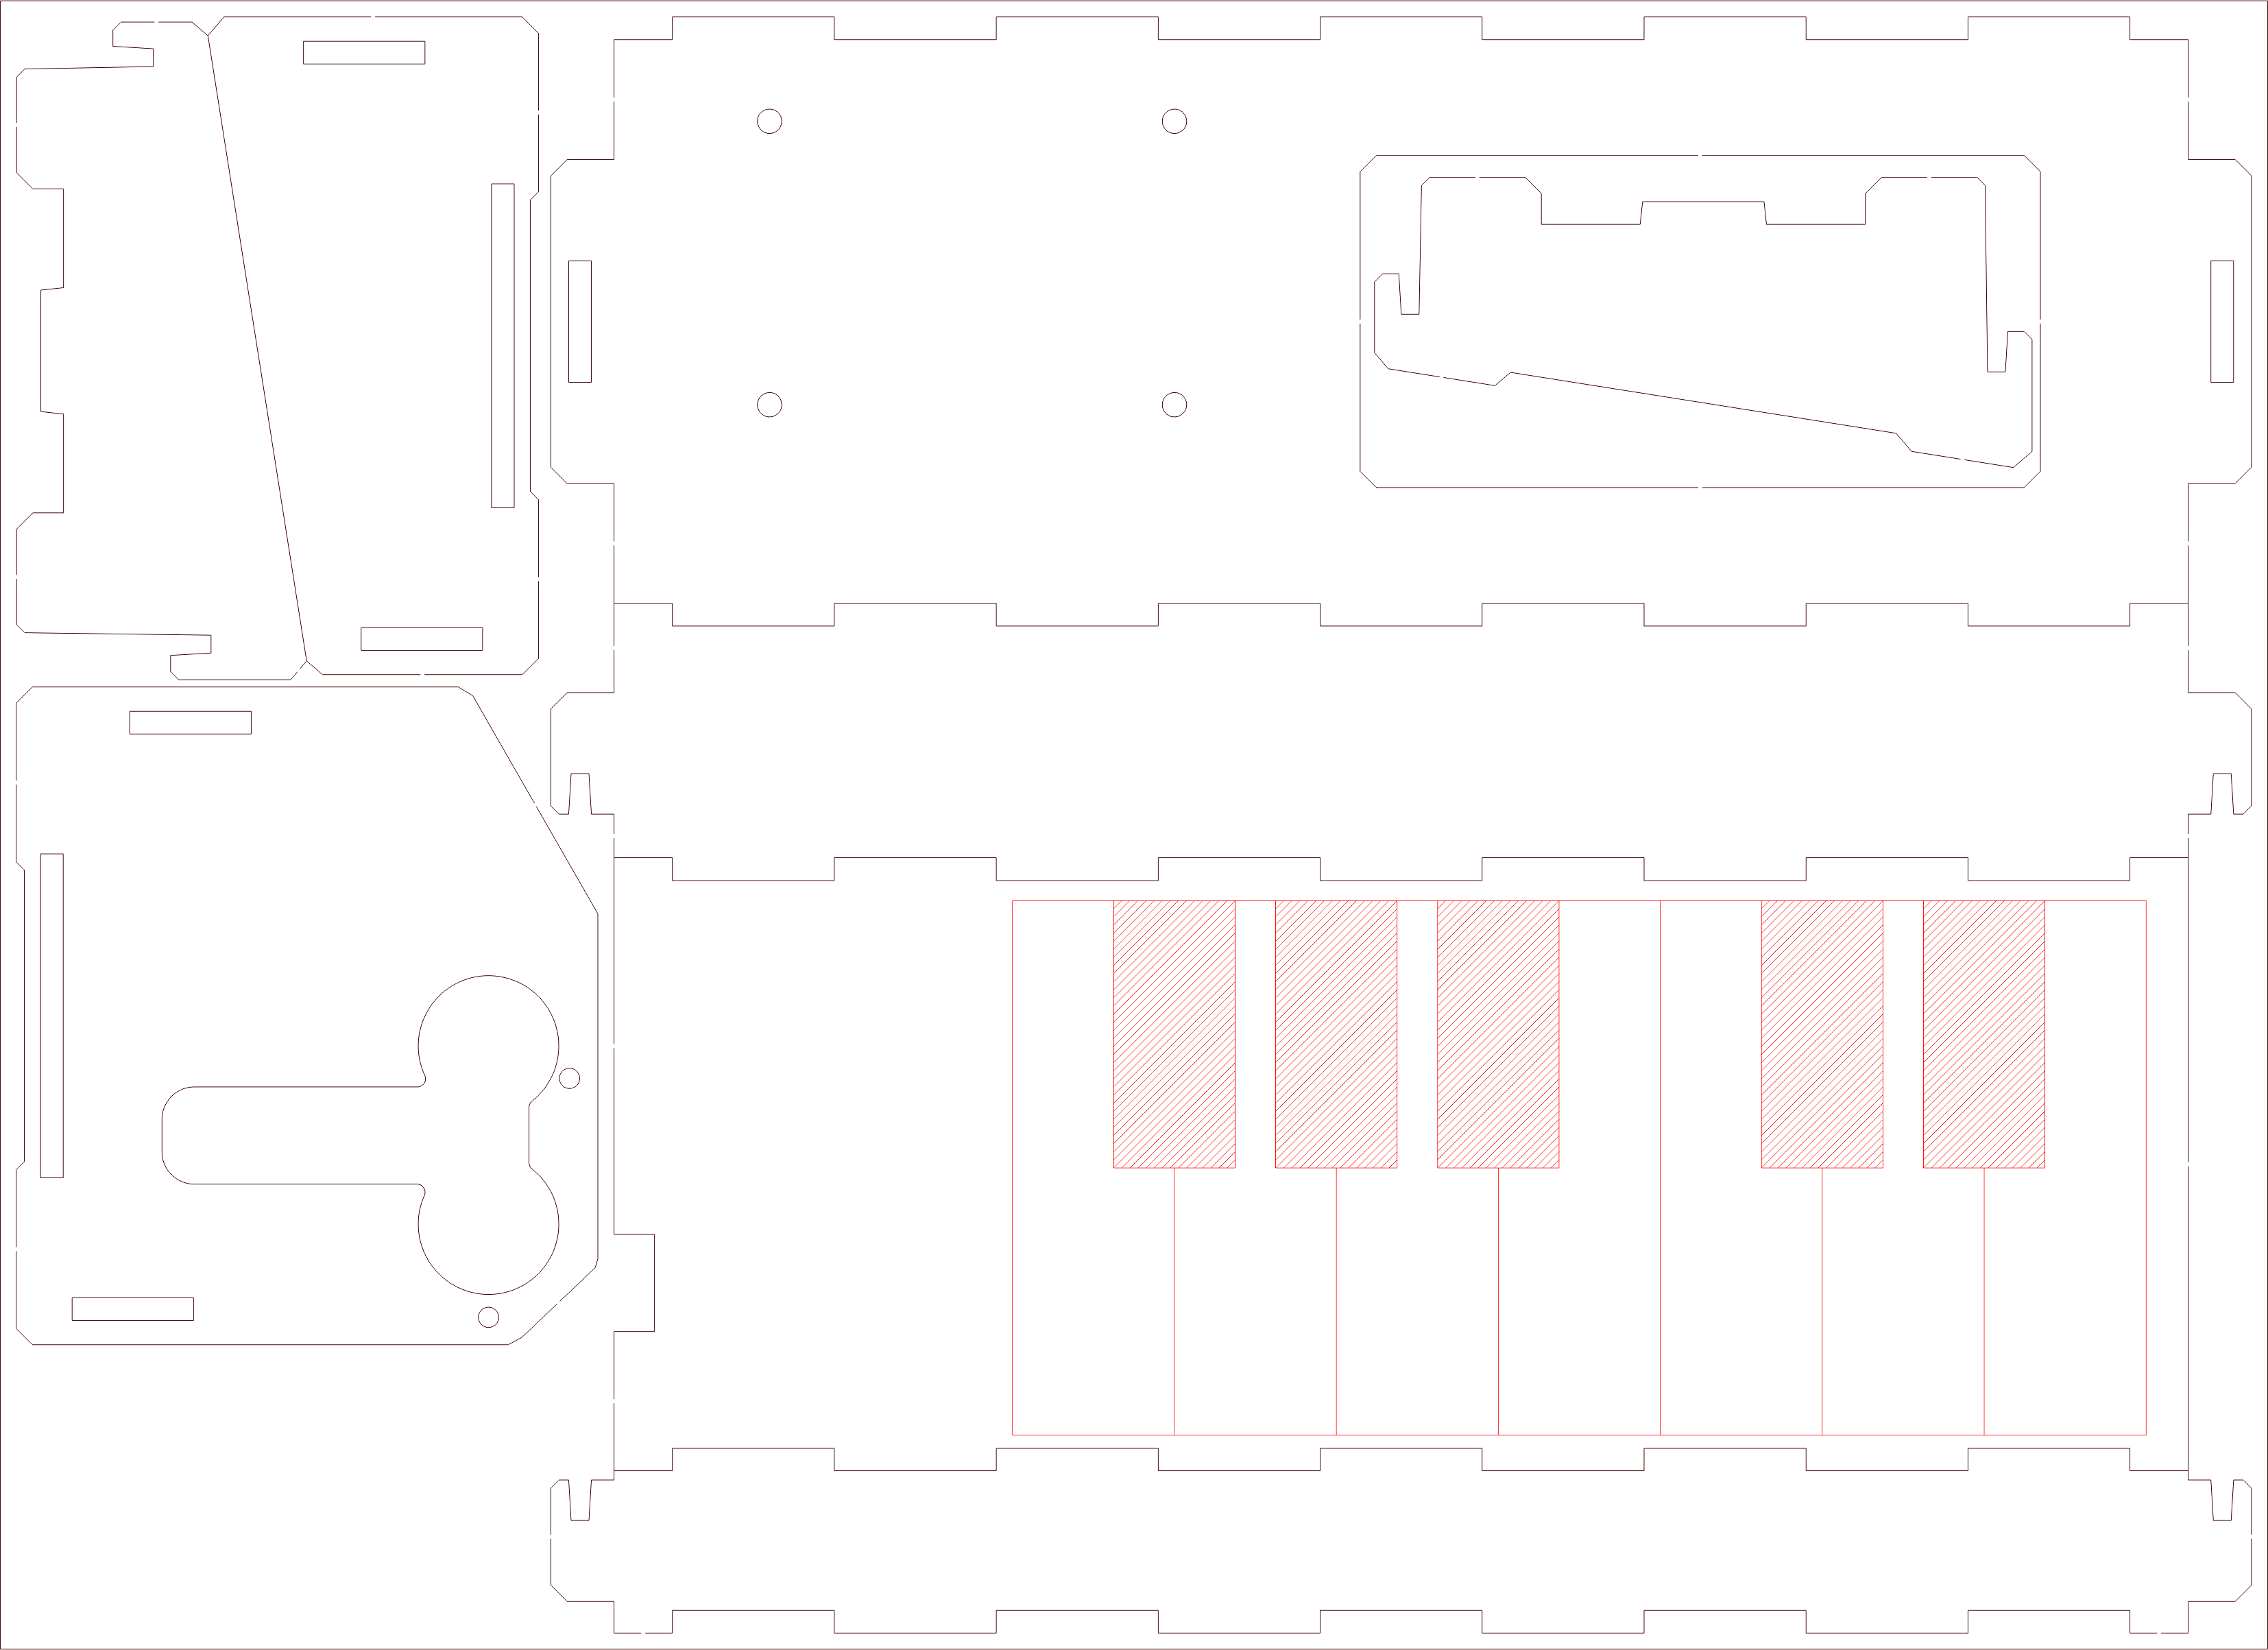 -->

Download the files suitable for the laser cutting machine 🔗 <br />
<https://github.com/mouseart/XIAO-Mastering-Arduino-and-TinyML/blob/main/dxf/XIAO_Air_Piano.dxf>.
<!--  -->

<!--  -->
<!--  -->
<!--  -->
