| date | title | published |
|---|---|---|
LED Lighting |
false |
LED lighting is commonly used in robots for purposes including illumination, communication, and aesthetics. This article covers key topics in LED lighting design and implementation as relevant to the robotics field.
As robots evolve to work in increasingly unstructured environments, interaction with humans becomes progressively more important to robot success. Often, humans are trained to work around robots (for example, in warehouse and manufacturing environments), while in other scenarios humans may be purchasing or encountering their first robot (for example, robot vacuums or mobile delivery robots). In both cases, LED lighting can serve as an efficient and cost-effective means to enhance robots’ utility in areas such as communication, aesthetics, and illumination.
Well-executed LED lighting may appear simple from a user’s perspective, but there can be a deceiving amount of complexity involved in successful execution. In many robotic applications, lighting implementation involves not only the selection of the physical LEDs, but also product design, mechanical design and material selection, electrical considerations, and programming. This guide seeks to provide an overview of key topics in the application of LED lighting to robots.
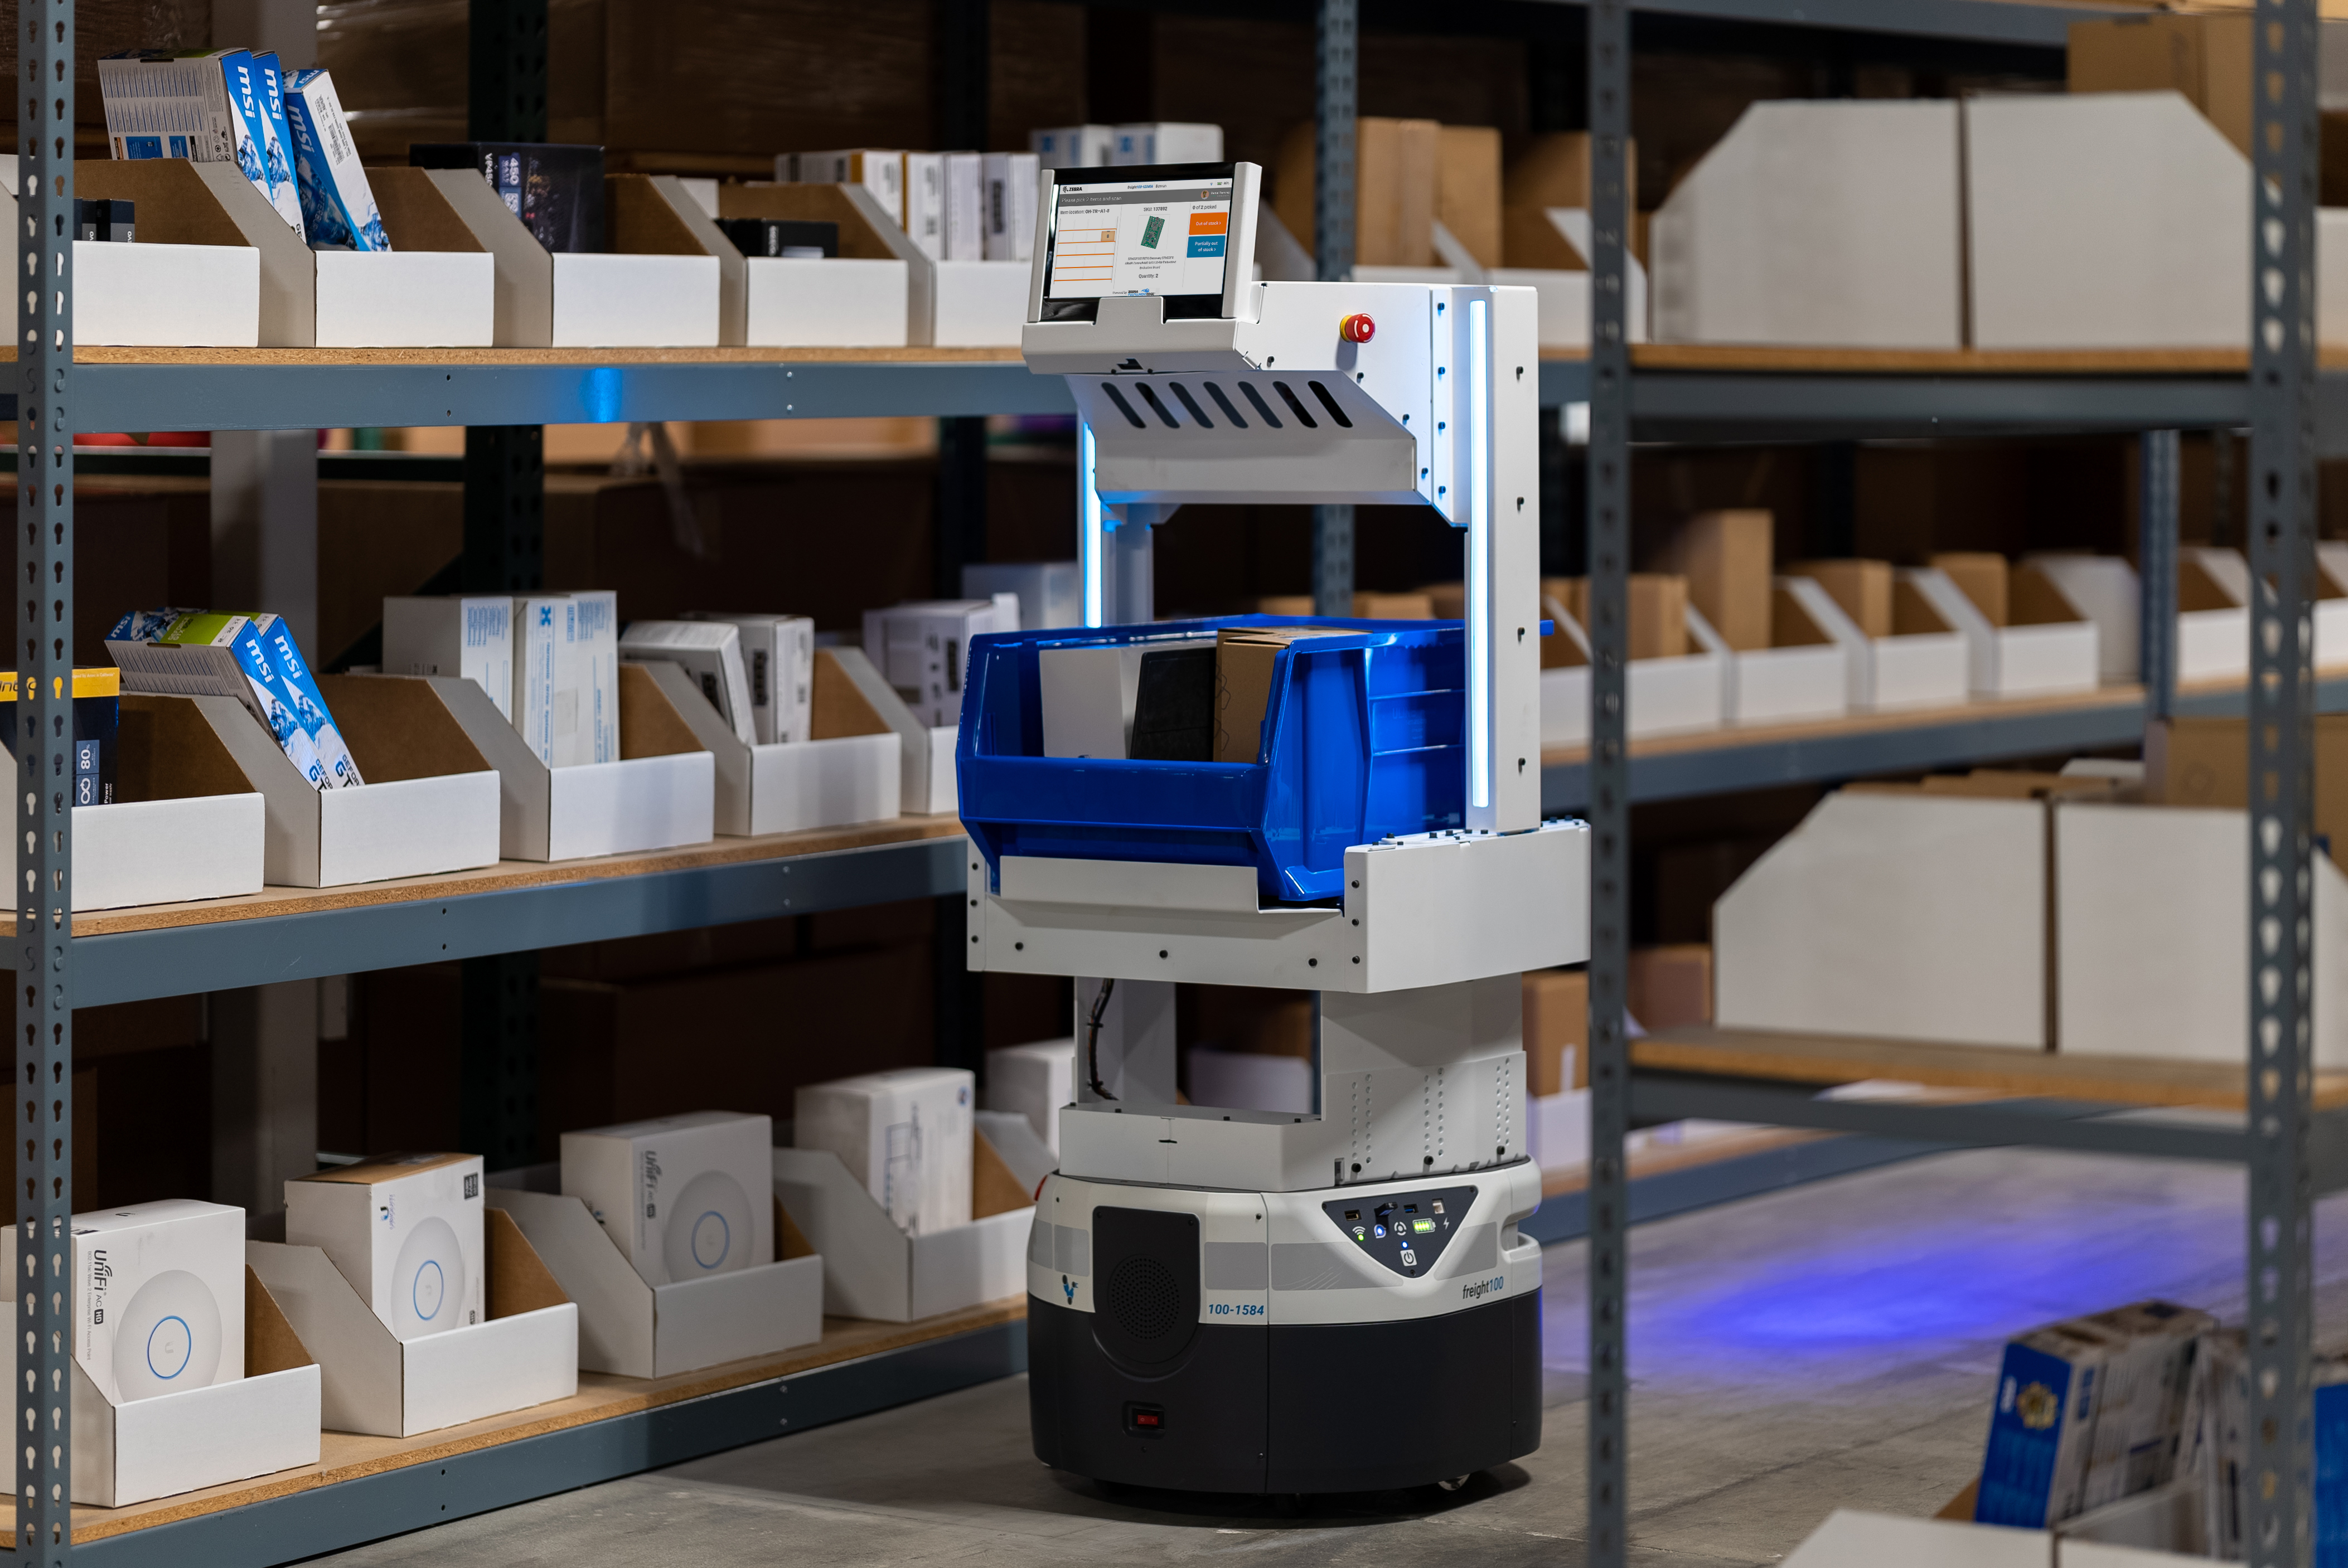
 A Fetch warehouse robot projects a blue light in front of it to alert people near corners
link
A Fetch warehouse robot projects a blue light in front of it to alert people near corners
link
 A Pudu Bellabot restaurant serving robot uses a subsurface display to communicate. link
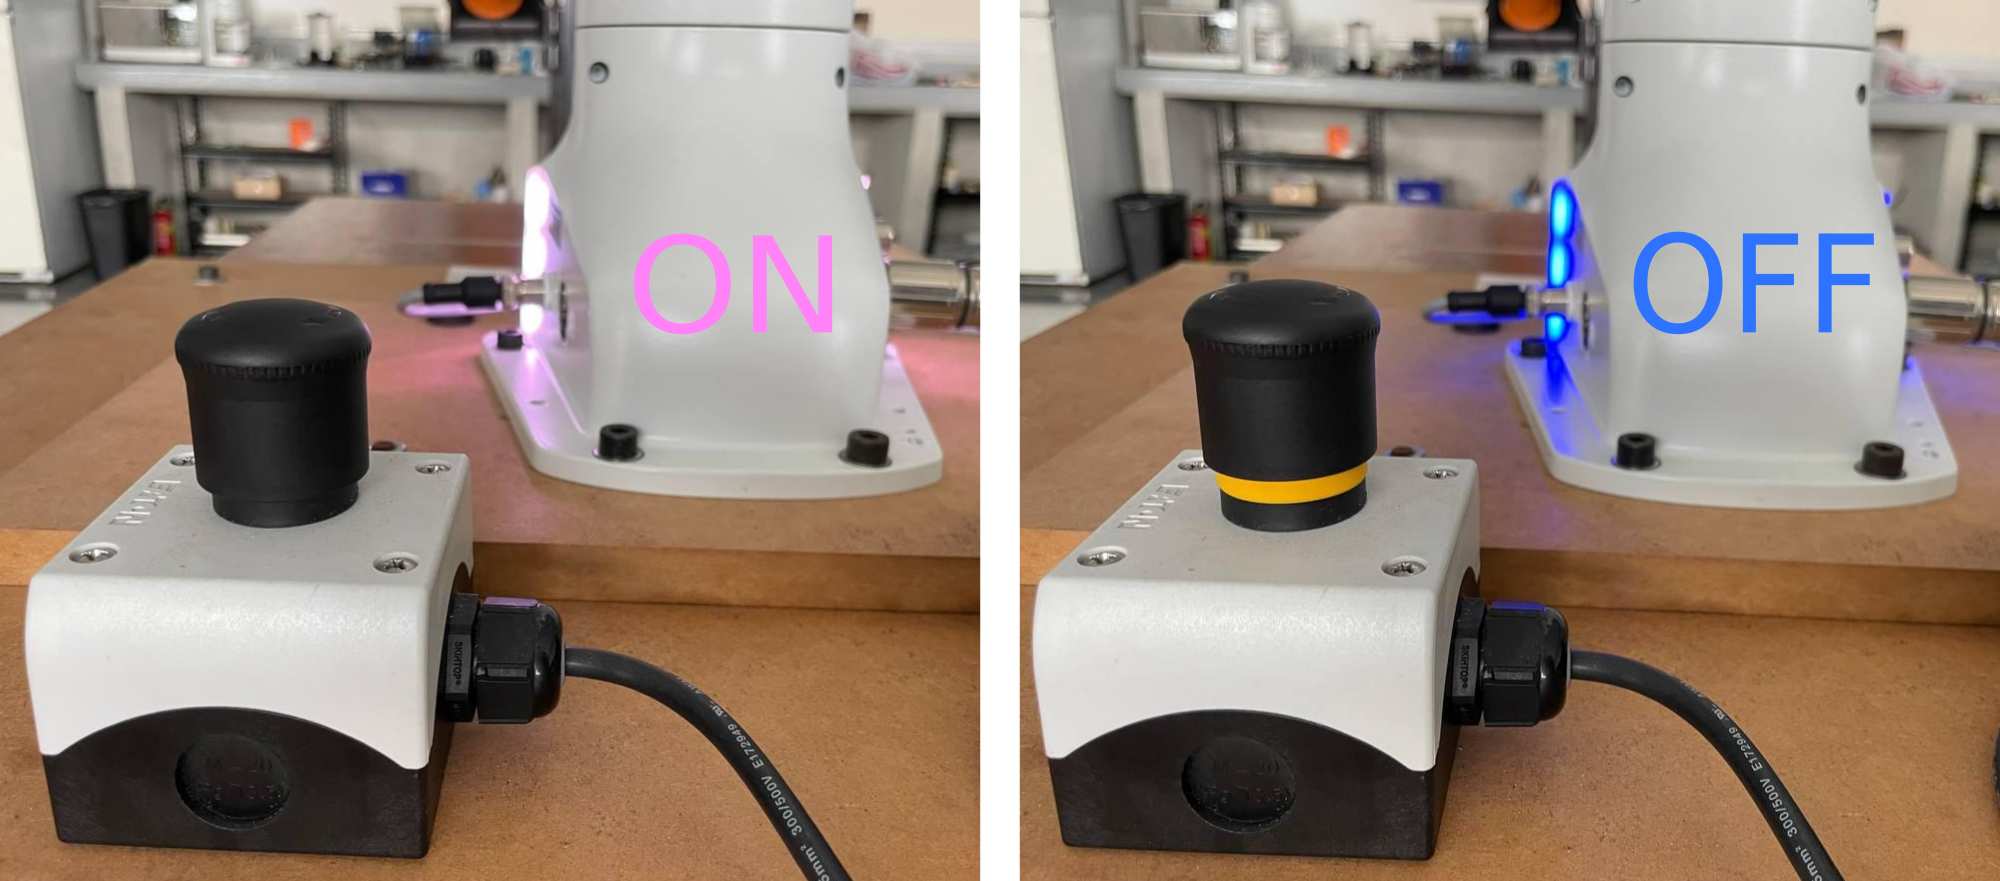
 The Franka robot uses different LED colors to show robot status link
 Relay Robotic’s delivery robot uses LEDs to light an interior compartment. link
 Bear Robotic’s restaurant robot uses LEDs to communicate and indicate which shelf to take from. link
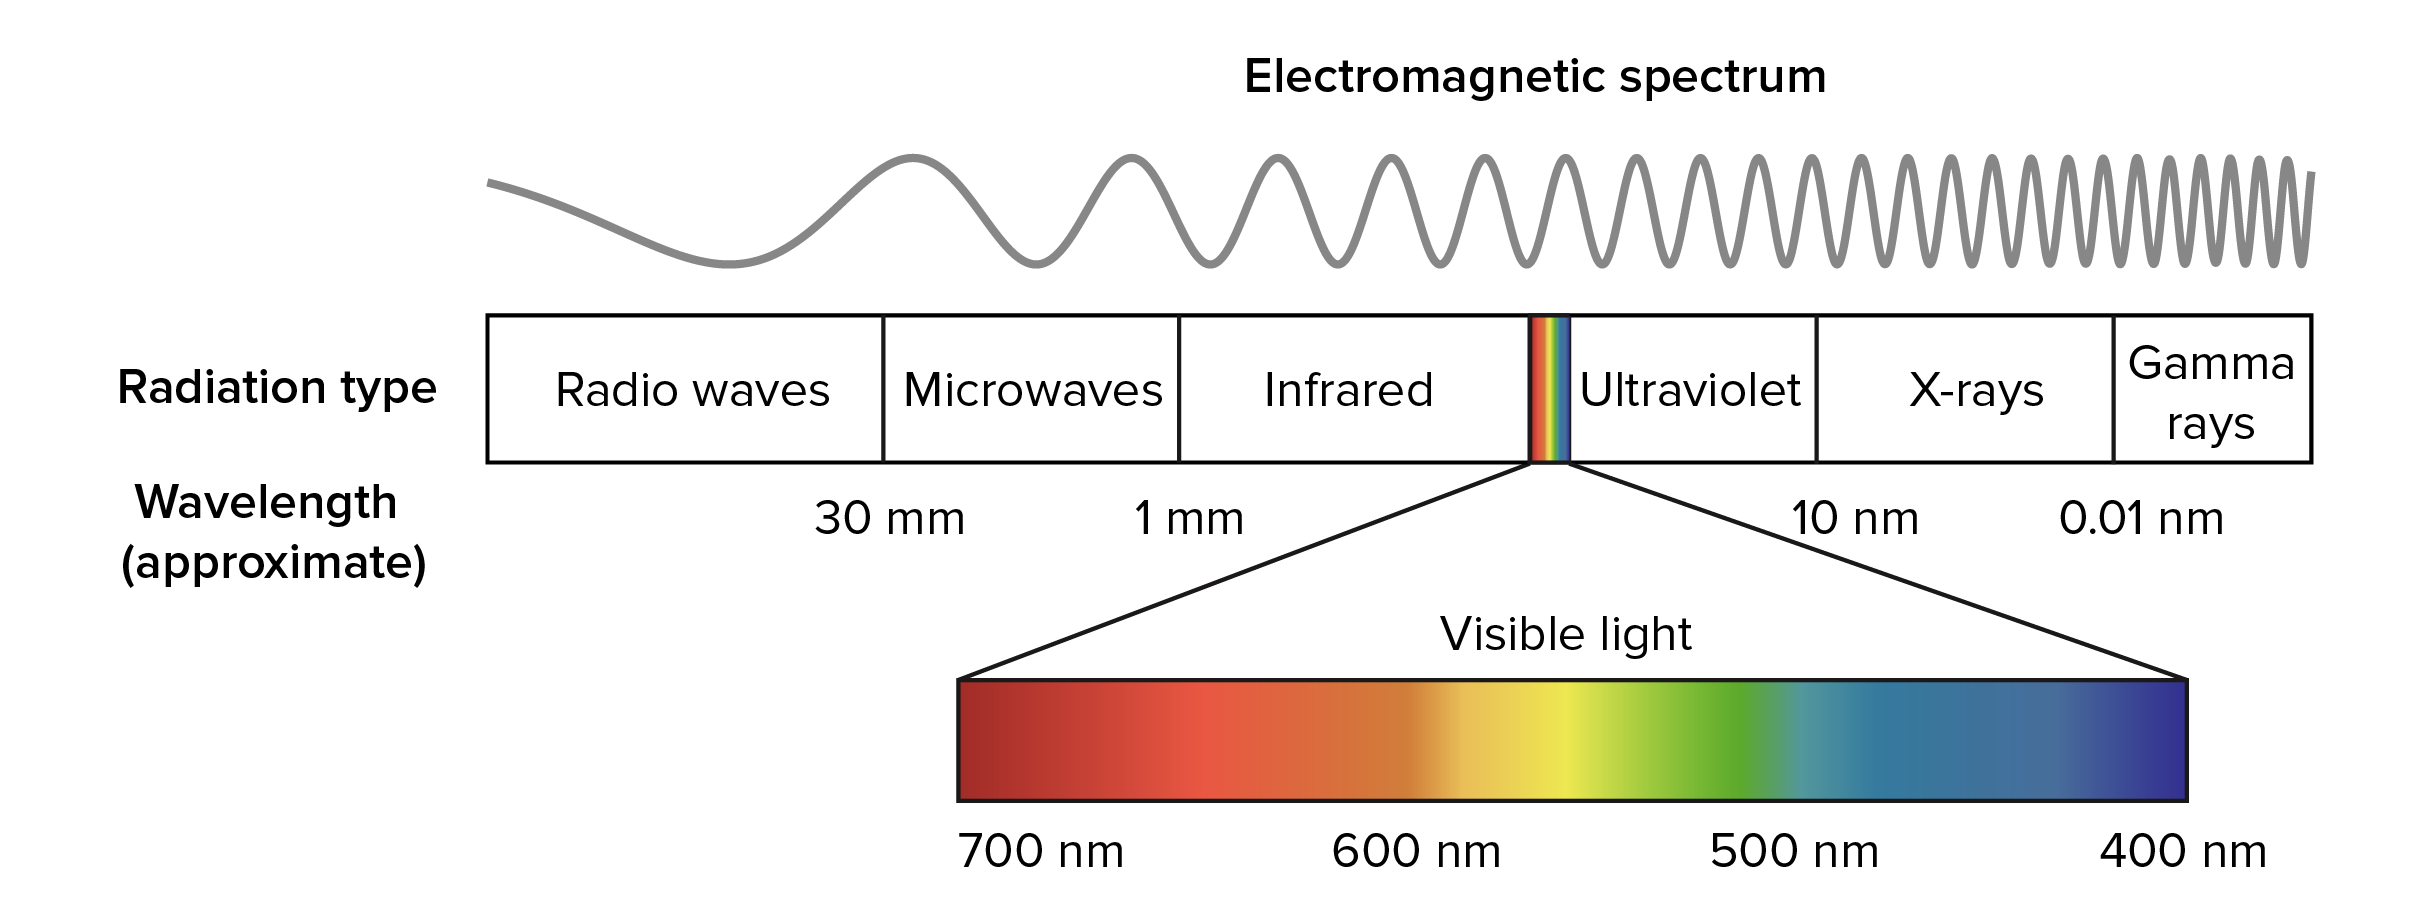
Visible light is electromagnetic radiation in the visible spectrum (shown below). Different colors of light correspond to different wavelengths. Additionally, colors can be imitated by mixing different wavelengths.

LEDs (Light emitting diodes) are a very commonly used light source due to their small size and high power efficiency. They are by far the most commonly used light source on robots for these reasons. LEDs use semiconducting materials with a specific energy gap, which corresponds to the emitted wavelength.
This article: https://electronics.howstuffworks.com/led.htm provides a nice overview of some of the physics and chemistry of how LEDs work.
Due to the nature of LEDs, they can only emit light at a specific wavelength. Most commonly, these are red (620-625 nm), green (522-525 nm), or blue (467-470 nm). Many LED chips are composed of these 3 types of LEDs, and other colors can be generated by activating all three LEDs in different ratios.
Color mixing
Light appears white when the whole spectrum of visible light is present. This can be accomplished by mixing red, green, and blue in equal proportions. However, this approach has several drawbacks which has led to the creation of alternative white LEDs. In addition to reduced power efficiency and requiring three emitters, mixing to create white light can create a lower quality light.
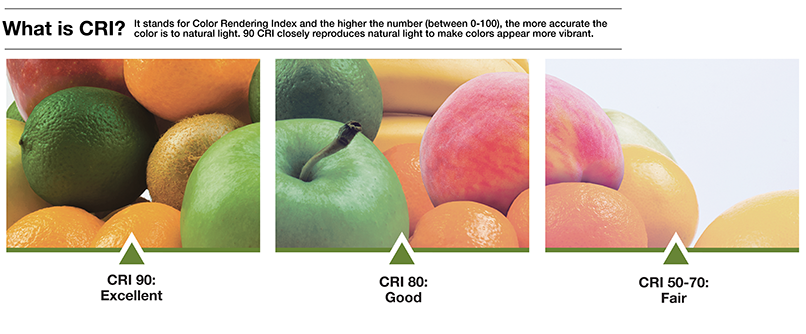
Color Render Index (CRI)
The quality of white light is often measured using the color render index (CRI). Objects appear to have color because they reflect that wavelength of light and absorb others (e.g. my notebook appears blue because it reflects blue light and absorbs other wavelengths). However, for an object to reflect a wavelength, that wavelength must be present in the incident light. One issue with mixing red, green, and blue LEDs is that the light produced has a lot of light in only the specific emitted wavelengths, so while the light appears white to the human eye, objects illuminated with this light may not show their true colors. The color render index measures how well a light source illuminates the true colors of different objects. The image below shows spectral graphs for several different lighting sources. As can be seen, sunlight gives off the most consistent spectrum of visible light, and has the highest color render index.
For some applications, CRI does not matter and it makes sense to go with the cheapest option. Parking garages, for example, often appear to have poor light because low CRI lights are used. In other applications having a high CRI is important - for example high CRI lighting is often used in kitchens because being able to accurately judge the color of meat is important for food safety. In robotics, having high-CRI light may be important for culinary robots, exploratory robots, or medical robots.


The image above shows the relative energy of wavelengths emitted by different light sources. link
White LEDs Due to the nature of LEDs, it’s not possible to emit across the whole visible spectrum directly. The most common method to achieve a higher quality white light is to cover a blue LED with a phosphor. The phosphor will absorb light from the blue LED and re-emit it at different wavelengths. This is frequently done for LED lights used for residential and commercial lighting (e.g., the lights you put in light fixtures). The bottom right spectral graph in the image above represents this combination.
Unfortunately, there is no single measurement used to describe the intensity of light. Instead, there are 3 key quantities that are measured and which you can use for selecting a light source.
- Lumens: This represents all the visible light given off, in any direction
- Candela: This represents the amount of light given off in a specific direction (for example, a candle and a laser pointer can give off the same number of lumens, but the laser pointer’s candela will be much higher because the light is focused in a specific direction)
- Lux: this i s a measurement of illumination intensity on a surface equal to 1 Lumen per square meter.
Depending on the situation, a different metric may be more relevant.
While the small form factor of LEDs is one of their greatest strengths, it can also be a major downside from an aesthetic perspective. LEDs appear as a single point of light, which is useful in some contexts, but is often not desired. Often, more continuous-appearing lighting is desired. This is achieved by using a diffuser, which scatters light rays in different directions, giving a more continuous appearance. From an implementation standpoint just about anything can act as a diffuser. Putting a piece of paper in front of your phone light is a great example to show how diffusers work. However, from an engineering perspective a diffuser which is optimal in some respect is often desired. Engineers and designers often want to control the diffusion, and this is possible through several means.
Increasing the distance between the LED and the diffuser will increase the apparent diffusion. A rough surface finish on a clear material is a very common diffuser. A common example of this is frosted glass. By changing the roughness of the surface, the level of diffusion can be adjusted. Some materials are specifically engineered for diffusion, for example by imbedding them with particles which scatter light. These materials can achieve very high efficiency as measured by the amount of light that passes through the material. The Makrolon DQ line of plastics is one example of a material engineered for diffusion (https://solutions.covestro.com/en/highlights/articles/theme/applications/lighting-and-led). Silicon is another commonly used diffuser for LED strips, since it is flexible.

One common problem encountered in robotics and other electronics is that putting an LED chip where you want the light to appear is often inconvenient. A technique called light piping allows you to put LEDs in one location, while “piping” the light to another location to be shown. One example of why this is useful: you can put an indicator light on the outside of an enclosure while keeping the LED for that light on a main PCB. This can considerably simplify the electrical setup.
To do so, light pipes connect the LED to wherever the light is meant to be shown. Light pipes are often made of plastics like Polycarbonate (PC) or Acrylic (PMMA). They take advantage of total internal reflection - a phenomenon where all the light is kept boucing within the light pipe as long as it hits the walls at certain angles. This article provides a good overview of how it works: https://www.bivar.com/resources/blog/the-science-of-light-pipes-reflection-refraction-and-diffusion/
LEDs can be bought as single chips. This is the most straightforward. They can come as surface mount or through-hole components.
LEDs can be bought pre-assembled on strips. This is useful for lighting larger areas. Ofen, these strips are flexible, allowing them to conform to a desired shape. One of the key metrics for LED strips is the pitch, which is the distance between pixels. Common densities are 144, 60, and 30 LEDs/meter.
One dimension up from strips, LEDs can come pre-assembled in matrices. These are often used for conveying information. They are good for viewing at a distance and outside of robotics are commonly used on buses, trains, and megatron displays. They’re generally cheaper than LCD or LED displays, with the drawback that they have a much lower resolution. Pitch is usually in the range of 2mm to 10mm.
Other form factors: LED rings are fairly common and can be useful for some illumination and communication tasks. Other form factors (including custom shapes) can be found and purchased online.
LED brightness is most often controlled using pulse-width modulation. This means that the voltage to the LED is rapidly changed between an on voltage and off - turning on and off the LED. If this is done quickly enough a human won’t notice. The percentage of time the LED is on (duty cycle) is proportional to the brightness. If this is done to each R, G, and B LED individually, colors can be adjusted. Typically, an LED chip will take care of the PWM for you. PWM speed is usually in the hundreds or thousands of Hertz.
While there are many different LED chips, one of the most common is the 5V WS2812B which integrated the control circuitry with the emitter (The SK6812 is a slightly newer, but almost equivalent chip) and uses a custom timing protocol for communication. These are commonly sold as individual pixels and chained together on LED strips. To set the LED, 3 8-bit integers are used to set the red, green, and blue levels individually.
There are many software packages that abstract away interfacing the LEDs directly, and allow you to set high-level directions (e.g., set all LEDs to red, show a rainbow, flash on-and-off), as well as write custom light patterns. Adafruit’s has a very good guide for using their library: https://learn.adafruit.com/adafruit-neopixel-uberguide Note: their library works for any WS2812 or SK6812 chips, you don’t have to buy Adafruit's neopixels. It also works with WS2811 (which uses 12V instead of 5V).
While WS2812 is one of the most common and useful things to learn, there are other chips and control methods. APA102 is also common. It uses SPI, but is a little more expensive than WS2812b. LED matrices often have supplier-supplied software for interfacing with their products.
While LEDs are a very efficient light source, they can still consume a lot of power, especially when you use a lot of them. For example, a 1 meter length strip of WS2812 LEDs from ipixelleds.com (https://www.ipixelleds.com/more.php?id=389) with a density of 60 LEDs/meter uses 14.4W at max power.
Along with consuming a lot of power, LEDs produce a lot of heat. While this may or may not be a problem depending on the application, heat sinks are often used to dissipate heat for high-power LEDs.
LEDs generally come in standard electric voltage levels: 5V, 12V, and 24V. One note of caution is that a drop in voltage will affect the color, in addition to the brightness, of the LED. LEDs tend to skew red during voltage drop. This is often a problem when chaining a lot of LEDs together using 5V - it’s common to use higher voltages for larger numbers of LEDs to avoid this issue.
In summary, some key things to consider when selecting LEDs for purchase are as follows:
- Color: While RGB is standard, there are many different colors and combinations you can buy, for example, single color, dual color, white, dual white (warm and cool temperature), RGB+White, ultraviolet, and more. Double check you are getting what you want!
- Voltage
- Power
- Brightness: Lumens and/or candela
- Control method
- In the case of LED strips and matrices: individual addressability. Sometimes each pixel color can be set individually, other times you can only set one color for the strip or can only set color for groups of pixels (multiple pixels are attached to a single control chip)
- Density (aka pixel pitch)
- CRI (color render index)
- Diffusers: some LED suppliers will sell diffusing covers with their LED. This is common especially for LED strips. In addition to diffusing light, they can increase the IP (ingress protection) rating.
- Mounting: Pay attention to how the LED is mounted: For single LEDs through hole, surface mount, and for larger LEDs screw mounting is common. Many LED strips come with an adhesive backing. LED panels frequently come with screw holes for mounting.
LED lighting is becoming increasingly important for robotics and can play a crucial role in the success of a robot. LED lighting can be used for illumination, communication, and aesthetics, among other uses. This article covers major topics in implementing LED lighting on robots. LED lighting crosses multiple sub-disciplines, and a summary of some key considerations is covered above.
- Adafruit has a strong guide for using their neopixel library for WS2812 compatable LEDs: https://learn.adafruit.com/adafruit-neopixel-uberguide Note: their library works for any WS2812 or SK6812 chips, you don’t have to buy Adafruit's neopixels. It also works with WS2811 (which uses 12V instead of 5V)
- A summary of total internal reflectance as relevant to light pipes: https://www.bivar.com/resources/blog/the-science-of-light-pipes-reflection-refraction-and-diffusion/
- Overview of how LEDs work: https://electronics.howstuffworks.com/led.htm