SageMaker
The steps below assume that you have an AWS account and access to Amazon SageMaker Studio. The entire one-time setup process may take up to 15 minutes.
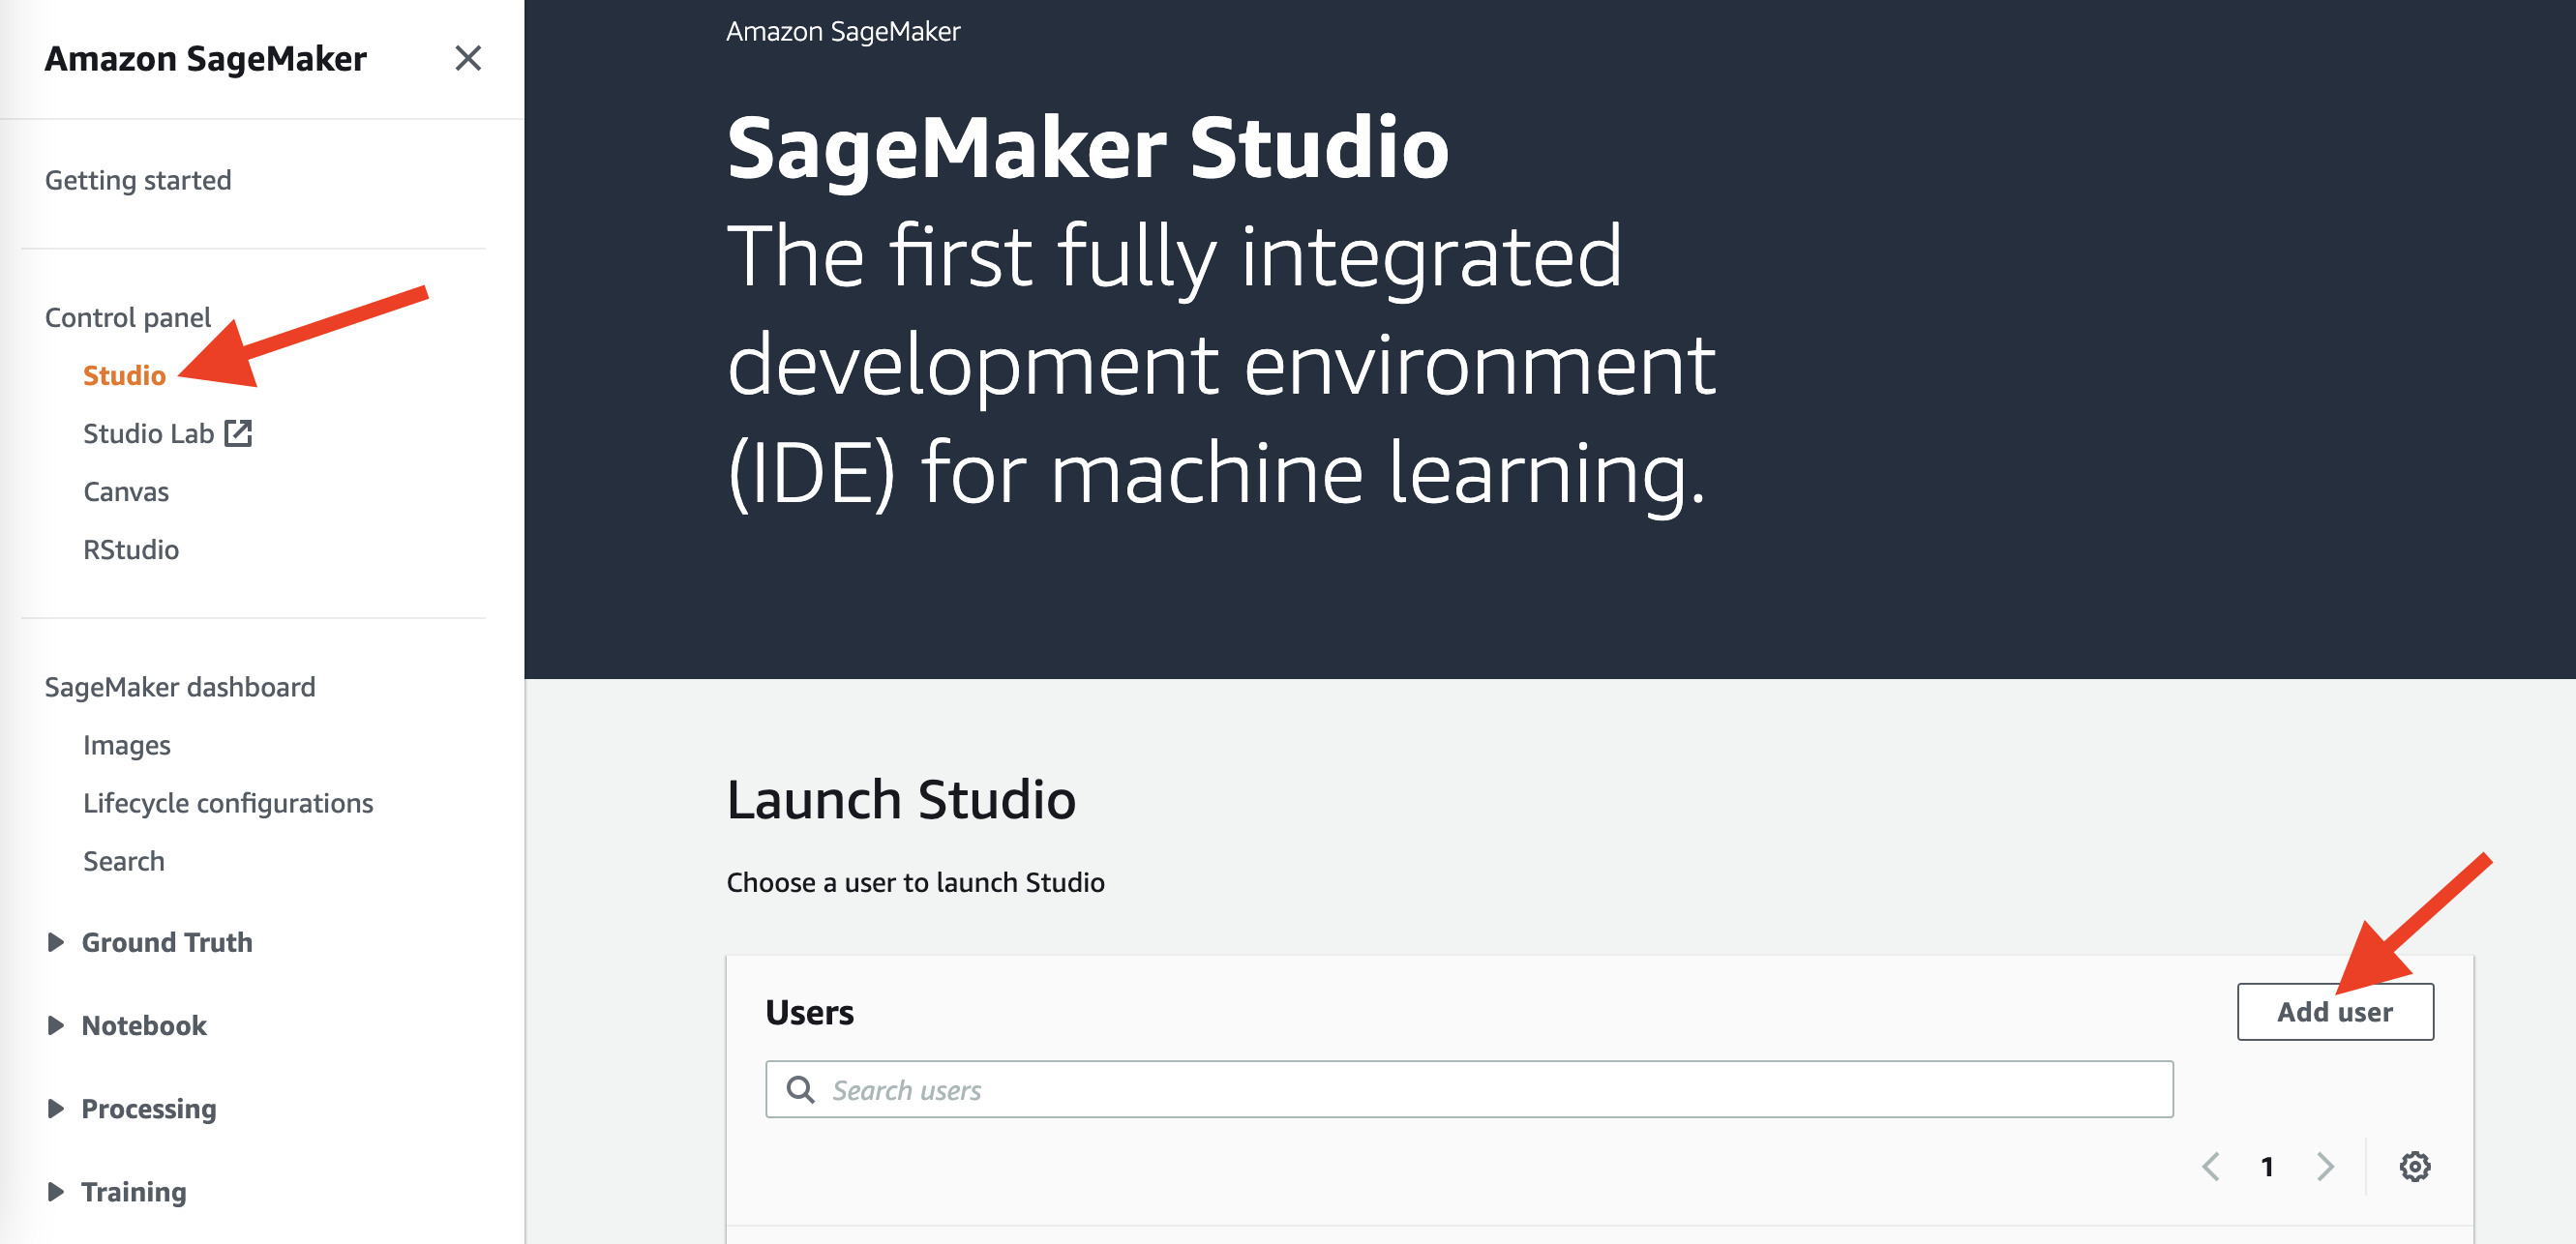
- Log into your Amazon SageMaker Studio Environment and
Add user
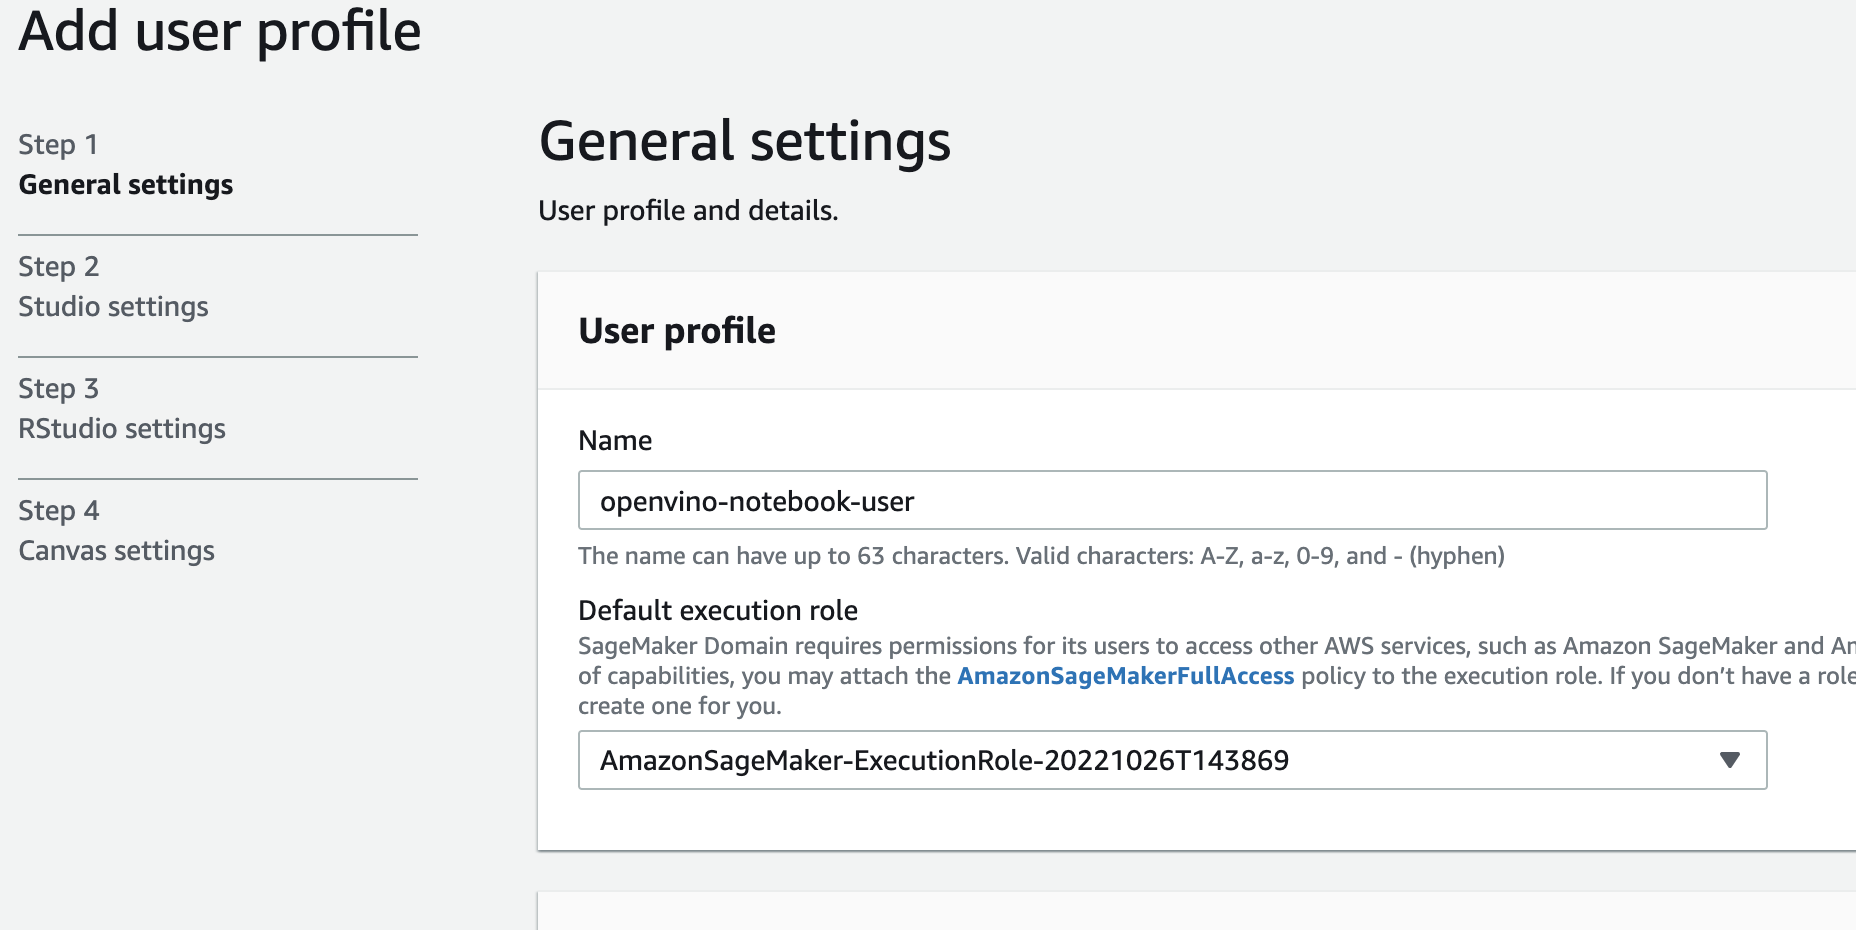
- Choose desired user profile name
- Choose Jupyter Lab version 3.0
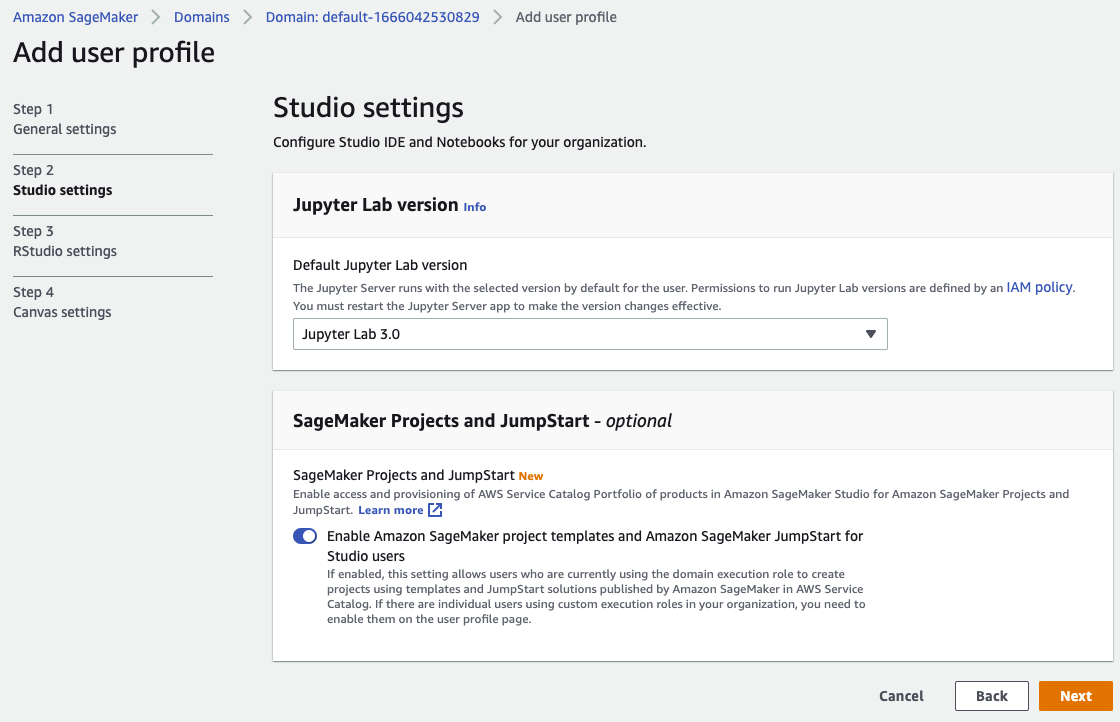
- Choose the remaining default setting and click Submit to Add user.
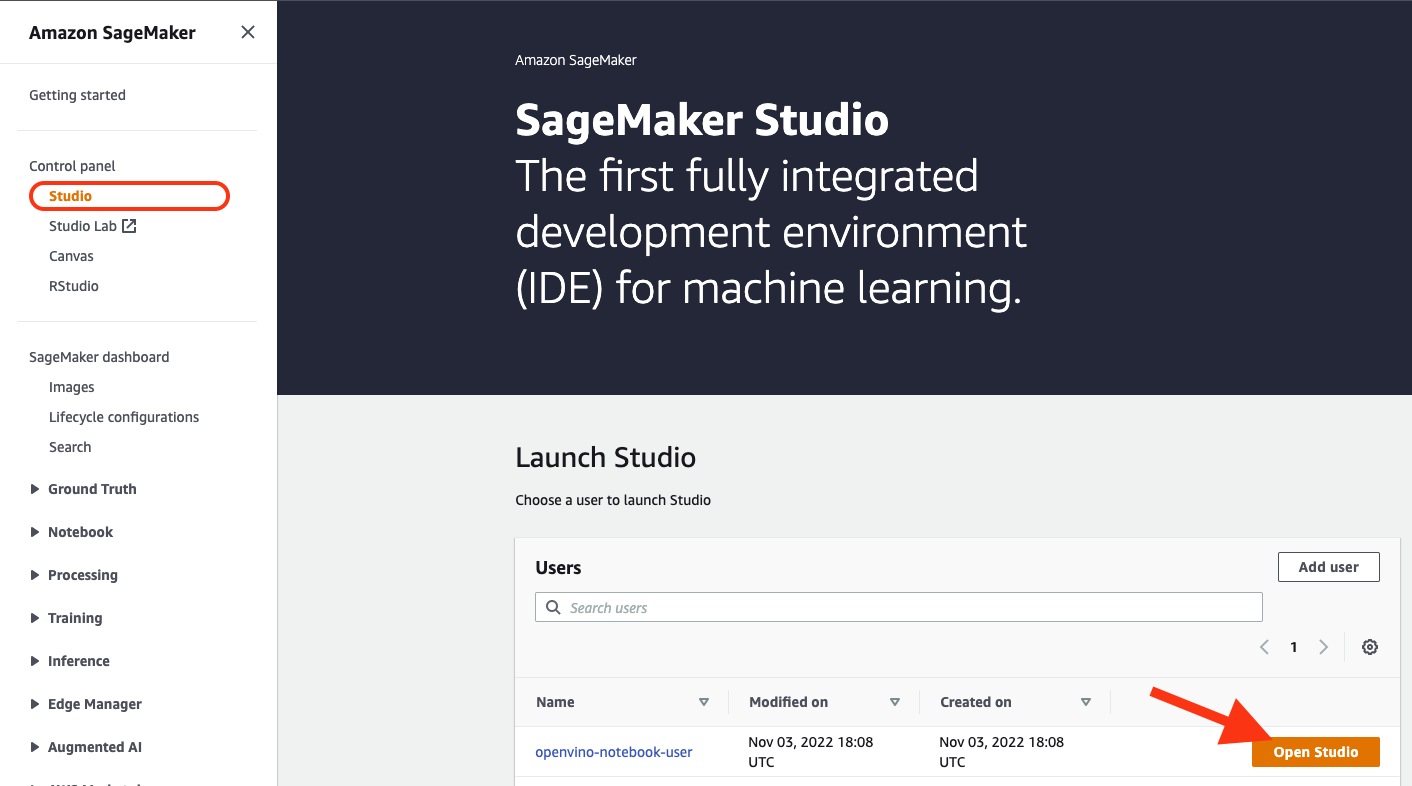
- Click "Open Studio" to Launch the Amazon SageMaker Studio environment.
Note: The Amazon SageMaker free tier usage per month for the first 2 months is 250 hours of ml.t3.medium instance on Studio notebook. In this example, we are using an ml.t3.medium instance.
- Allow a couple of minutes for your environment to spin up. You should see the following loading screen:
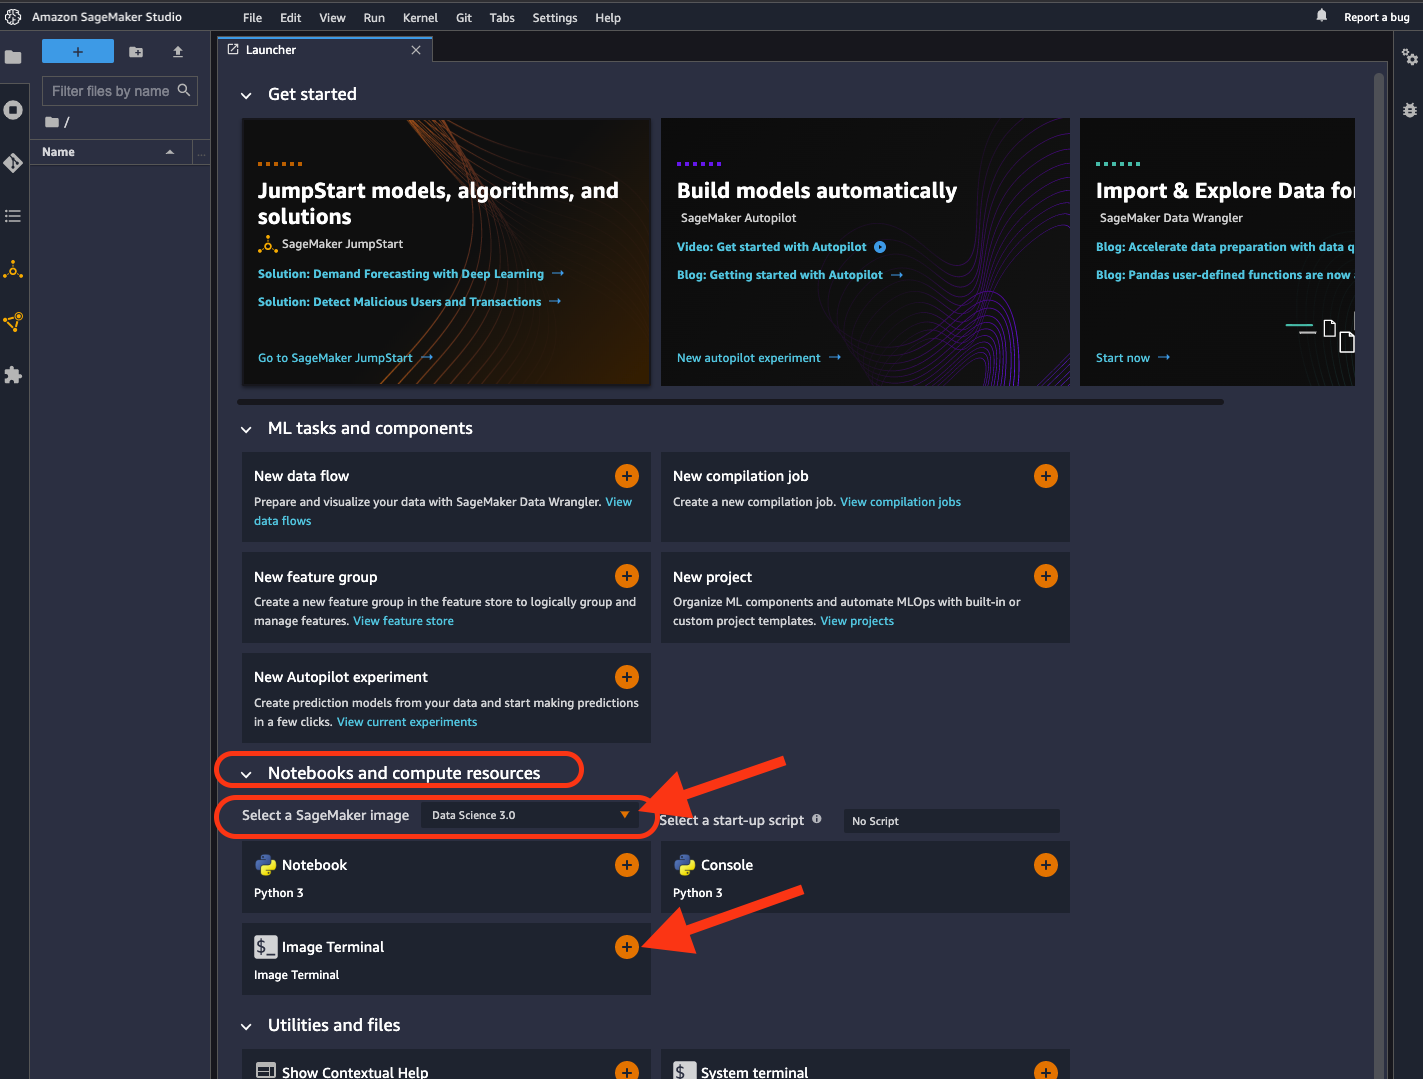
- Then, Choose
Data Science 3.0in "select a SageMaker image" drop-down under Notebooks and compute resources - Then, Click on
**+**onImage Terminalto open a terminal session:
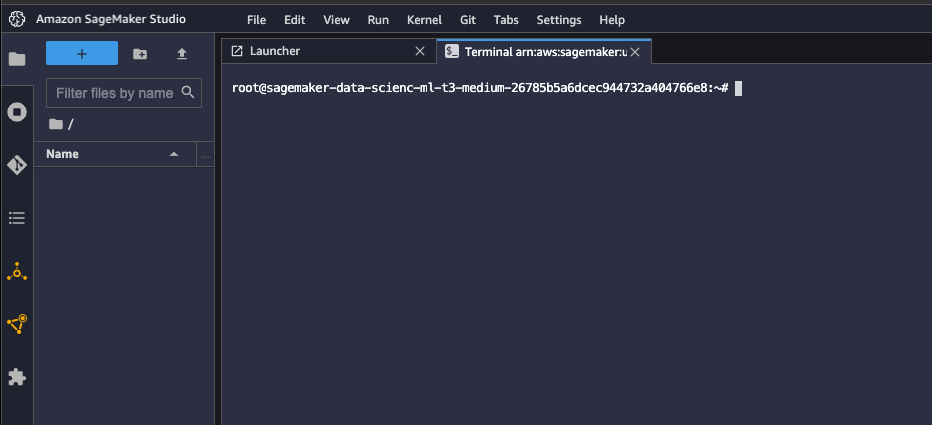
- Inside the terminal, follow the steps below.
apt update
apt install build-essential -y
apt install libpython3.9-dev -y
apt install libgl1-mesa-glx -yconda create --name openvino_env python=3.9
conda activate openvino_env
conda install ipykernel
set PATH="/anaconda/envs/openvino_env/bin;%PATH%"git clone https://github.com/openvinotoolkit/openvino_notebooks.git
cd openvino_notebooks
# Install OpenVINO and OpenVINO notebook Requirements
python -m pip install --upgrade pip
pip install -r requirements.txt- To run the notebooks, click on the top level ‘openvino_notebooks’ folder and navigate to your example:

- Choose Image -
Data Science 3.0, Kernel -Python [conda env:openvino_env], Instance type - your desired compute instance.
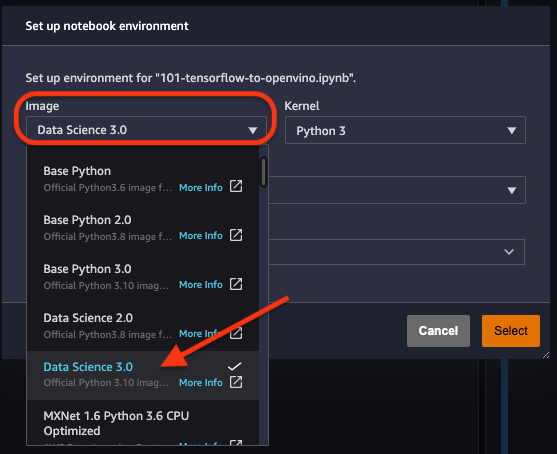
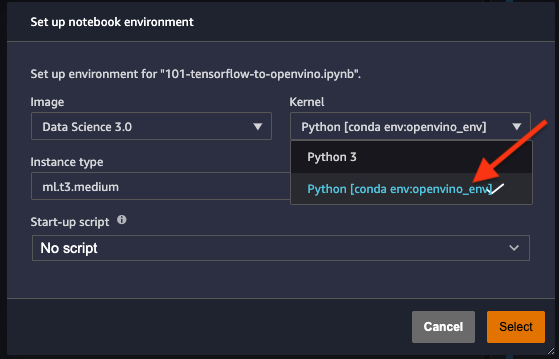

Note: Please also ensure you use the Python [conda env:openvino_env] environment (not Python 3).
- Next, run the cells of the notebook. Try other notebooks to explore OpenVINO features and examples !!