WUProxy Windows XP
Configuring Windows XP for the use of WUProxy
Note: I am using Windows POSReady 2009 in evaluation mode, but the steps also works under Windows XP or Windows Server 2003.
- You can install the Windows Update Client V3.0 if your current client is too old. You can download it here:
[Windows Update Agent V3.0]
[Windows Update Agent V3.0 (X64)]
[Windows Update Agent V3.0 (IA64)]

- Gather the certificate of the proxy which can be found in the folder iexpress_installer, itself located in the folder certs which is at the root of the proxy.
- You need to run MMC.
- Inside of MMC, do Console and Add/Remove Snap-In
- Inside of the window, press Add, choose Certificates and then Add again.
- Check Computer account and then leave all the setting as default.
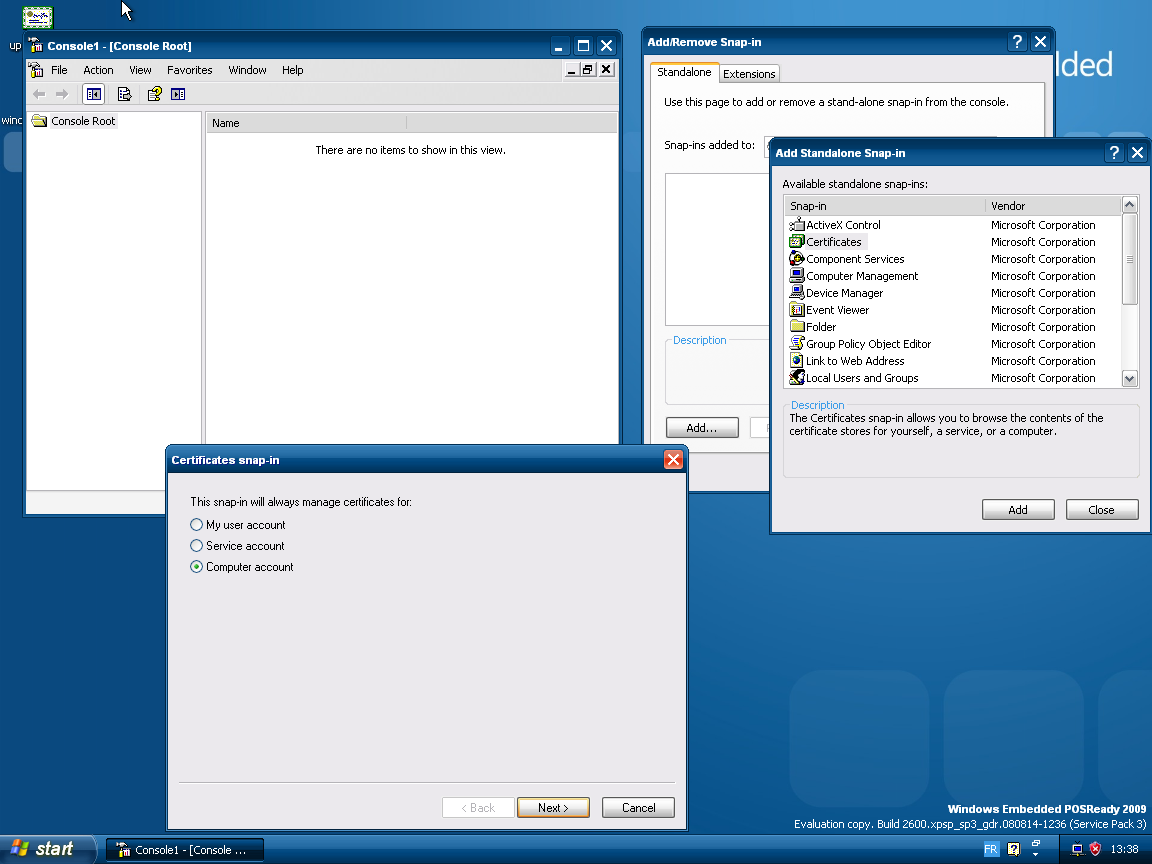
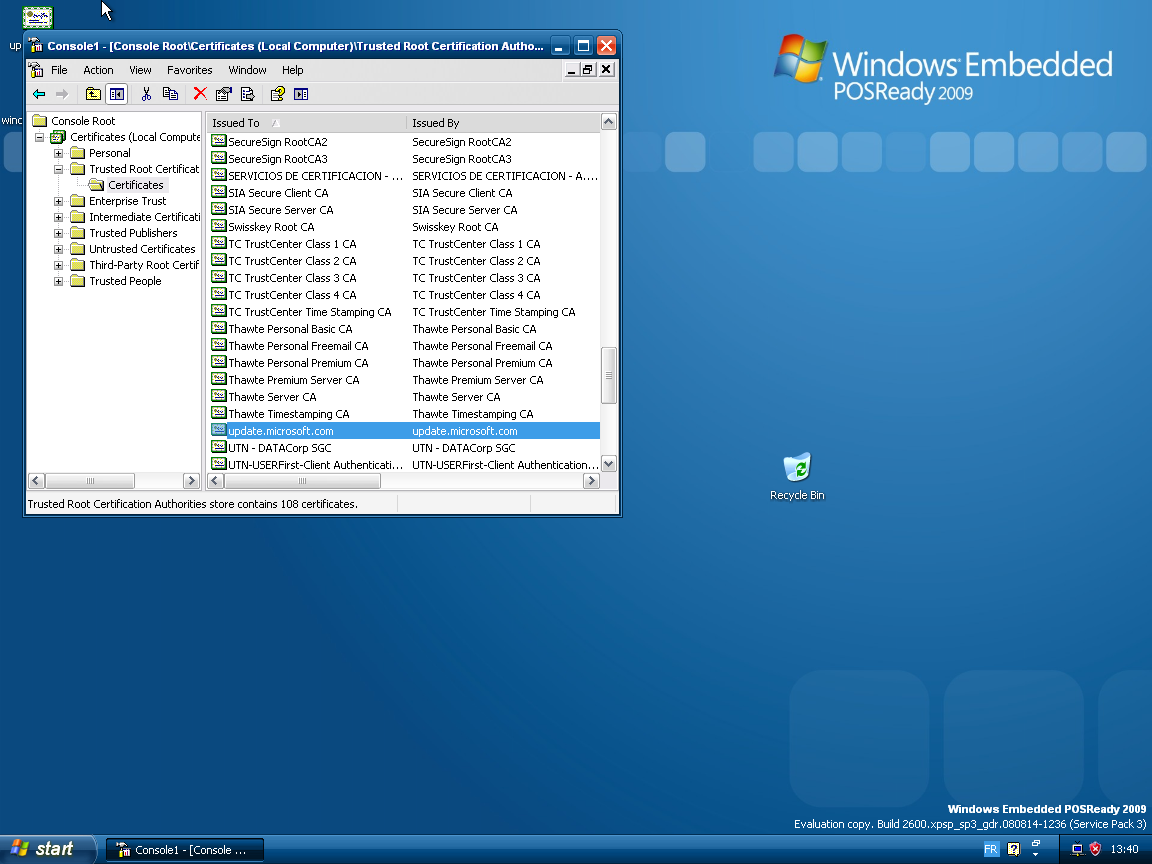
- Once the Snap-In is opened, go to the tree, expand Certificates (local computer), then Trusted Root Certification Authorities.
- You can right click on it, and press Import, choose one of the certificates.
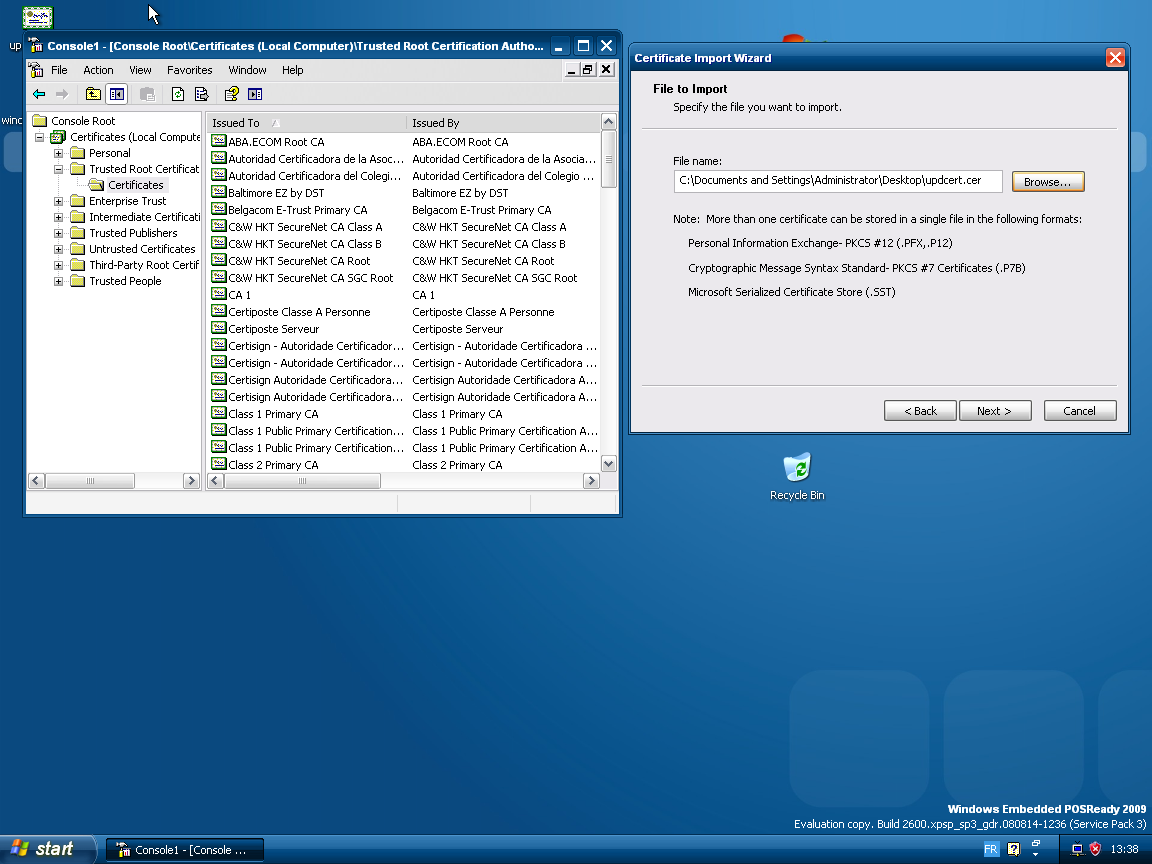
- Press next, and be sure to leave unchecked Automatically select certificate store.
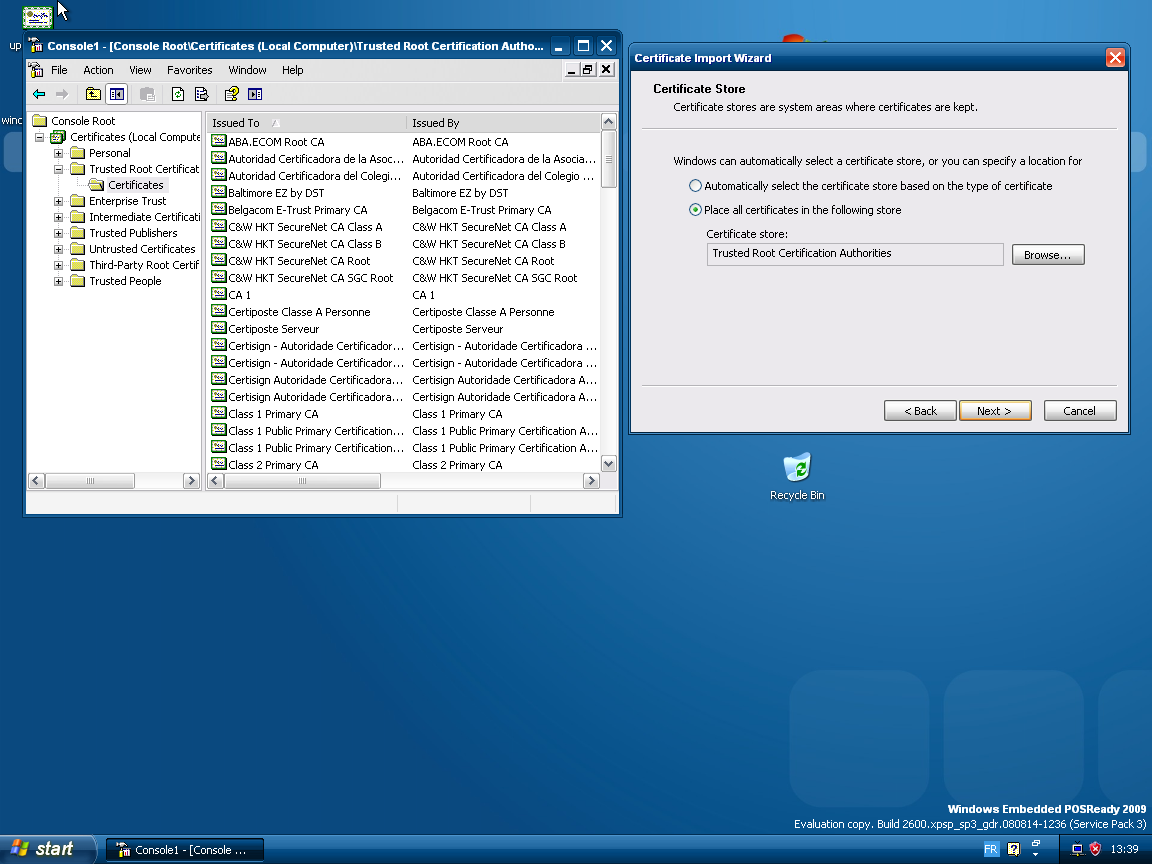
- Once it is done, ensure that your certificate appear.
- You now need to setup proxy settings. Open Internet Explorer, go to Tools and Internet Options.
- Choose tab Connections and then LAN settings.
- Check Use a proxy server.
- Go to the Advanced proxy settings, and fill the blanks for HTTP and HTTPS (the port used by the Proxy, if unchanged, is 8087, for the IP, use the IP which hosts the proxy)
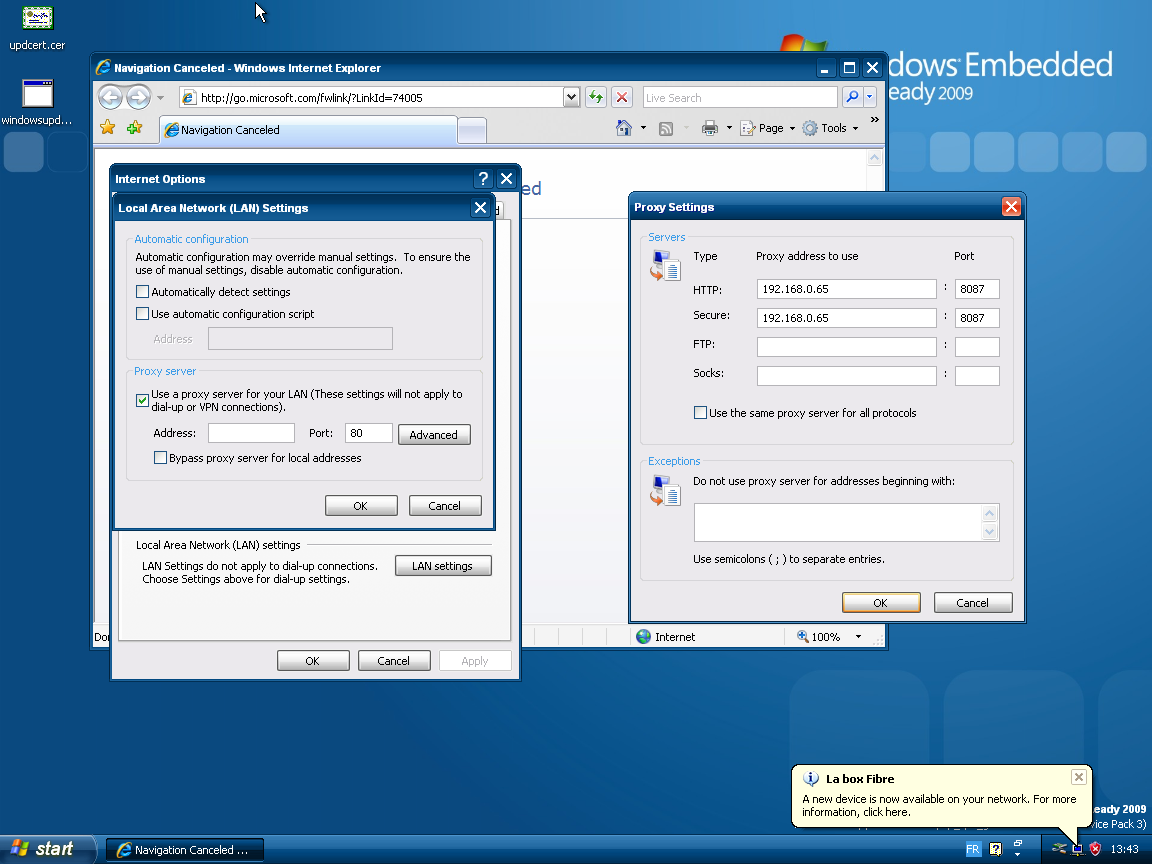
- Don't forget to apply your changes.
Note: Steps 16-21 are here because they are valid in any cases. If your computer contains proxycfg, prefer using it rather than the registry method.
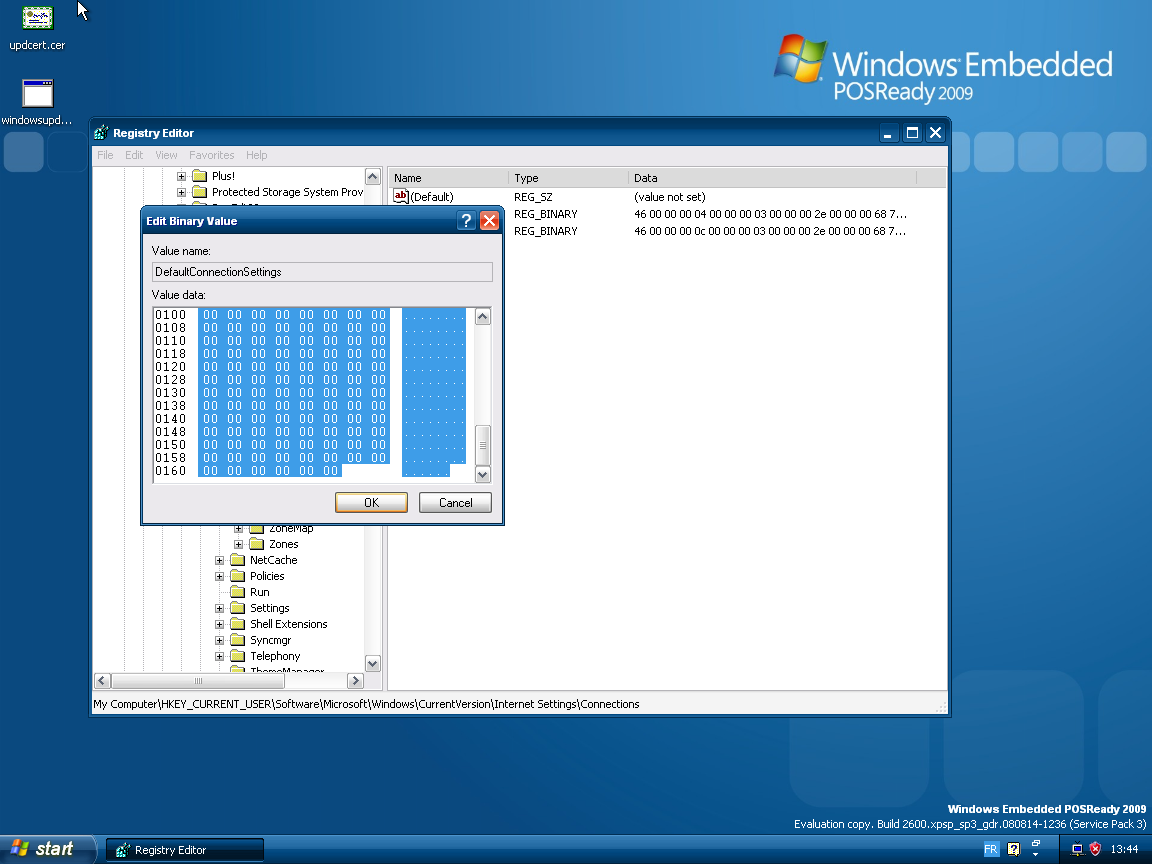
With proxycfg, you should only do:proxycfg -p "http=192.168.0.65:8087 https=192.168.0.65:8087"(don't forget to replace the IP by the proxy IP) - Open regedit.
- Navigate to HKCU\Software\Microsoft\Windows\CurrentVersion\Internet Settings\Connections and open the binary value called DefaultConnectionSettings. Copy its content.
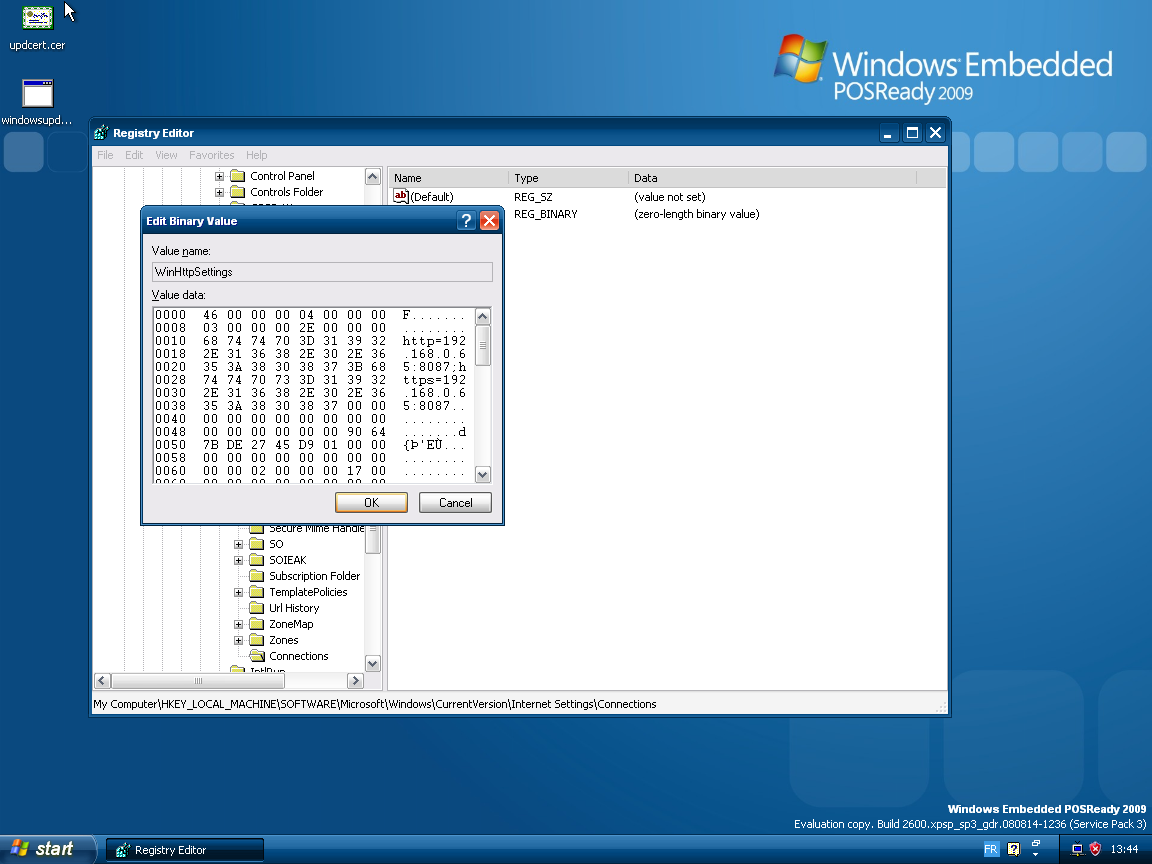
- Now navigate to HKLM\Software\Microsoft\Windows\CurrentVersion\Internet Settings
- If not existing, you will have to create the Connections key.
- Now create the binary value WinHttpSettings, and paste the content copied earlier.
- Once this is done, you need to restart Windows XP.
Some screenshots of Windows Update under Windows POSReady 2009.
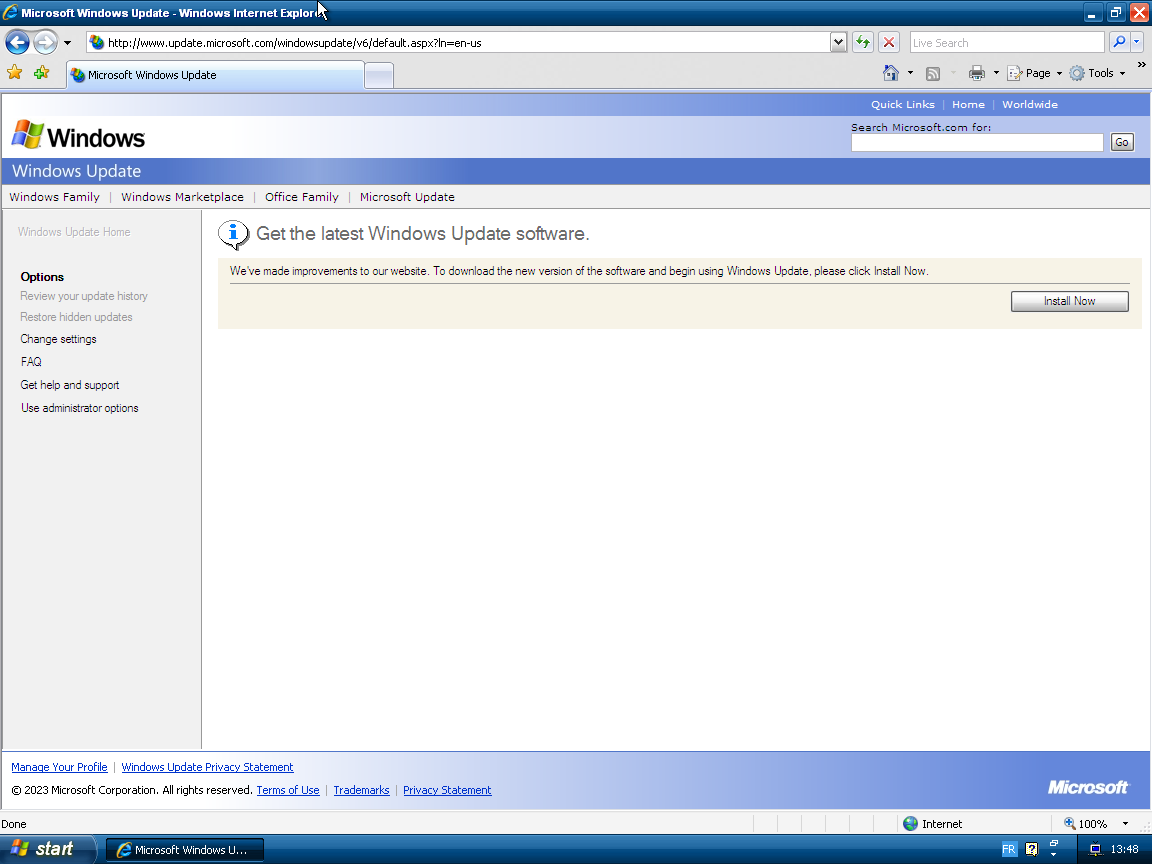
Windows Update is saying that you must install some things before!
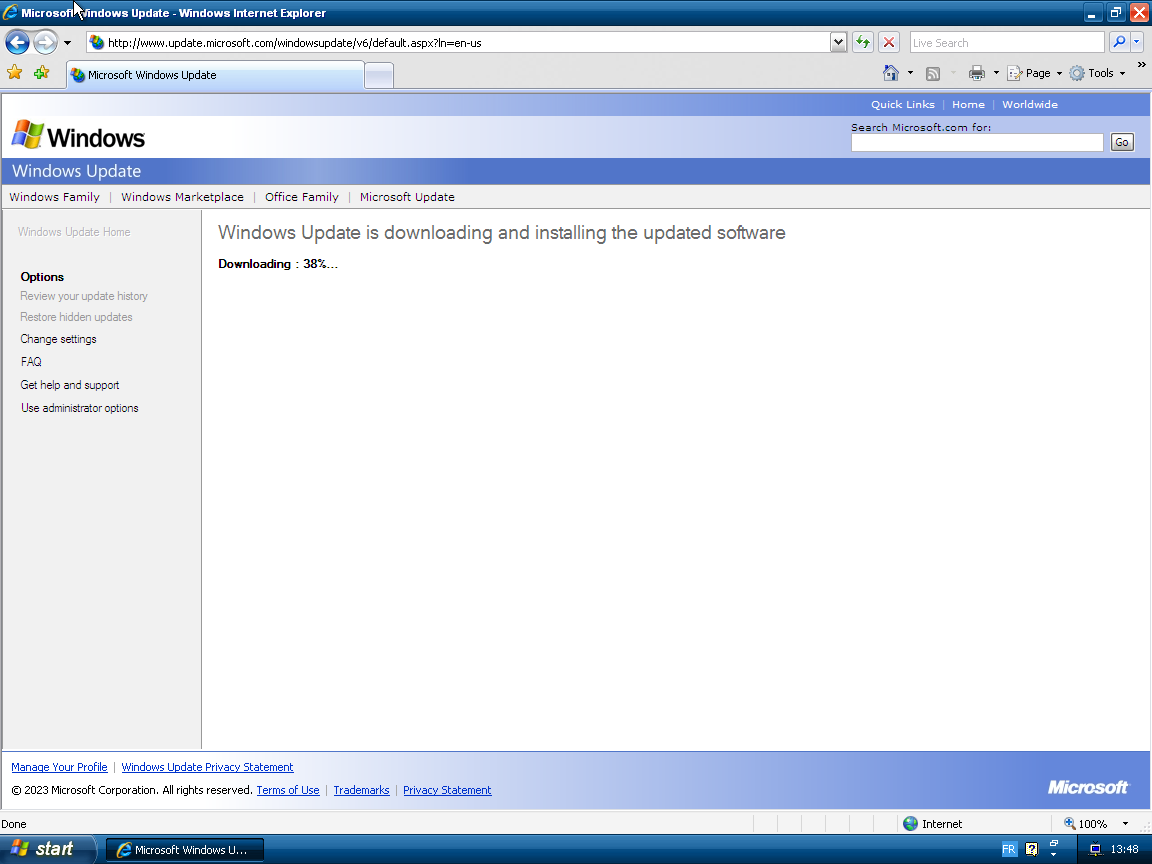
Windows Update is downloading the required up-to-date components...
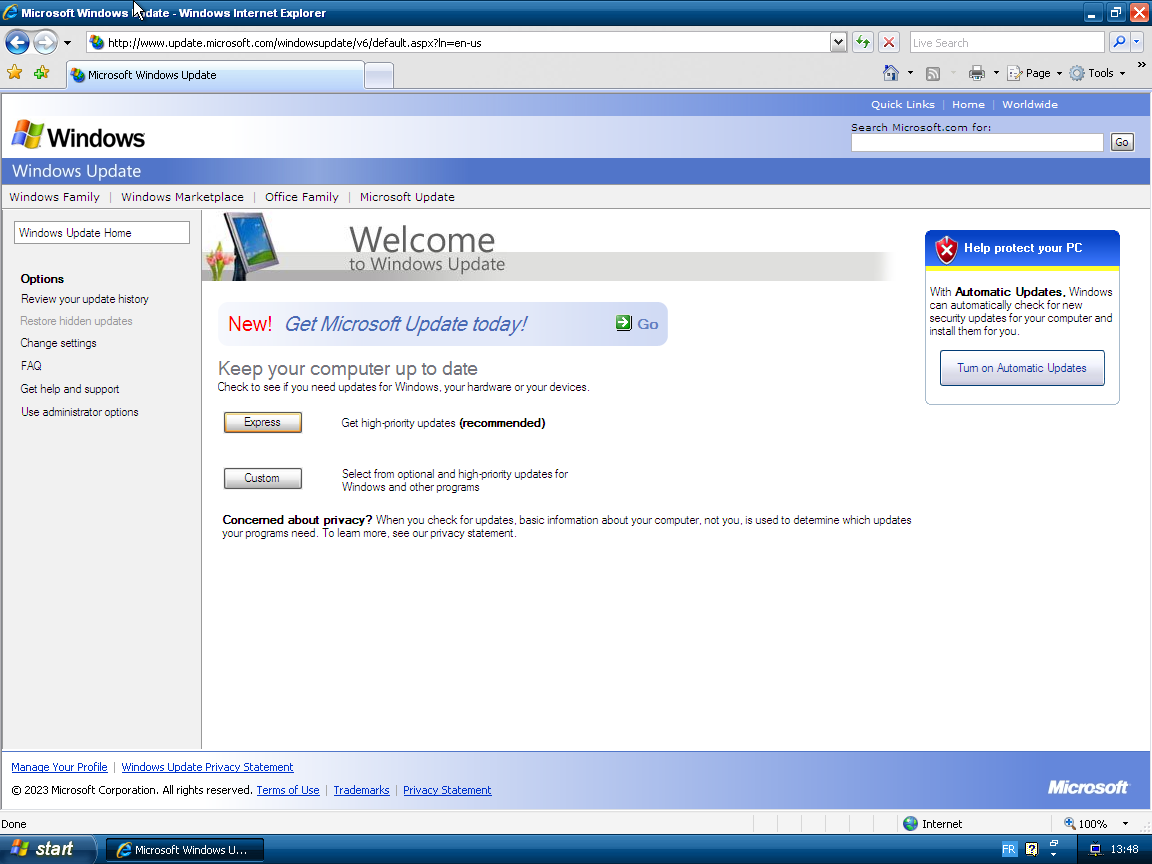
Windows Update is welcoming you !
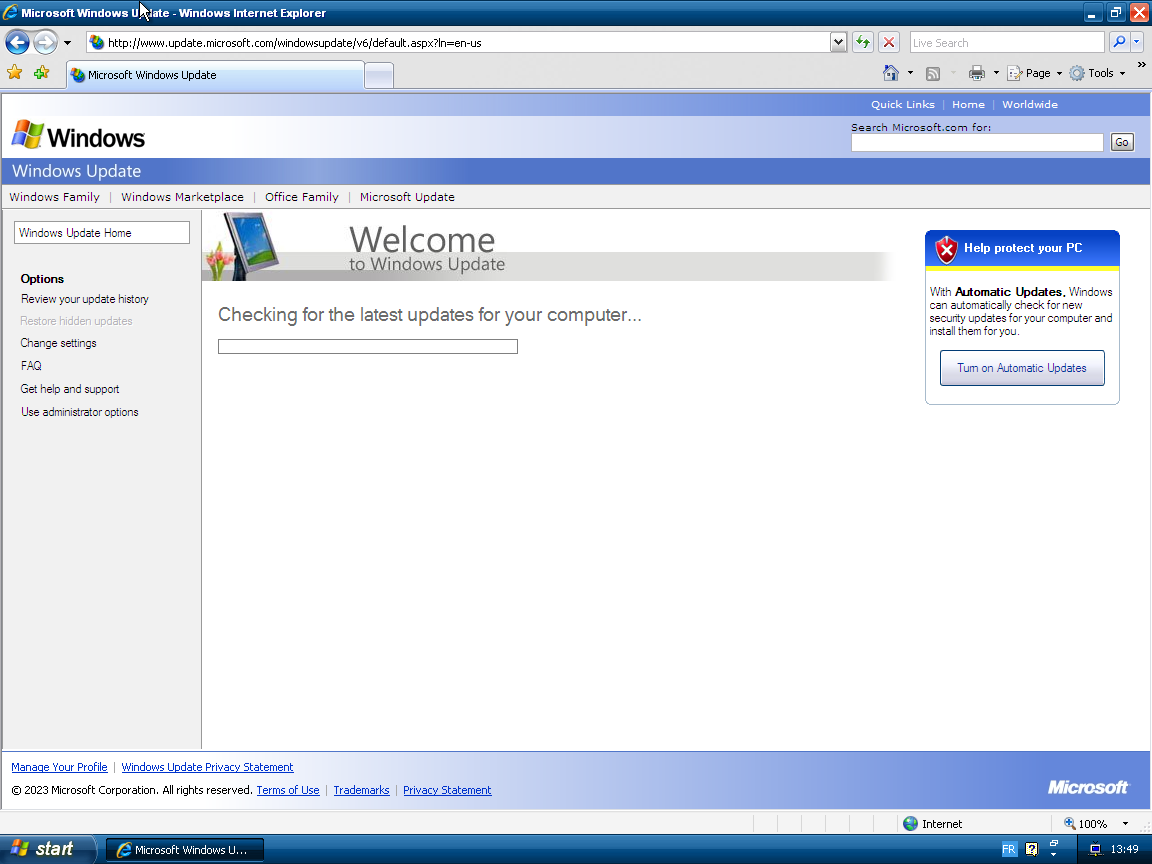
Windows Update is searching for some updates...
Windows Update has found updates !

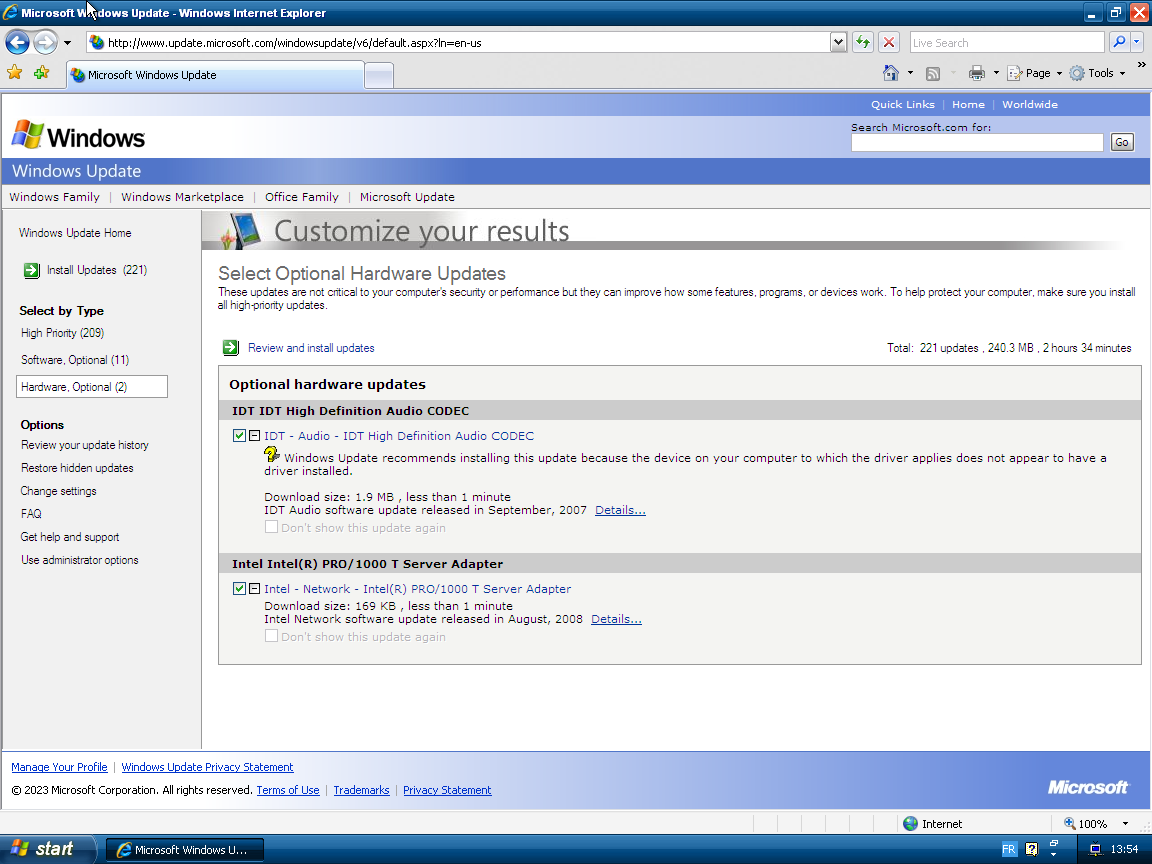
Windows Update has found hardware updates !
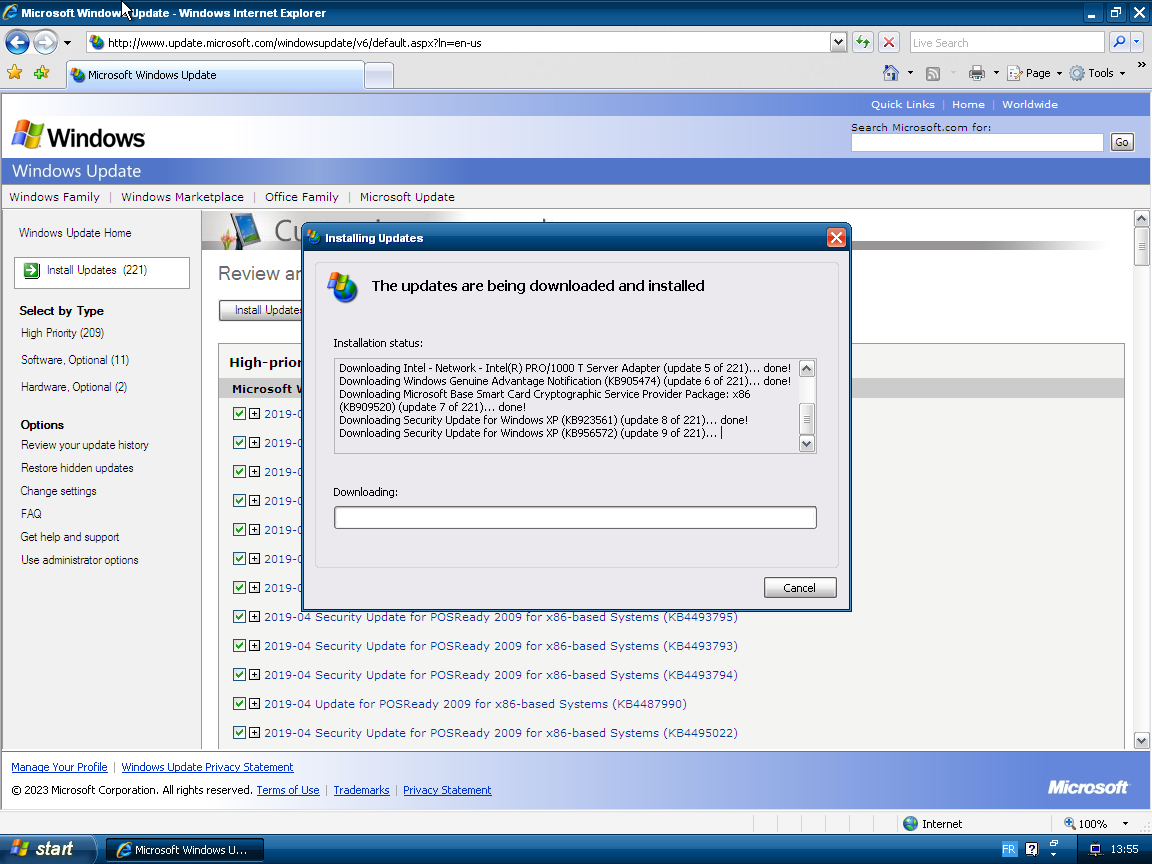
Windows Update is downloading found updates...
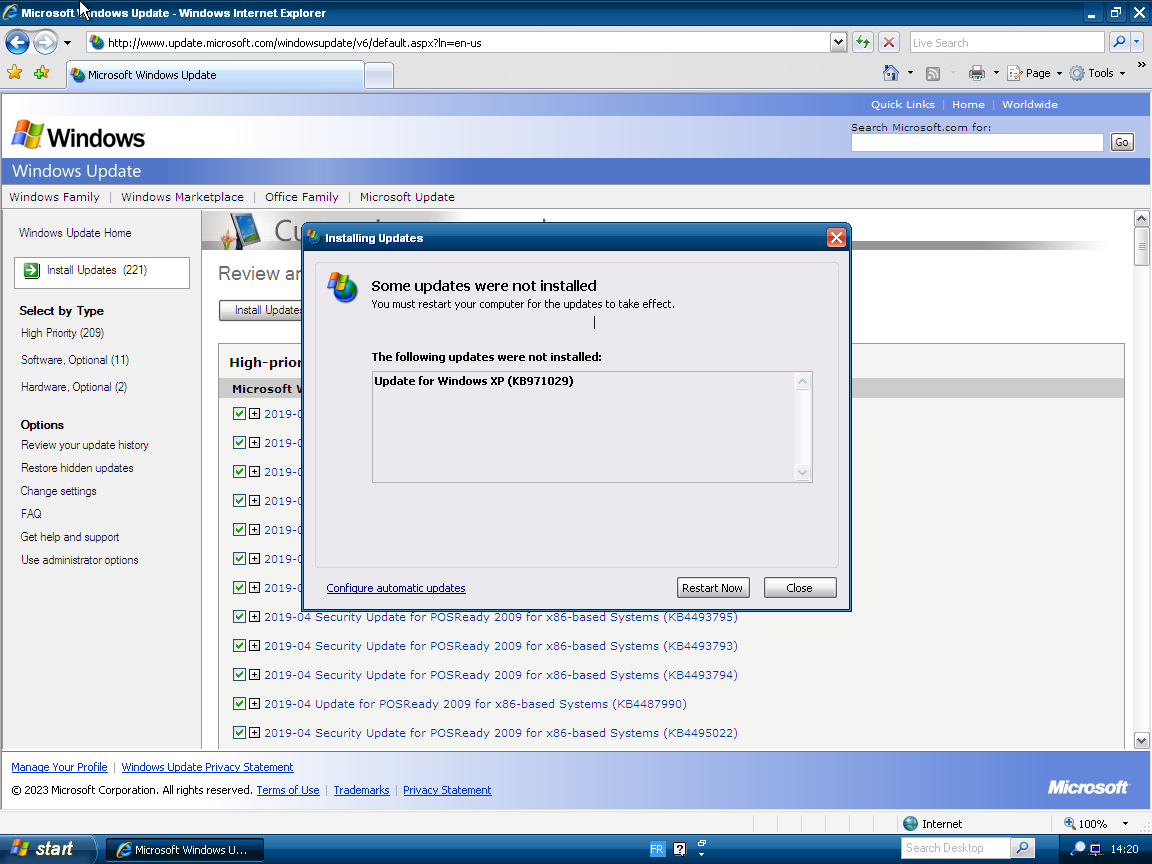
Windows Update has installed updates and is waiting for you to reboot.