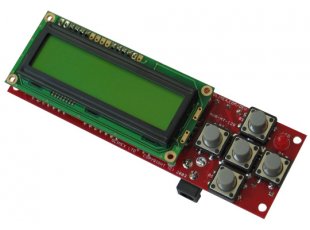
We have several Olimex AVR-MT128 development boards that can be used for learning basics of embedded programming. These document provide instructions on how to integrate it with Arduino IDE.
-
Download the Arduino IDE a. tested version is 1.8.9, Zip file for non admin installation
-
Extract all, navigate: ~\arduino-1.8.9-windows\arduino-1.8.9 and start “arduino.exe”
-
Add library: (https://github.com/MCUdude/MegaCore) a. Open the File>Preferences b. Enter the following url in Additional Board Manager URLs: https://mcudude.github.io/MegaCore/package_MCUdude_MegaCore_index.json c. Open the Tools>Board>Boards Manager… d. Wait for the platform indexes to finish downloading e. Scroll until you see the MegaCore by MCUdude entry and click on it f. Click Install g. After installation is complete, close the Boards Manager Window
-
Close Arduino IDE
-
Add Programmer: a. Navigate: ~\arduino-1.8.9-windows \arduino-1.8.9\hardware\arduino\avr b. Open: programmers.txt c. add to the very end:
jtag1.name=Olimex JTAG
jtag1.communication=serial
jtag1.protocol=jtag1
jtag1.program.protocol=jtag1
jtag1.program.tool=avrdude
jtag1.program.extra_params=-P{serial.port}
- Close all and open arduino.exe a. From Tools>Boards select: ATmega128 b. From Tools>Bootloader select: No Bootloader c. From Tools>Clock select: External 16 MHz d. From Tools>BOD select: BOD Disabled e. From Tools>Compiler LTO: select: LTO Disabled f. Connect JTAG and Olimex board and power the board g. From Tools>Port select: the com “x”-port your JTAG is connected to h. From Tools>Programmer: select: Olimex JTAG
- Check the pinorder on megacore documentation vs Olimex documentation a. Olimex link: https://www.olimex.com/Products/AVR/Development/AVR-MT128/ b. Select AVR-MT-128 User Manual and Find schematics c. Megacore link: https://github.com/MCUdude/MegaCore d. Find MegaCore standard pinout e. For example Button 1 is PA0 of the microprocessor , B 1 in Olimex, which is 44 in your code for megacore.
Test with this code (Change this for the code in Arduino IDE window and press the arrow right in upper left corner):
// include the library code:
#include <LiquidCrystal.h>
// initialize the library by associating any needed LCD interface pin
// with the arduino pin number it is connected to
const int rs = 28, en = 30, d4 = 32, d5 = 33, d6 = 34, d7 = 35;
LiquidCrystal lcd(rs, en, d4, d5, d6, d7);
void setup() {
//Pin29 is R/W pin for LCD
  pinMode(29, OUTPUT);
  digitalWrite(29, LOW);
  // set up the LCD's number of columns and rows:
  lcd.begin(16, 2);
  // Print a message to the LCD.
  lcd.setCursor(4, 0); // top left
  lcd.print("Arduino!");
  lcd.setCursor(2, 1); // bottom left
  lcd.print("Olimex JTAG!");
  delay(1500);
}
void loop() {
  // scroll 13 positions (string length) to the left
  // to move it offscreen left:
  for (int positionCounter = 0; positionCounter < 13; positionCounter++) {
    // scroll one position left:
    lcd.scrollDisplayLeft();
    // wait a bit:
    delay(200);
  }
  // scroll 29 positions (string length + display length) to the right
  // to move it offscreen right:
  for (int positionCounter = 0; positionCounter < 29; positionCounter++) {
    // scroll one position right:
    lcd.scrollDisplayRight();
    // wait a bit:
    delay(200);
  }
  // scroll 16 positions (display length + string length) to the left
  // to move it back to center:
  for (int positionCounter = 0; positionCounter < 16; positionCounter++) {
    // scroll one position left:
    lcd.scrollDisplayLeft();
    // wait a bit:
    delay(200);
  }
  // delay at the end of the full loop:
  delay(1500);
}