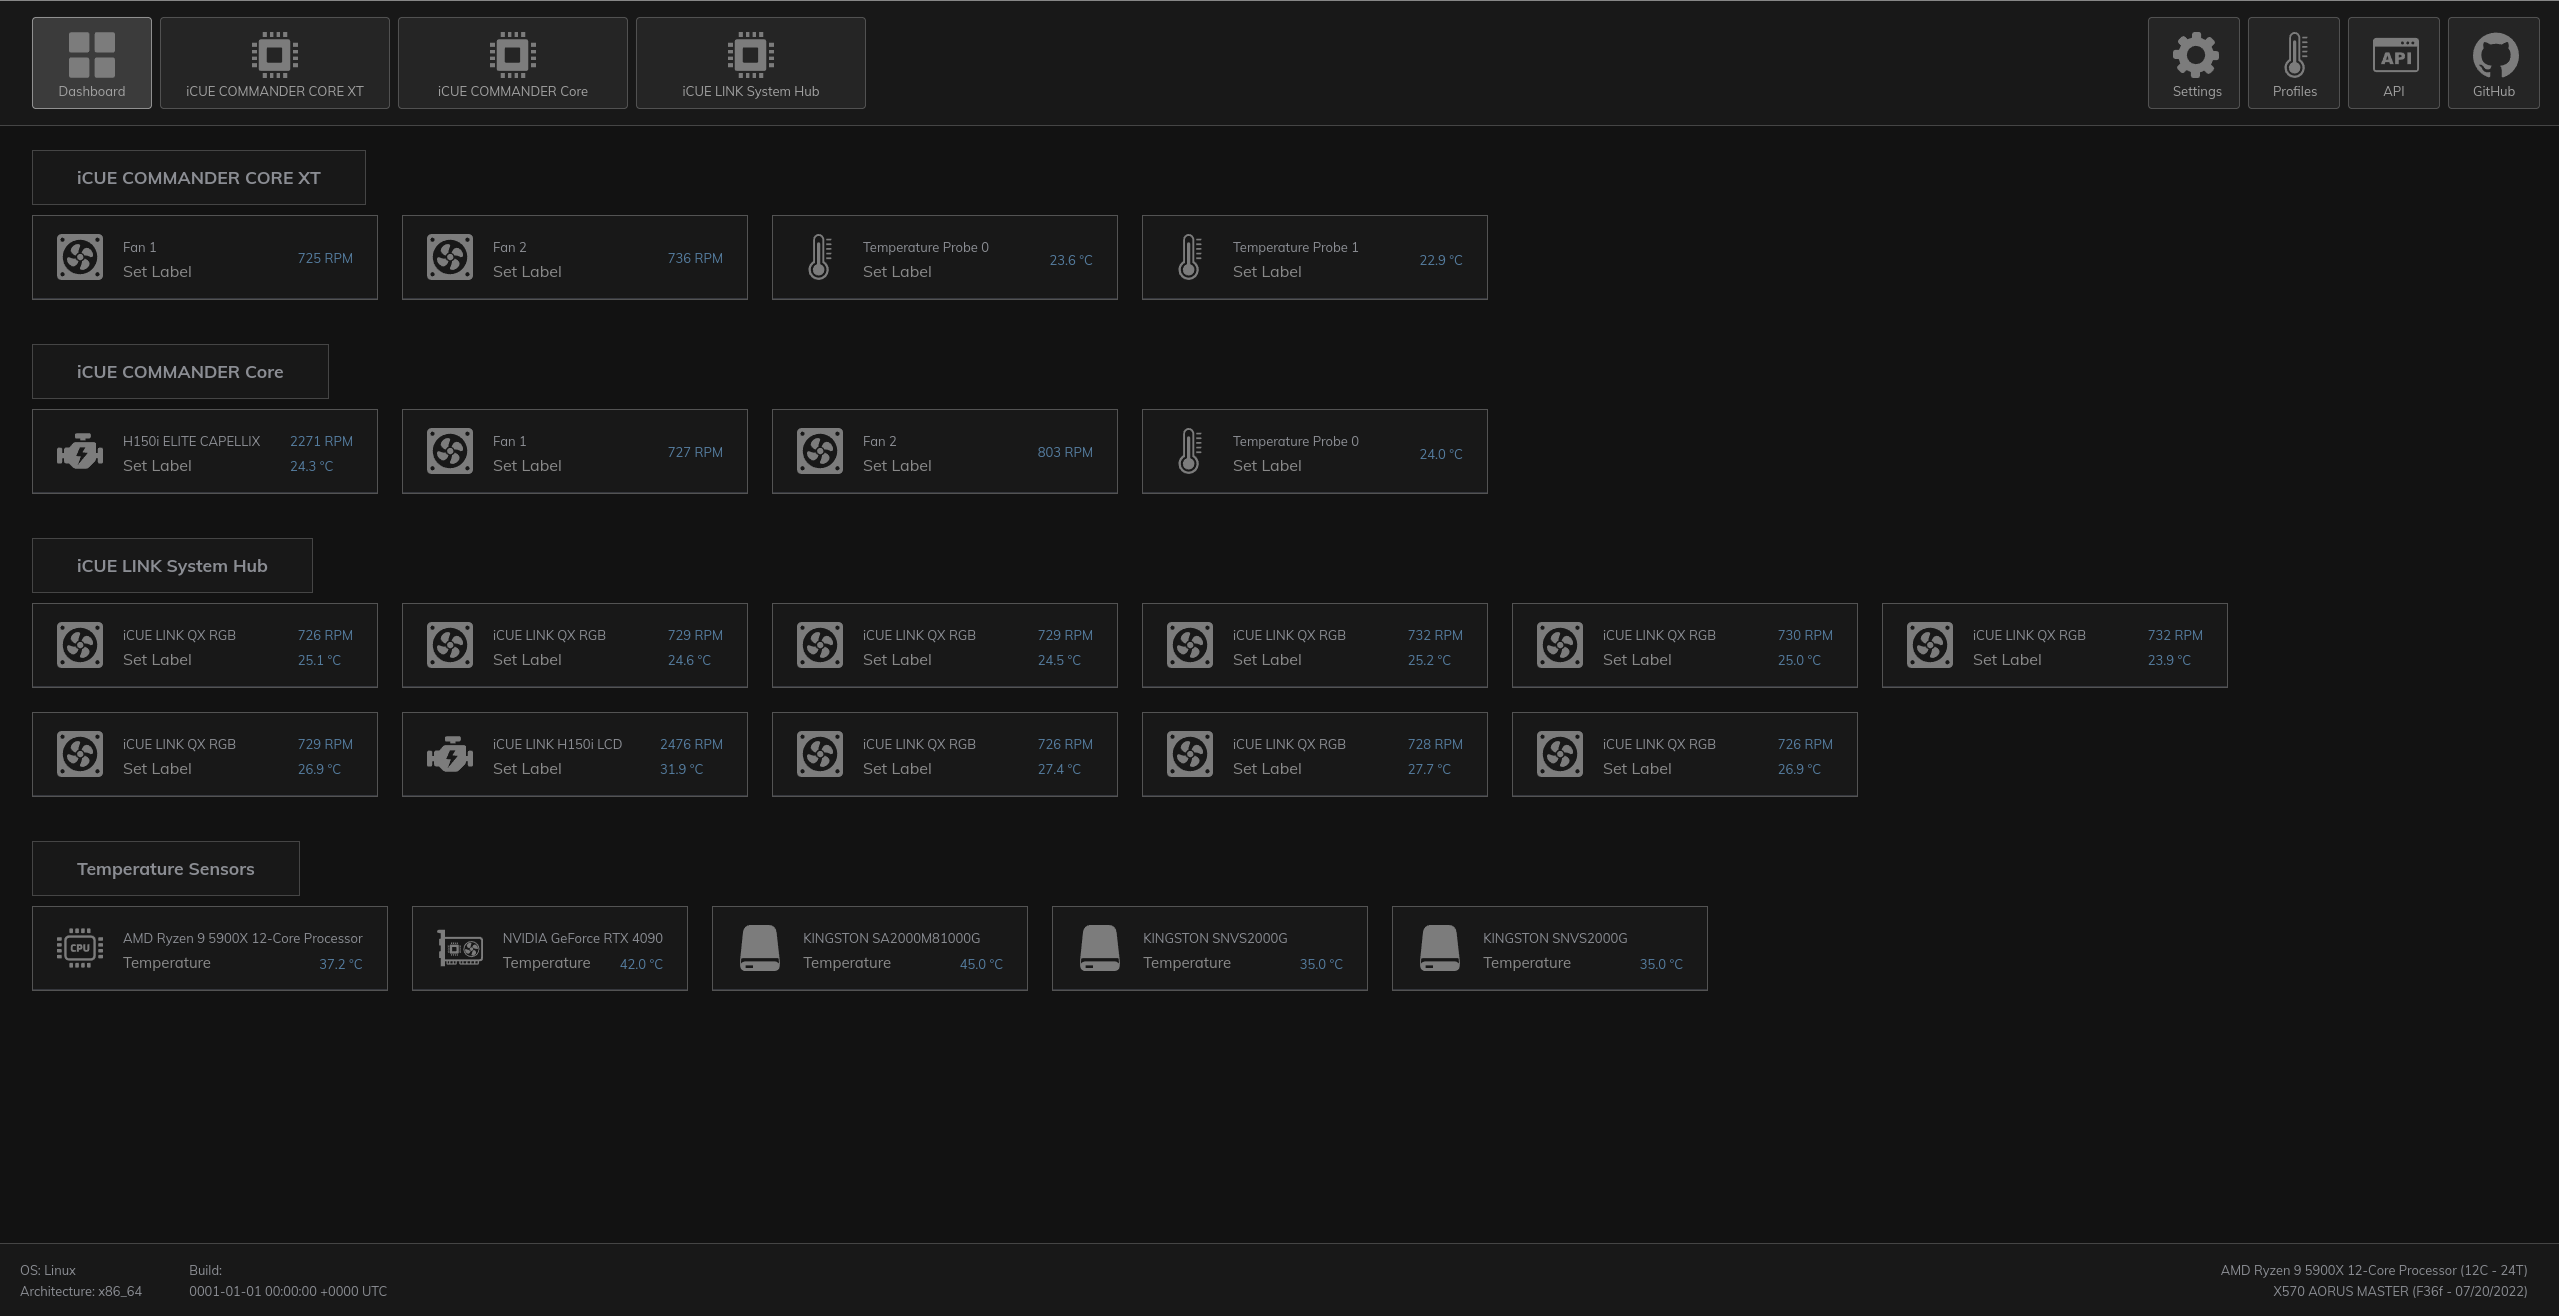
An open-source Linux interface for iCUE LINK Hub and other Corsair AIOs, Hubs. Manage RGB lighting, fan speeds, system metrics, as well as keyboards, mice, headsets via a web dashboard.
![]()
- Web-based UI accessible at
http://localhost:27003 - Control AIO coolers, fans, hubs, pumps, LCDs and RGB lighting
- Manage keyboards, mice and headsets
- Support for DDR4 and DDR5 memory
- Custom fan profiles, temperature sensors and RGB editor
- If you need system tray menu - https://github.com/jurkovic-nikola/openlinkhub-tray
- Supported device list
- This project was created out of own necessity to control fans and pumps on workstations after switching everything to Linux.
- I take no responsibility for this code at all. Use this at your own risk.
- Most of the devices are actually tested on live hardware.
- Take care and have fun!
- This project is not an official Corsair product.
- Download either .deb or .rpm package from the latest Release, depends on your Linux distribution
- Open terminal
- Navigate to the folder where the package is downloaded
# Debian Based (deb)
$ sudo apt install ./OpenLinkHub_?.?.?_amd64.deb

# RPM based (rpm)
$ sudo dnf install ./OpenLinkHub-?.?.?-1.x86_64.rpm$ sudo add-apt-repository ppa:jurkovic-nikola/openlinkhub
$ sudo apt update
$ sudo apt-get install openlinkhub$ sudo dnf copr enable jurkovic-nikola/OpenLinkHub
$ sudo dnf install OpenLinkHub- libudev-dev
- usbutils
- go 1.23.8 - https://go.dev/dl/
# Required packages (deb)
$ sudo apt-get install libudev-dev
$ sudo apt-get install usbutils

# Required packages (rpm)
$ sudo dnf install libudev-devel
$ sudo dnf install usbutils$ git clone https://github.com/jurkovic-nikola/OpenLinkHub.git
$ cd OpenLinkHub/
$ go build .
$ chmod +x install.sh
$ sudo ./install.sh# Download latest build from https://github.com/jurkovic-nikola/OpenLinkHub/releases/latest
$ wget "https://github.com/jurkovic-nikola/OpenLinkHub/releases/latest/download/OpenLinkHub_$(curl -s https://api.github.com/repos/jurkovic-nikola/OpenLinkHub/releases/latest | jq -r '.tag_name')_amd64.tar.gz"
$ tar xf OpenLinkHub_?.?.?_amd64.tar.gz
$ cd /home/$USER/OpenLinkHub/
$ chmod +x install.sh
$ sudo ./install.sh# Do not install RPM or DEB packages on immutable distributions, they will not work.
# This same procedure may be followed to update an existing installation.
# Download the latest tar.gz from the Release page, or use the following command to download the latest release.
$ wget "https://github.com/jurkovic-nikola/OpenLinkHub/releases/latest/download/OpenLinkHub_$(curl -s https://api.github.com/repos/jurkovic-nikola/OpenLinkHub/releases/latest | jq -r '.tag_name')_amd64.tar.gz"
# Extract package to your home directory
$ tar xf OpenLinkHub_?.?.?_amd64.tar.gz -C /home/$USER/
# Go to extract folder
$ cd /home/$USER/OpenLinkHub
# Make install-immutable.sh executable
$ chmod +x install-immutable.sh
# Run install-immutable.sh. Enter your password for sudo when asked to copy 99-openlinkhub.rules file
$ ./install-immutable.sh
# Restart
$ systemctl reboot{
"debug": false,
"listenPort": 27003,
"listenAddress": "127.0.0.1",
"cpuSensorChip": "k10temp",
"manual": false,
"frontend": true,
"metrics": true,
"resumeDelay": 15000,
"memory": false,
"memorySmBus": "i2c-0",
"memoryType": 4,
"exclude": [],
"decodeMemorySku": true,
"memorySku": "",
"logFile": "",
"logLevel": "info",
"enhancementKits": [],
"temperatureOffset": 0,
"amdGpuIndex": 0,
"amdsmiPath": "",
"cpuTempFile": "",
"graphProfiles": false,
"ramTempViaHwmon": false,
"nvidiaGpuIndex": [0],
"defaultNvidiaGPU": 0
}- listenPort: HTTP server port.
- listenAddress: Address for HTTP server to listen on.
- cpuSensorChip: CPU sensor chip for temperature.
k10temporzenpowerfor AMD andcoretempfor Intel - manual: set to true if you want to use your own UI for device control. Setting this to true will disable temperature monitoring and automatic device speed adjustments.
- frontend: set to false if you do not need WebUI console, and you are making your own UI app.
- metrics: enable or disable Prometheus metrics
- resumeDelay: amount of time in milliseconds for program to reinitialize all devices after sleep / resume
- memory: Enable overview / control over the memory
- memorySmBus: i2c smbus sensor id
- memoryType: 4 for DDR4. 5 for DDR5
- exclude: list of device ids in uint16 format to exclude from program control
- decodeMemorySku: set to false to manually define
memorySkuvalue. - memorySku: Memory part number, e.g. (CMT64GX5M2B5600Z40)
- You can find memory part number by running the following command:
sudo dmidecode -t memory | grep 'Part Number' - logFile: custom location for logging. Default is empty.
- Defining
-for logFile will send all logs to standard console output. - If you change the location of logging, make sure the application username has permission to write to that folder.
- Defining
- logLevel: log level to log in console or file.
- enhancementKits: DDR4/DDR5 Light Enhancement Kits addresses.
- If your kit is installed in first and third slot, value would be:
"enhancementKits": [80,82],. This value is byte value converted from hexadecimal output ini2cdetect- When kits are used, you need to set
decodeMemorySkutofalseand definememorySku
- When kits are used, you need to set
- temperatureOffset: Temperature offset for AMD Threadripper CPUs
- amdGpuIndex: GPU device index. You can find your GPU index via
amd-smi static --asic --json - amdsmiPath: Manual path to amd-smi binary (not recommended). Better way is to define
amd-smipath in$PATHvariable if missing. - cpuTempFile: custom hwmon temperature input file, e.g. tempX_input. Use in combination with
cpuSensorChip. - graphProfiles: Setting this value to
truewill enable graph based temperature profiles on/temperatureendpoint and enable temperature interpolation. - ramTempViaHwmon: Switch to true if you want to monitor RAM temperature via hwmon system. With this option, you don't have to unload modules to get temperature. (Require 6.11+ kernel)
- nvidiaGpuIndex: NVIDIA multi gpu setup.
- defaultNvidiaGPU: default index of NVIDIA gpu, default is 0.
- If you use vfio-pci/pass-through, you have to set it to -1 to avoid conflits with nvidia modules.
The web UI supports installation as a progressive web app (PWA). With a supported browser, this allows the UI to appear as a standalone application. Chromium-based based browsers support PWAs, Firefox currently does not. GNOME 'Web,' also known as 'Epiphany' is a good option for PWAs on GNOME systems.
# Stop service
sudo systemctl stop OpenLinkHub.service

# Remove application directory
sudo rm -rf /opt/OpenLinkHub/

# Remove systemd file (file location can be found by running sudo systemctl status OpenLinkHub.service)
sudo rm /etc/systemd/system/OpenLinkHub.service
# or
sudo rm /usr/lib/systemd/system/OpenLinkHub.service

# Reload systemd
sudo systemctl daemon-reload

# Remove udev rules
sudo rm -f /etc/udev/rules.d/99-openlinkhub.rules
sudo rm -f /etc/udev/rules.d/98-corsair-memory.rules

# Reload udev
sudo udevadm control --reload-rules
sudo udevadm triggerAs an alternative, OpenLinkHub can be run in Docker, using the Dockerfile in this repository to build it locally. A configuration file has to be mounted to /opt/OpenLinkHub/config.json
$ docker build . -t openlinkhub
$ # To build a specific version you can use the GIT_TAG build argument
$ docker build --build-arg GIT_TAG=0.1.3-beta -t openlinkhub .

$ docker run --privileged openlinkhub

# For WebUI access, networking is required
$ docker run --network host --privileged openlinkhub- LCD images / animations are located in
/opt/OpenLinkHub/database/lcd/images/
- Device Dashboard is accessible by browser via link
http://127.0.0.1:27003/ - Device Dashboard allows you to control your devices.
- RGB configuration is located at
database/rgb/your-device-serial.jsonfile - RGB can be configured via RGB Editor in Dashboard
- OpenLinkHub ships with built-in HTTP server for device overview and control.
- Documentation is available at
http://127.0.0.1:27003/docs
- By default, memory overview and RGB control are disabled in OpenLinkHub.
- To enable it, you will need to switch
"memory":falseto"memory":trueand set propermemorySmBusvalue. - Things to consider prior:
- If you are using any other RGB software that can control your RAM, do not set
"memory":true. - Two programs cannot write to the same I2C address at the same time.
- If you do not know what
acpi_enforce_resources=laxmeans, do not enable this.
- If you are using any other RGB software that can control your RAM, do not set
# Install tools
$ sudo apt-get install i2c-tools

# Enable loading of i2c-dev at boot and restart
echo "i2c-dev" | sudo tee /etc/modules-load.d/i2c-dev.conf

# List all i2c, this is AMD example! (AM4, X570 AORUS MASTER (F39d - 09/02/2024)
# If everything is okay, you should see something like this, especially first 3 lines.
$ sudo i2cdetect -l
i2c-0	smbus     	SMBus PIIX4 adapter port 0 at 0b00	SMBus adapter
i2c-1	smbus     	SMBus PIIX4 adapter port 2 at 0b00	SMBus adapter
i2c-2	smbus     	SMBus PIIX4 adapter port 1 at 0b20	SMBus adapter
i2c-3	i2c       	NVIDIA i2c adapter 1 at c:00.0  	I2C adapter
i2c-4	i2c       	NVIDIA i2c adapter 2 at c:00.0  	I2C adapter
i2c-5	i2c       	NVIDIA i2c adapter 3 at c:00.0  	I2C adapter
i2c-6	i2c       	NVIDIA i2c adapter 4 at c:00.0  	I2C adapter
i2c-7	i2c       	NVIDIA i2c adapter 5 at c:00.0  	I2C adapter
i2c-8	i2c       	NVIDIA i2c adapter 6 at c:00.0  	I2C adapter
i2c-9	i2c       	NVIDIA i2c adapter 7 at c:00.0  	I2C adapter

# If you do not see any smbus devices, you will probably need to set acpi_enforce_resources=lax
# Before setting acpi_enforce_resources=lax please research pros and cons of this and decide on your own!

# In most of the cases, memory will be registered under SMBus PIIX4 adapter port 0 at 0b00 device, aka i2c-0. Lets validate that.
# DDR4 example:
$ sudo i2cdetect -y 0 # this is i2c-0 from i2cdetect -l command
     0  1  2  3  4  5  6  7  8  9  a  b  c  d  e  f
00:                         08 -- -- -- -- -- -- --
10: 10 -- -- 13 -- 15 -- -- 18 19 -- -- -- -- -- --
20: -- -- -- -- -- -- -- -- -- -- -- -- -- -- -- --
30: 30 31 -- -- 34 35 -- -- -- -- 3a -- -- -- -- --
40: -- -- -- -- -- -- -- -- -- -- 4a -- -- -- -- --
50: 50 51 52 53 -- -- -- -- 58 59 -- -- -- -- -- --
60: -- -- -- -- -- -- -- -- 68 -- -- -- 6c -- -- --
70: 70 -- -- -- -- -- -- --

# Set I2C permission
$ echo 'KERNEL=="i2c-0", MODE="0600", OWNER="openlinkhub"' | sudo tee /etc/udev/rules.d/98-corsair-memory.rules
# Reload udev rules
$ sudo udevadm control --reload-rules
$ sudo udevadm trigger- Modify
"memorySmBus": "i2c-0"if needed. - Set
"memory":truein config.json file. - Set
"memoryType"in config.json4if you have a DDR4 platform5if you have a DDR5 platform
- Restart OpenLinkHub service.